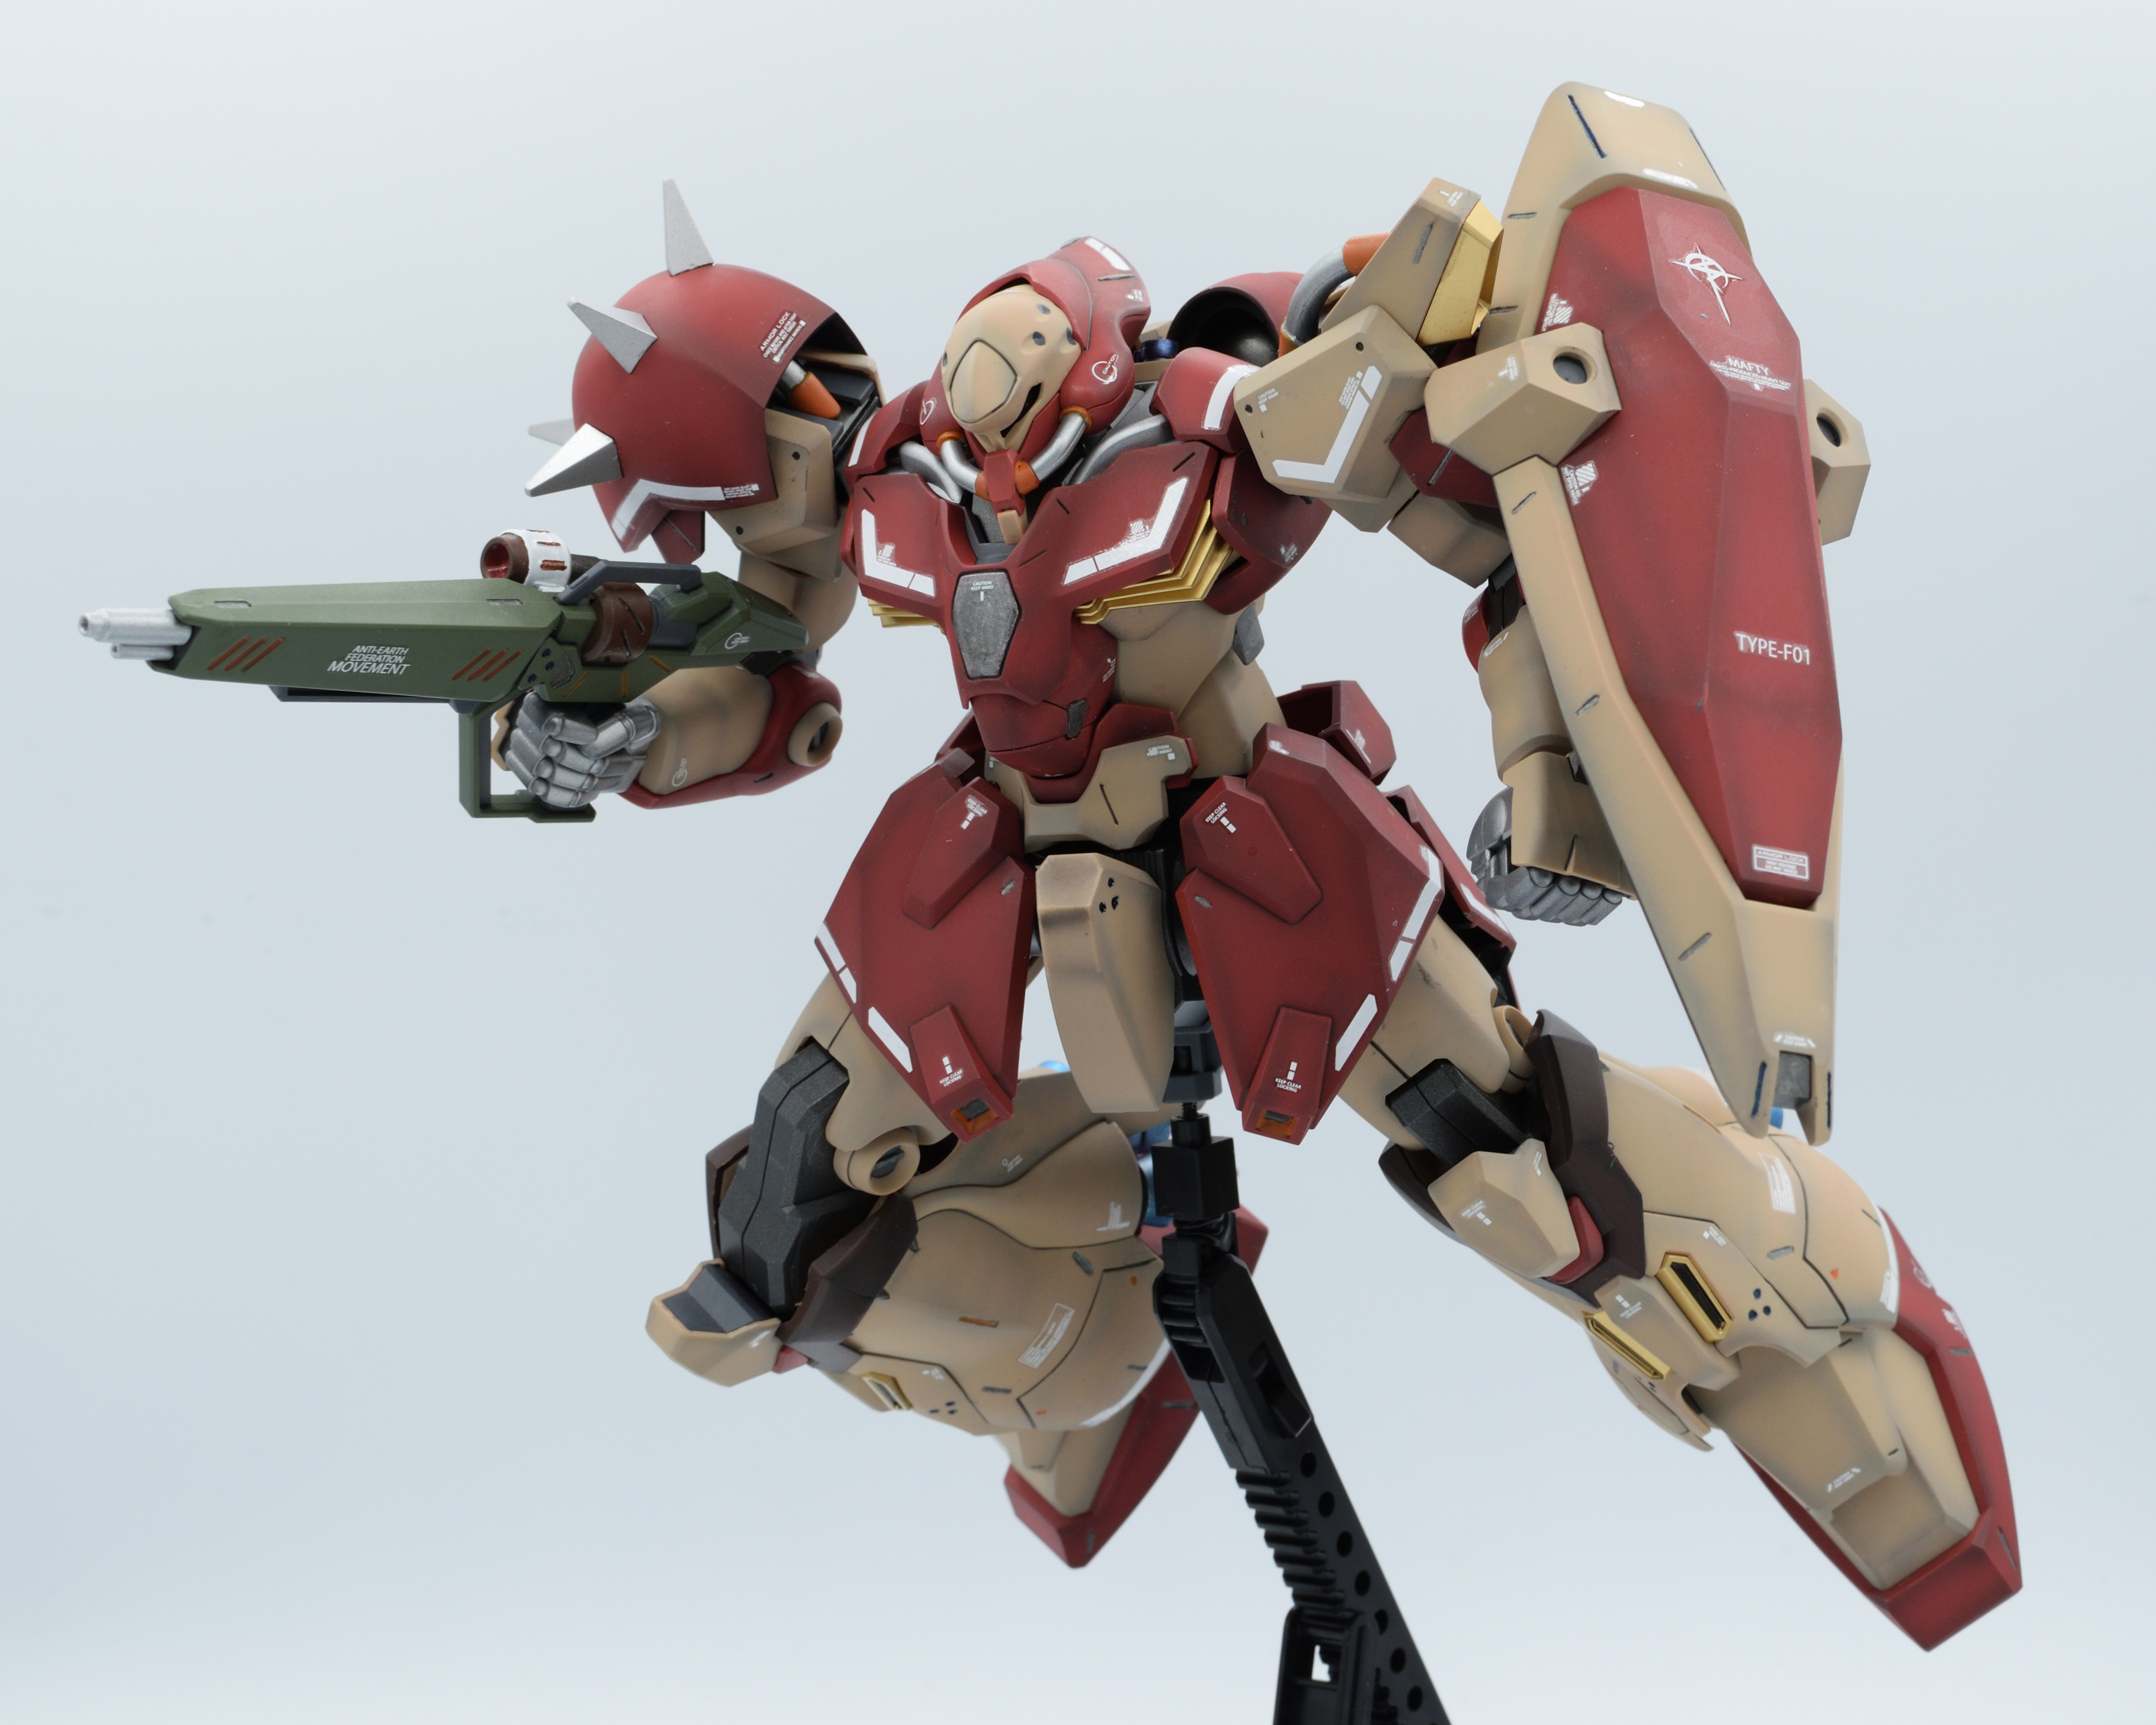
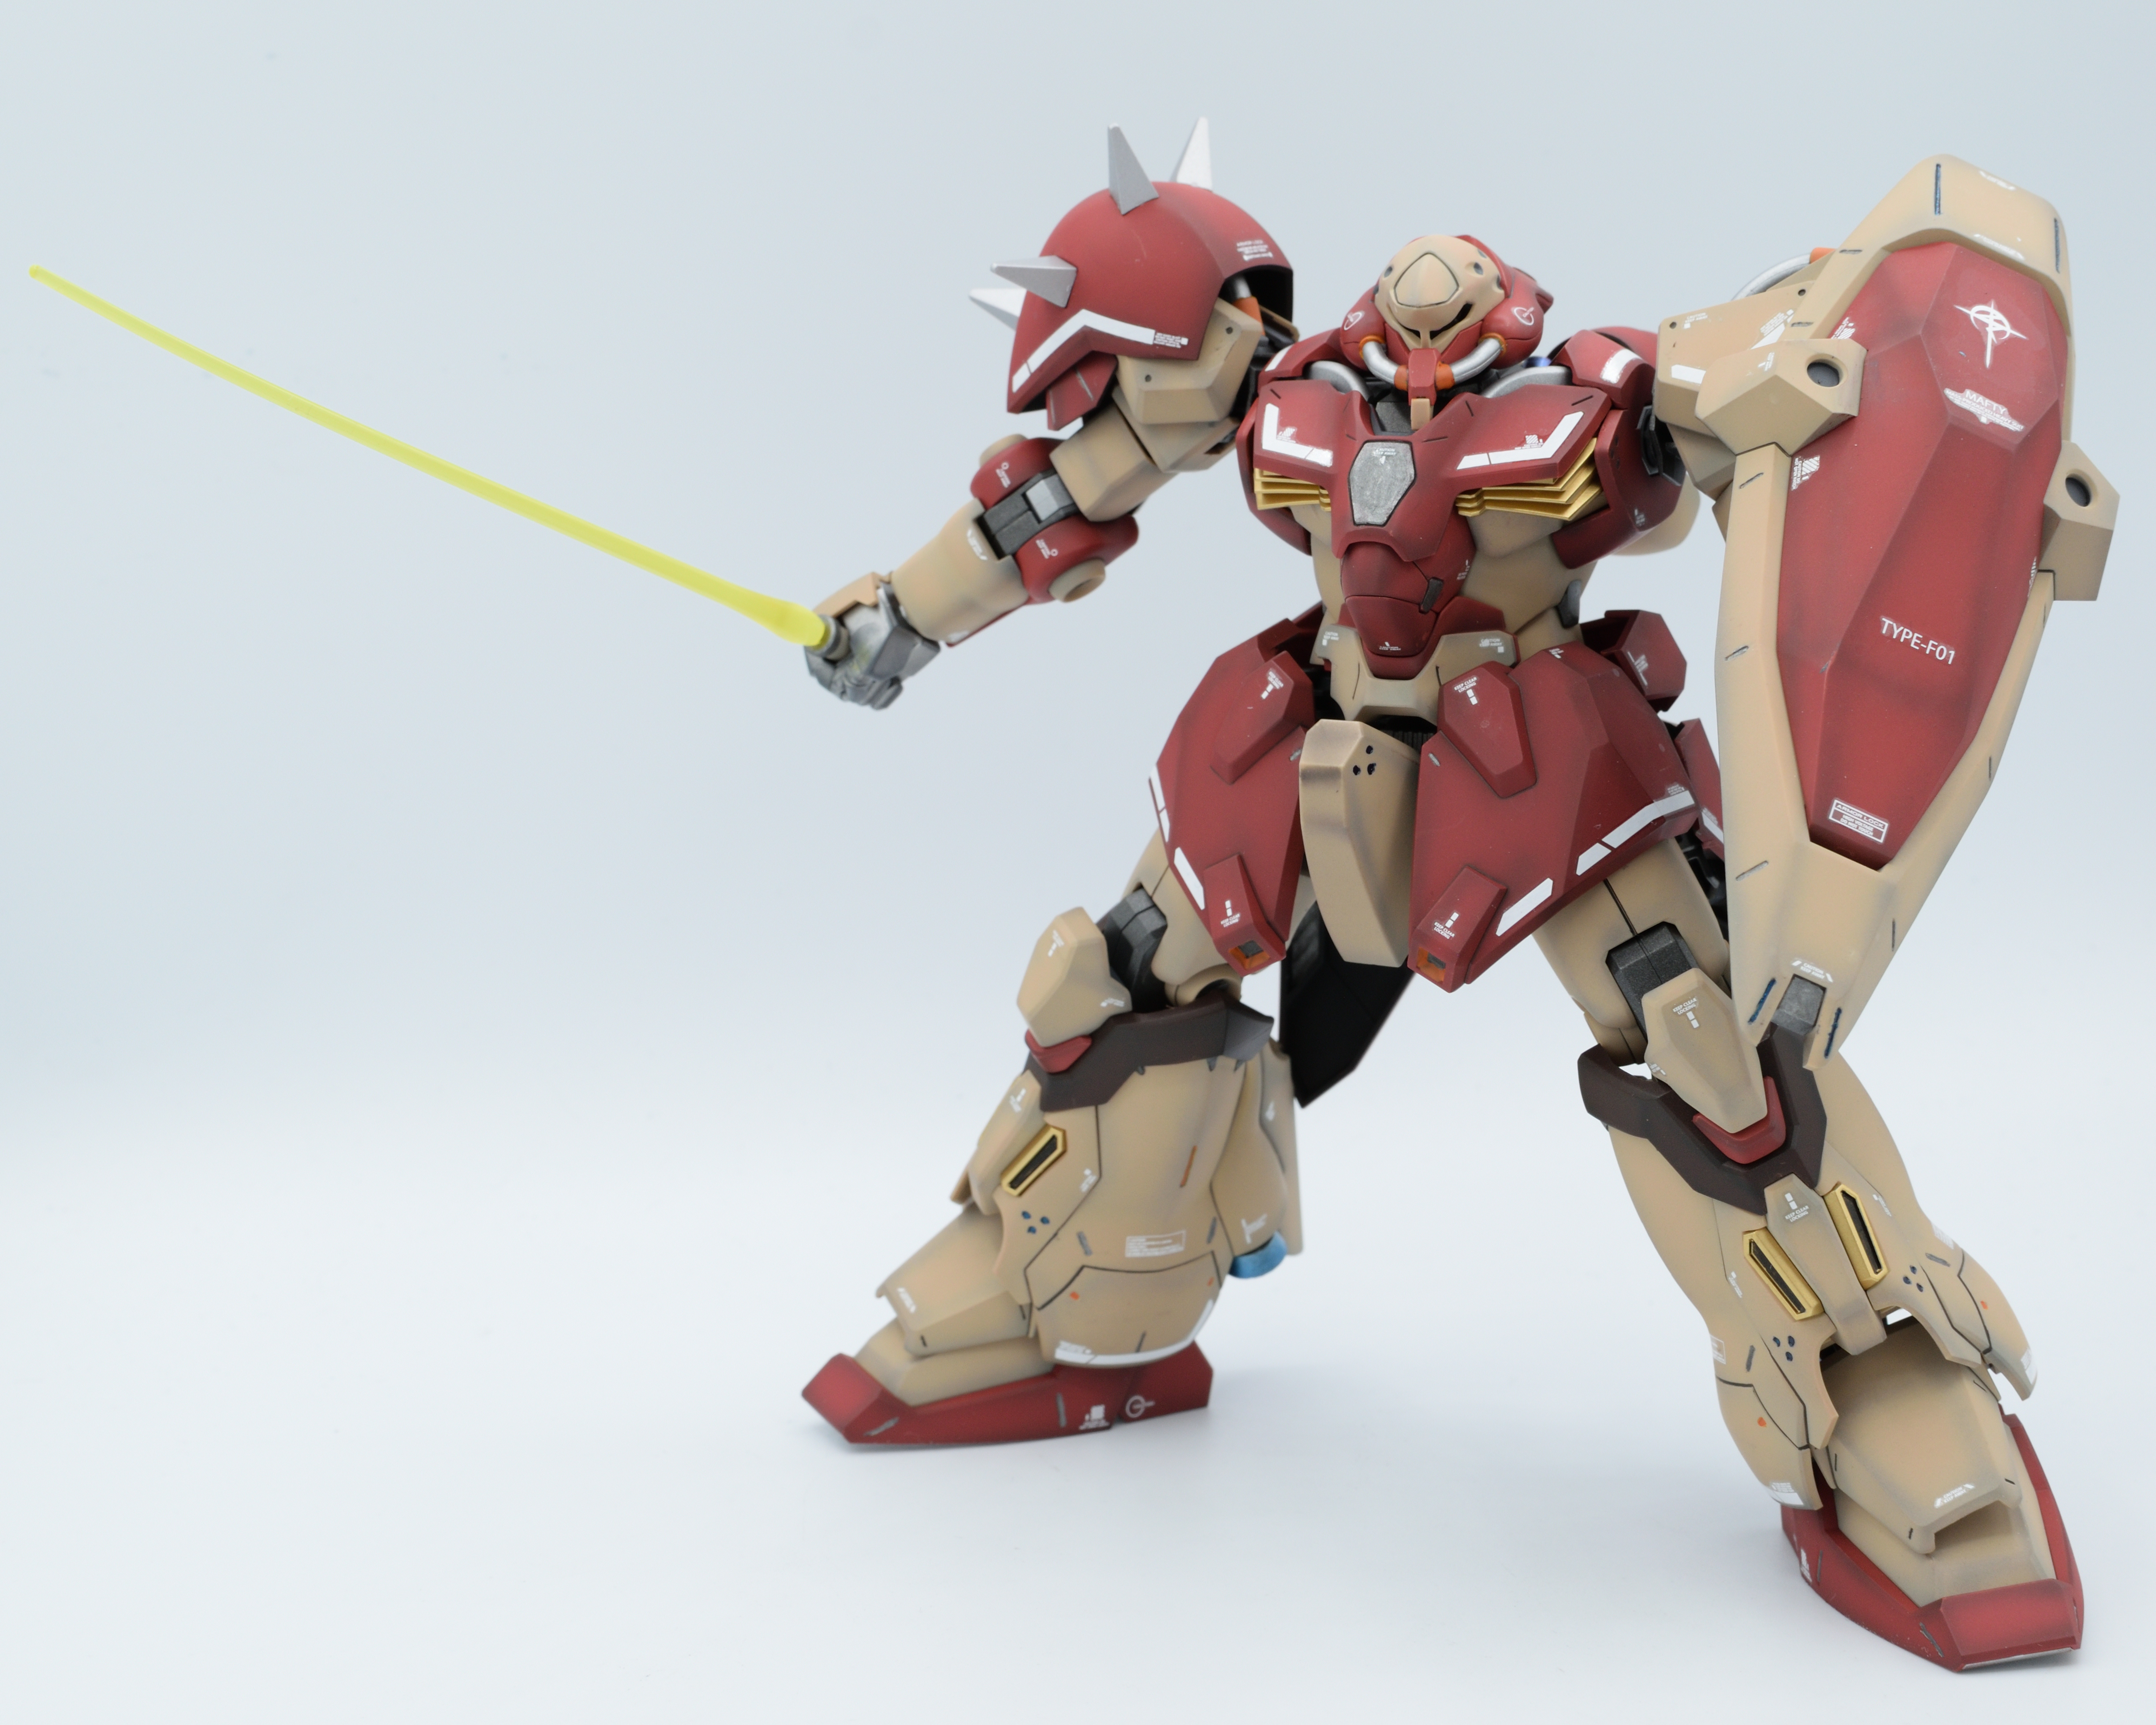
Built, partially airbrushed, hand painted, panel lined and decaled by me. Pre-shaded/shadowed and thrusters painted by my dad. I airbrushed the frame.
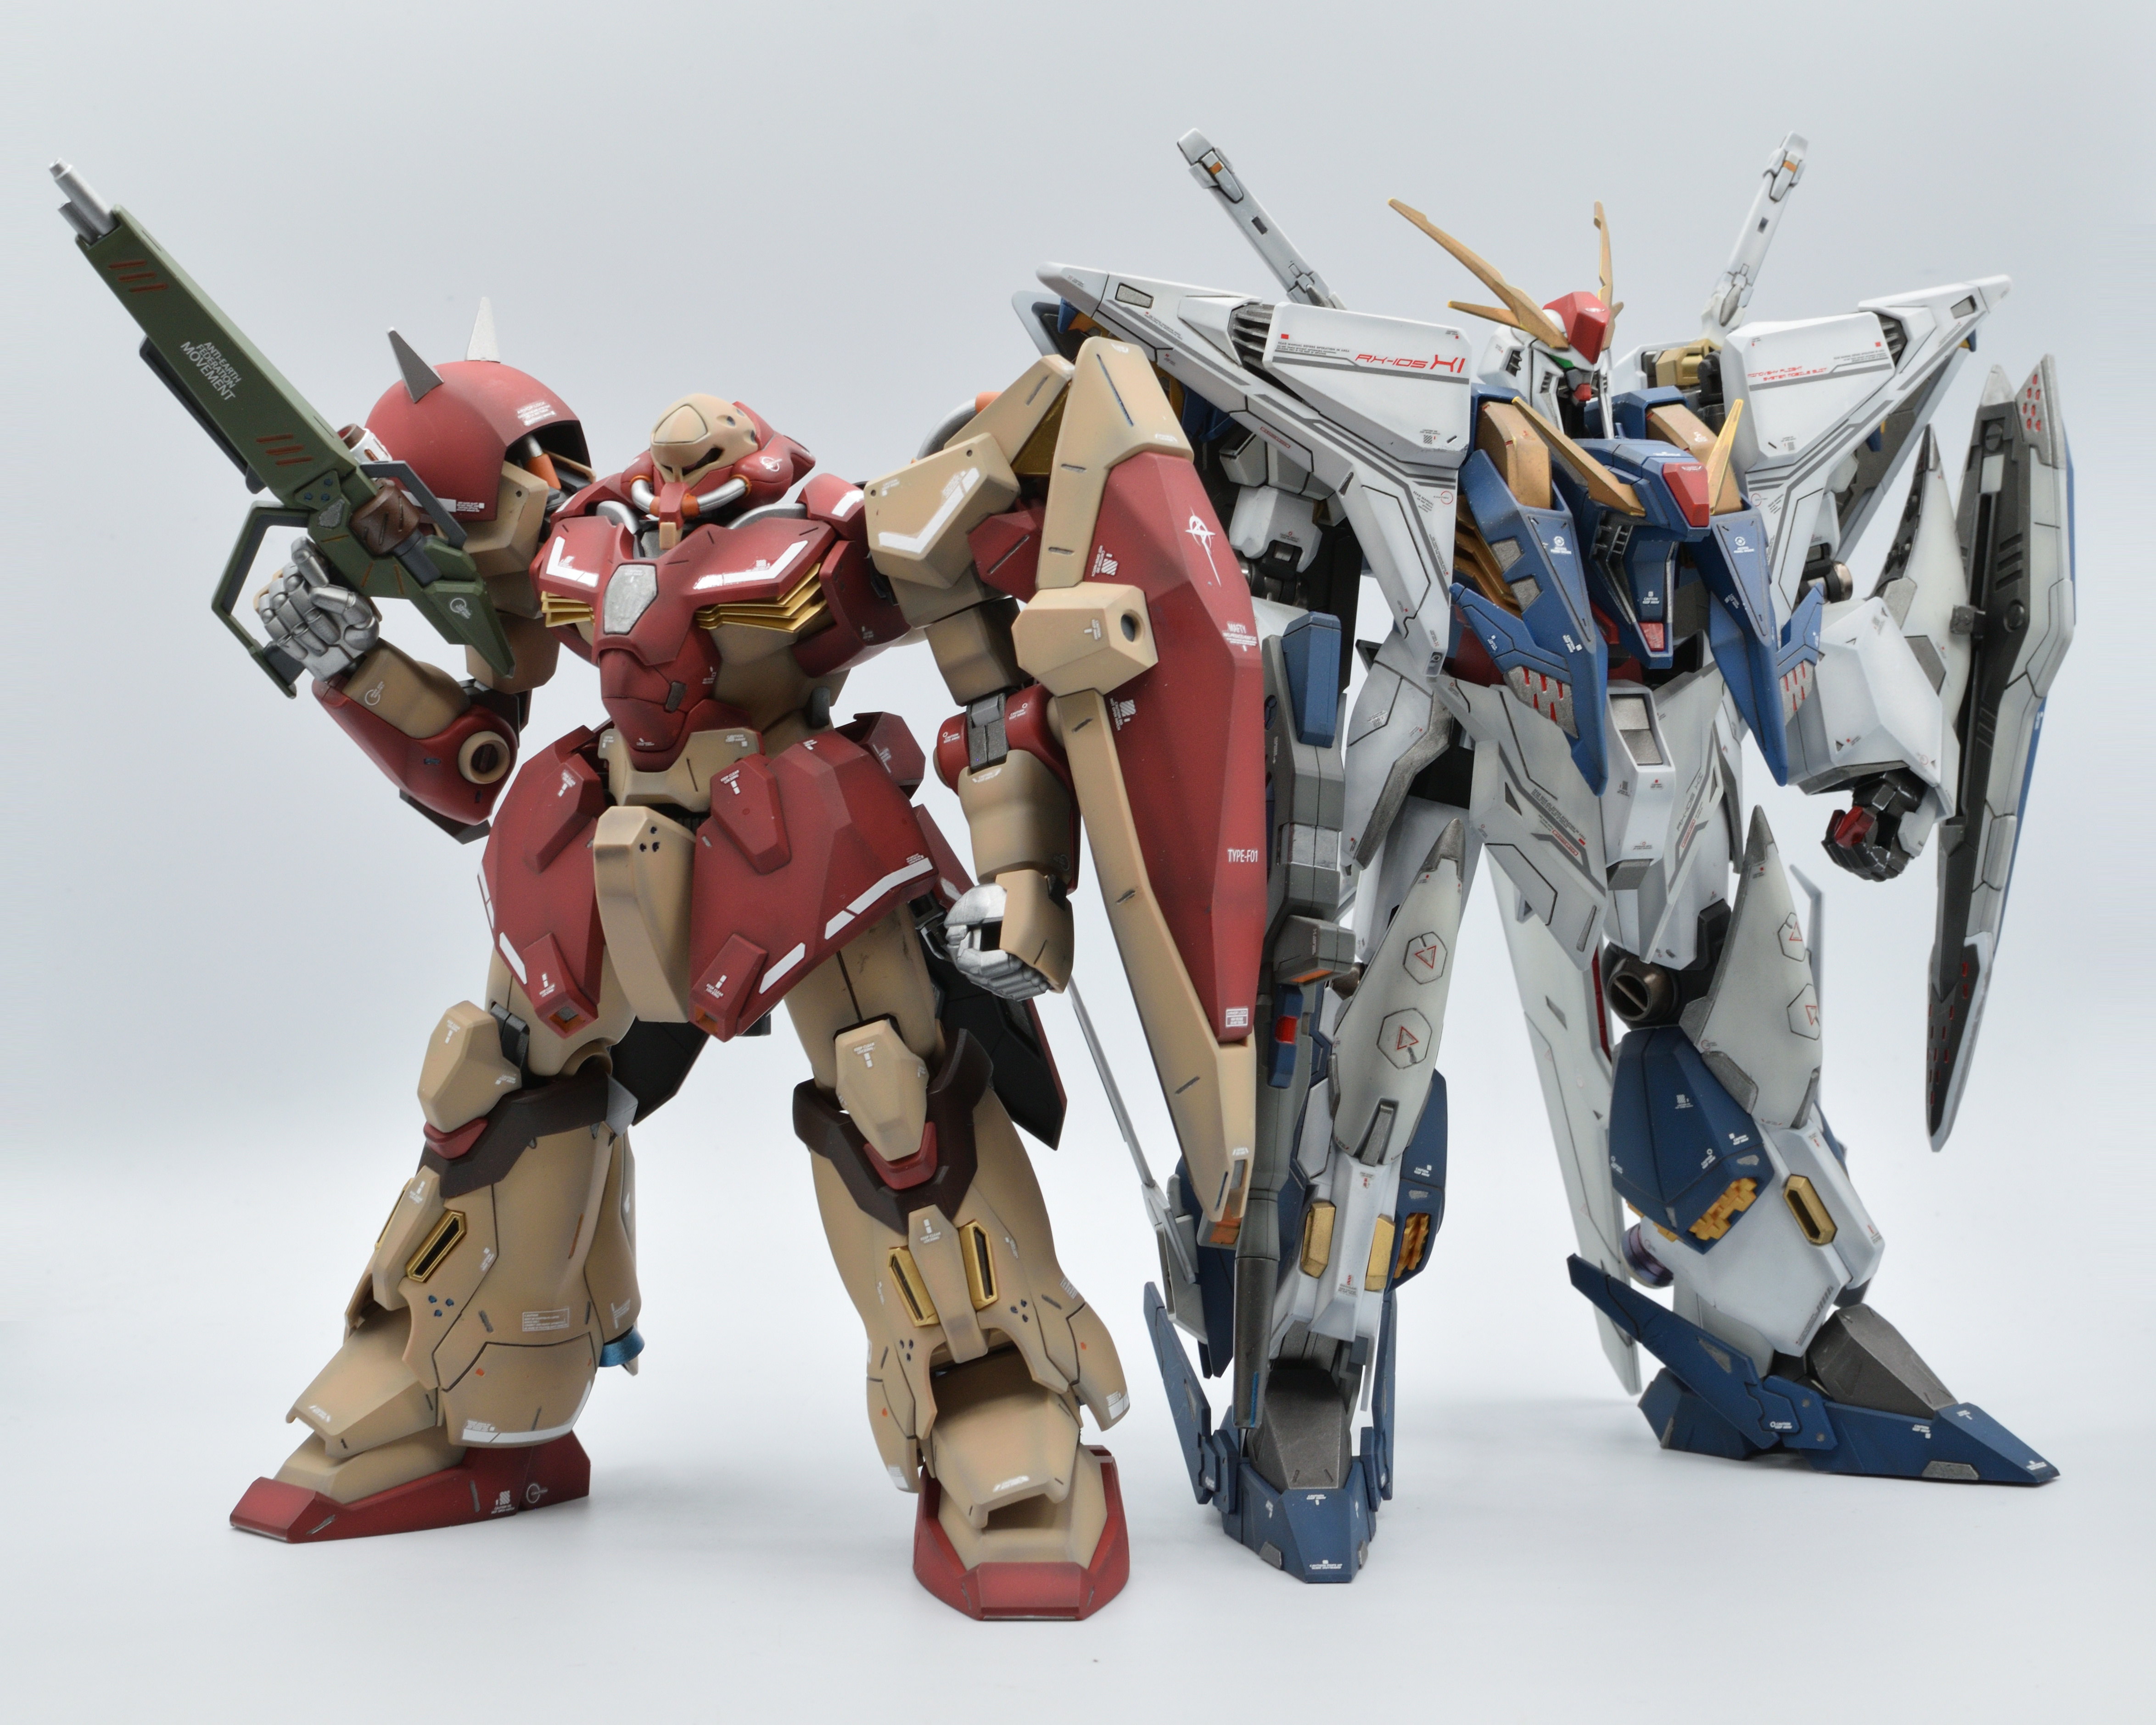
After 3 years of having this in my backlog, this Messer F01 has finally been assembled and completed. I originally got this back in 2023 at Gundam Planet when I was going on an HG buying spree at the time, but unlike the other HGs I was doing, I wanted this one to be completely painted to go with our Penelopeand Xi Gundam . What took so long? Well, getting my dad to paint anything for me is like asking him if he could take me outer space and I was gonna be the one doing the hand painting, which I was still relatively new at and was very scared doing so with my MG Stark Jegan. Now that enough time has passed where I have learned to fully paint some kits, we figured it was time to finally get this over with.
As an HG Hathaway kit, this kit is BIG for an HG, but while it doesn’t come with polycaps, the build is barebones and feels very hollow. This kit retails cheaper than most HG SEED Freedom kits at 2500 yen, and it definitely shows. Frame structure barely exists, pieces sandwich together with giant hollow gaps in them, and there are surprisingly a few annoying seam lines that make me wonder why the hell Bandai didn’t just mold a panel line to mask them. While big and imposing, the Messer is light, and with its simple articulation and bulkiness, it is a pain to pose, but more on that later. Interestingly, this newer print of the Messer doesn’t come with two B2 runners like in the original, where you have a ton of spares. The 3 parts used in that 2nd B2 runner was retroactively fitted into B3 instead, only left with 1 spare part instead.
With a non-existent frame, it was quick and easy painting up the frame pieces, using a mixture of Alclad Steel, Aluminum, White Aluminum, Pale Gold and Airframe Aluminum as I unexpectedly ran out of regular aluminum. I spray painted the gun with Tamiya Olive Green, and that was about it from me. To my surprise, it only took the day after for my dad to airbrush the armor pieces and the thrusters, and was pretty much done by the next day. Even assembling the kit with painted parts, which usually strengthens the kit quite a bit, there was still a very cheap feeling when moving it around.
It was now time to get to the fun part—the detailing. I first panel lined with my good ol’ Copic 0.03 pen, which compared to the Penelope and Xi, there’s not much to panel line. There a lot of thick channels that I could panel line, but as you can probably tell, I opted to paint those areas instead. The majority of the hand paint I did was with Tamiya Metallic Grey, as well using some Tamiya Metallic Blue and Brown, Vallejo Dark Gray, Orange Rust, Light Red and some red for the scope. Overall, I’m really happy how my hand paint turned out, it ain’t perfectly clean, but it ain’t a total disaster either.
Finally, I decaled the Messer up with some custom decals I got from DelpiDecal a while back, and honestly I kinda wish I got the G-Rework decals instead. The pinstripes included with Delpi’s are a bit too thick for my liking and the font they used for the custom Messer decals are hilariously basic that I wouldn’t be surprised if they actually used the default Word font for them. This wasn’t a problem with Xi’s as they stylized the letters, so I’m wondering if Delpi just couldn’t find anything or just didn’t give a shit enough to characterize the font at all. G-Rework’s are very similar to Delpi’s, but have thinner pinstripes and more unique markings. But I already had Delpi’s for so long anyways, and they for sure add a lot of detail to the kit.
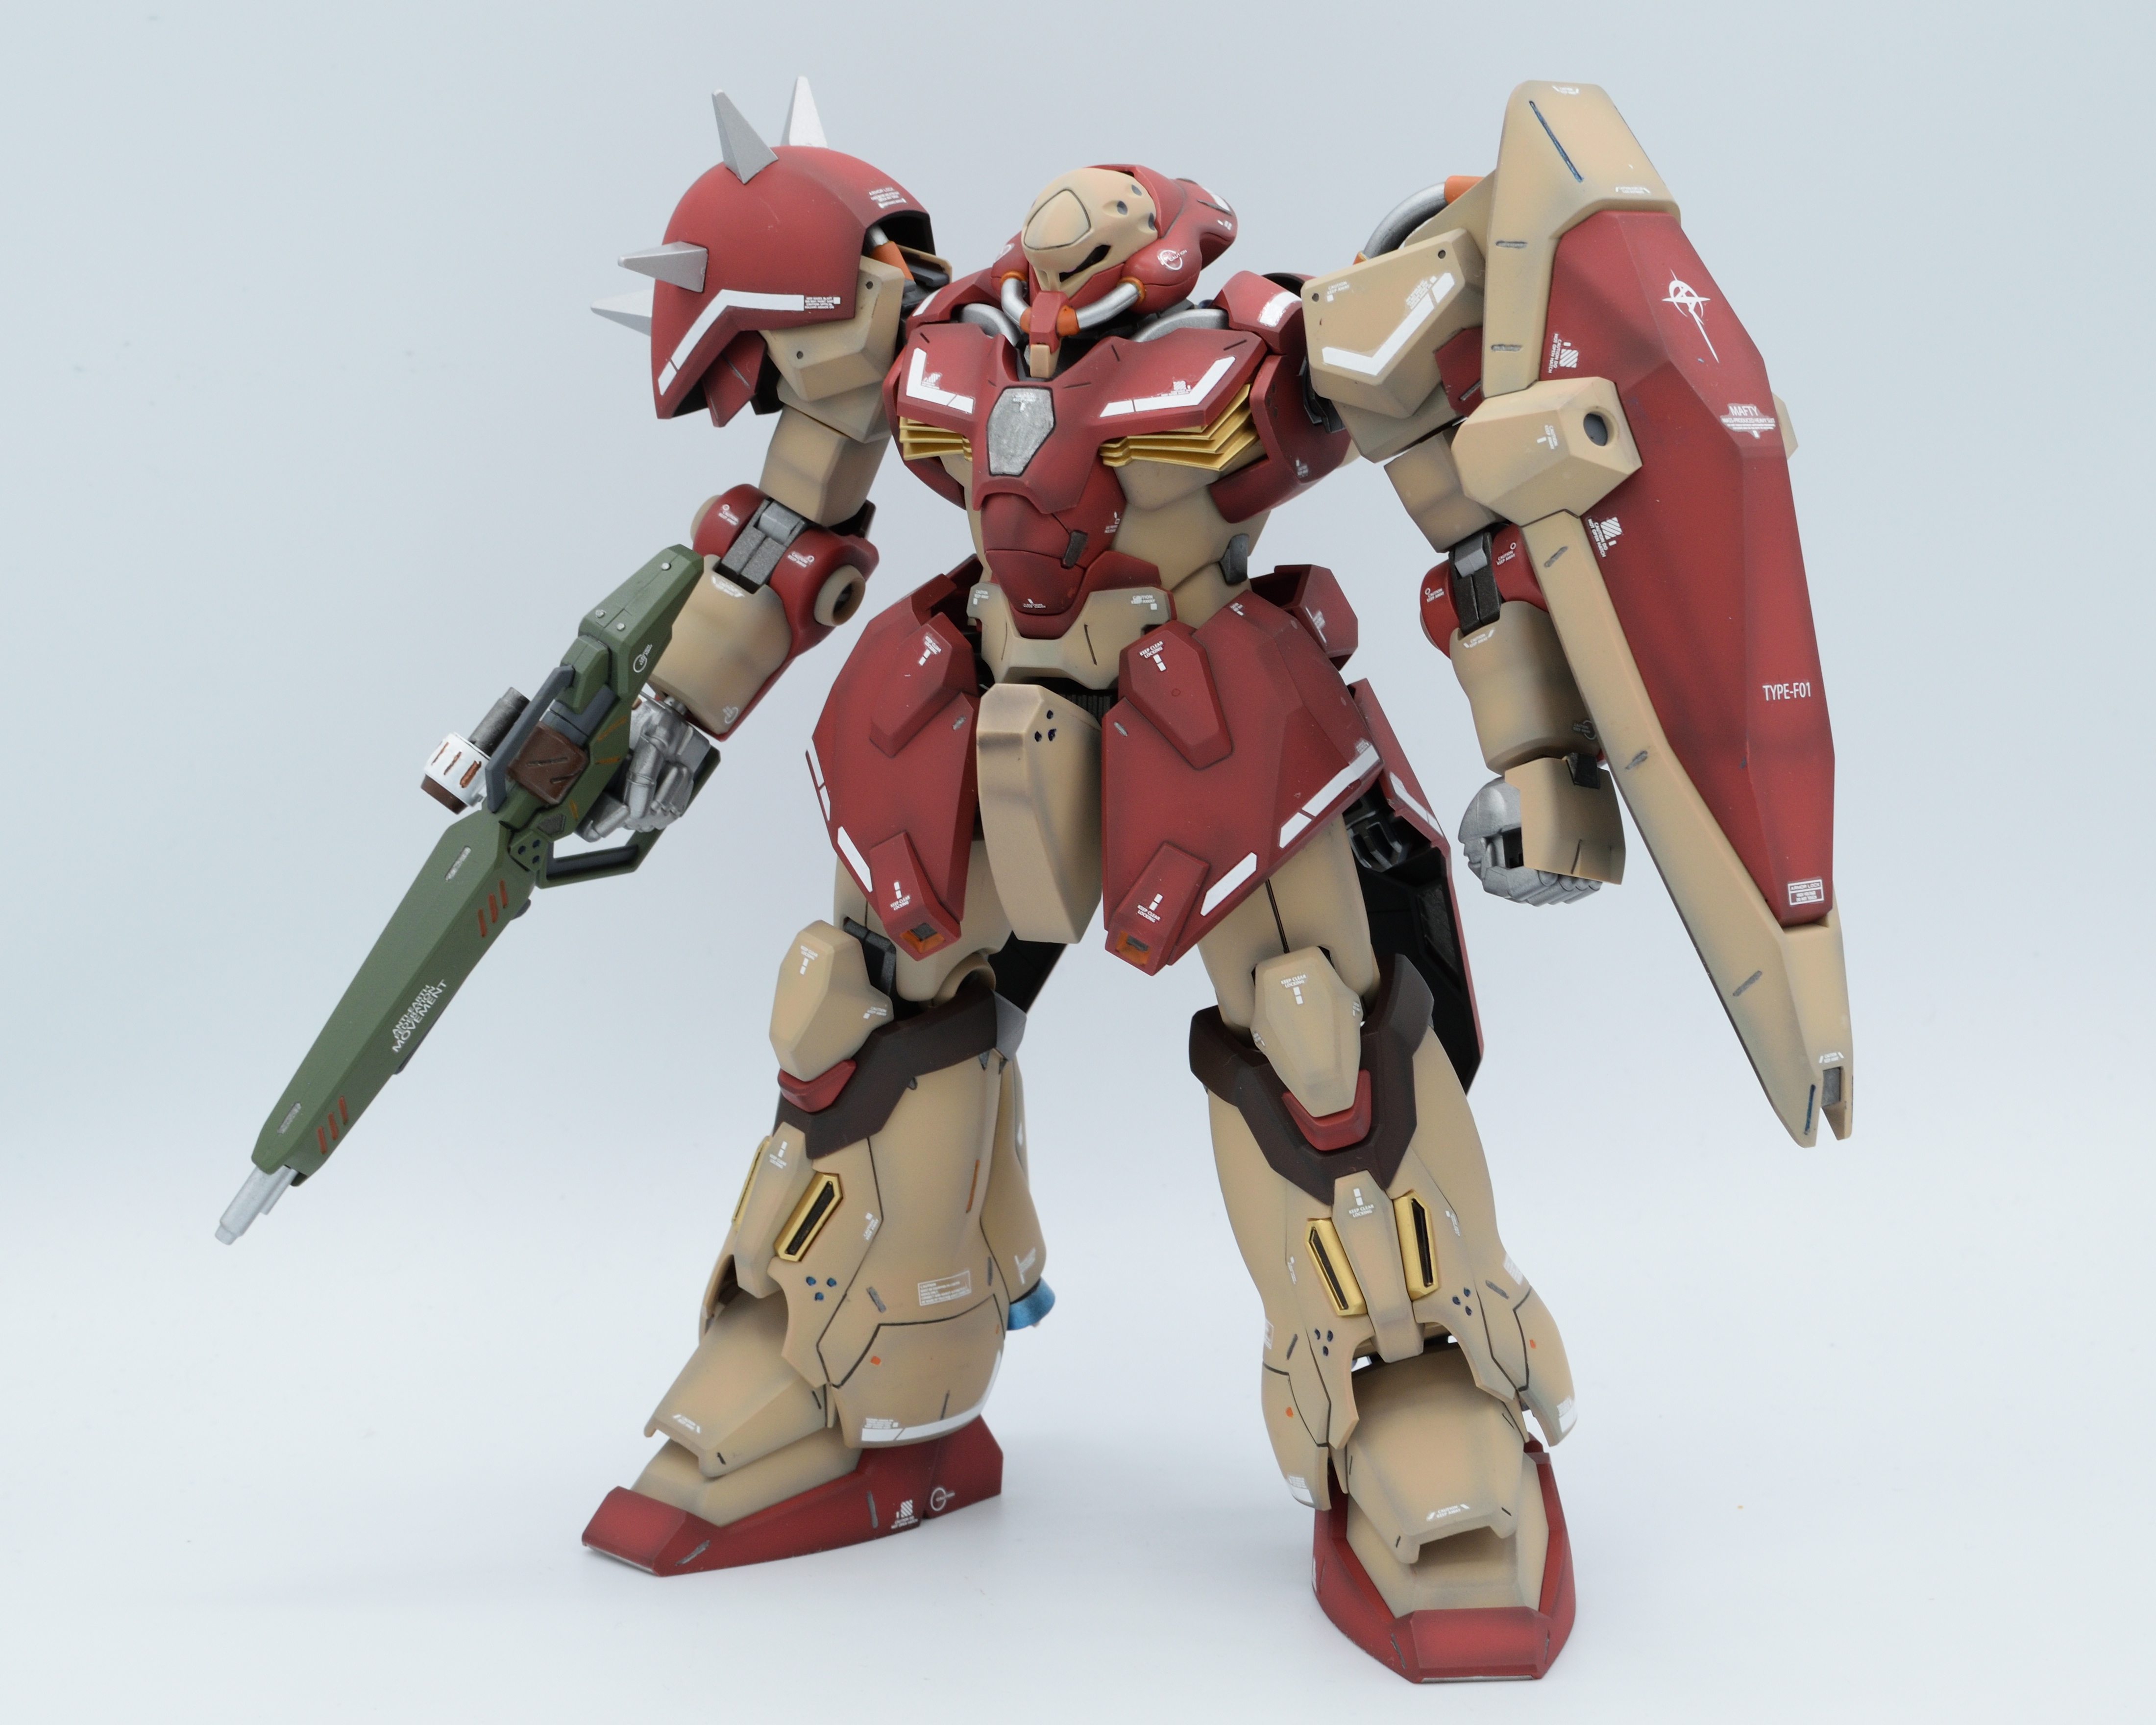
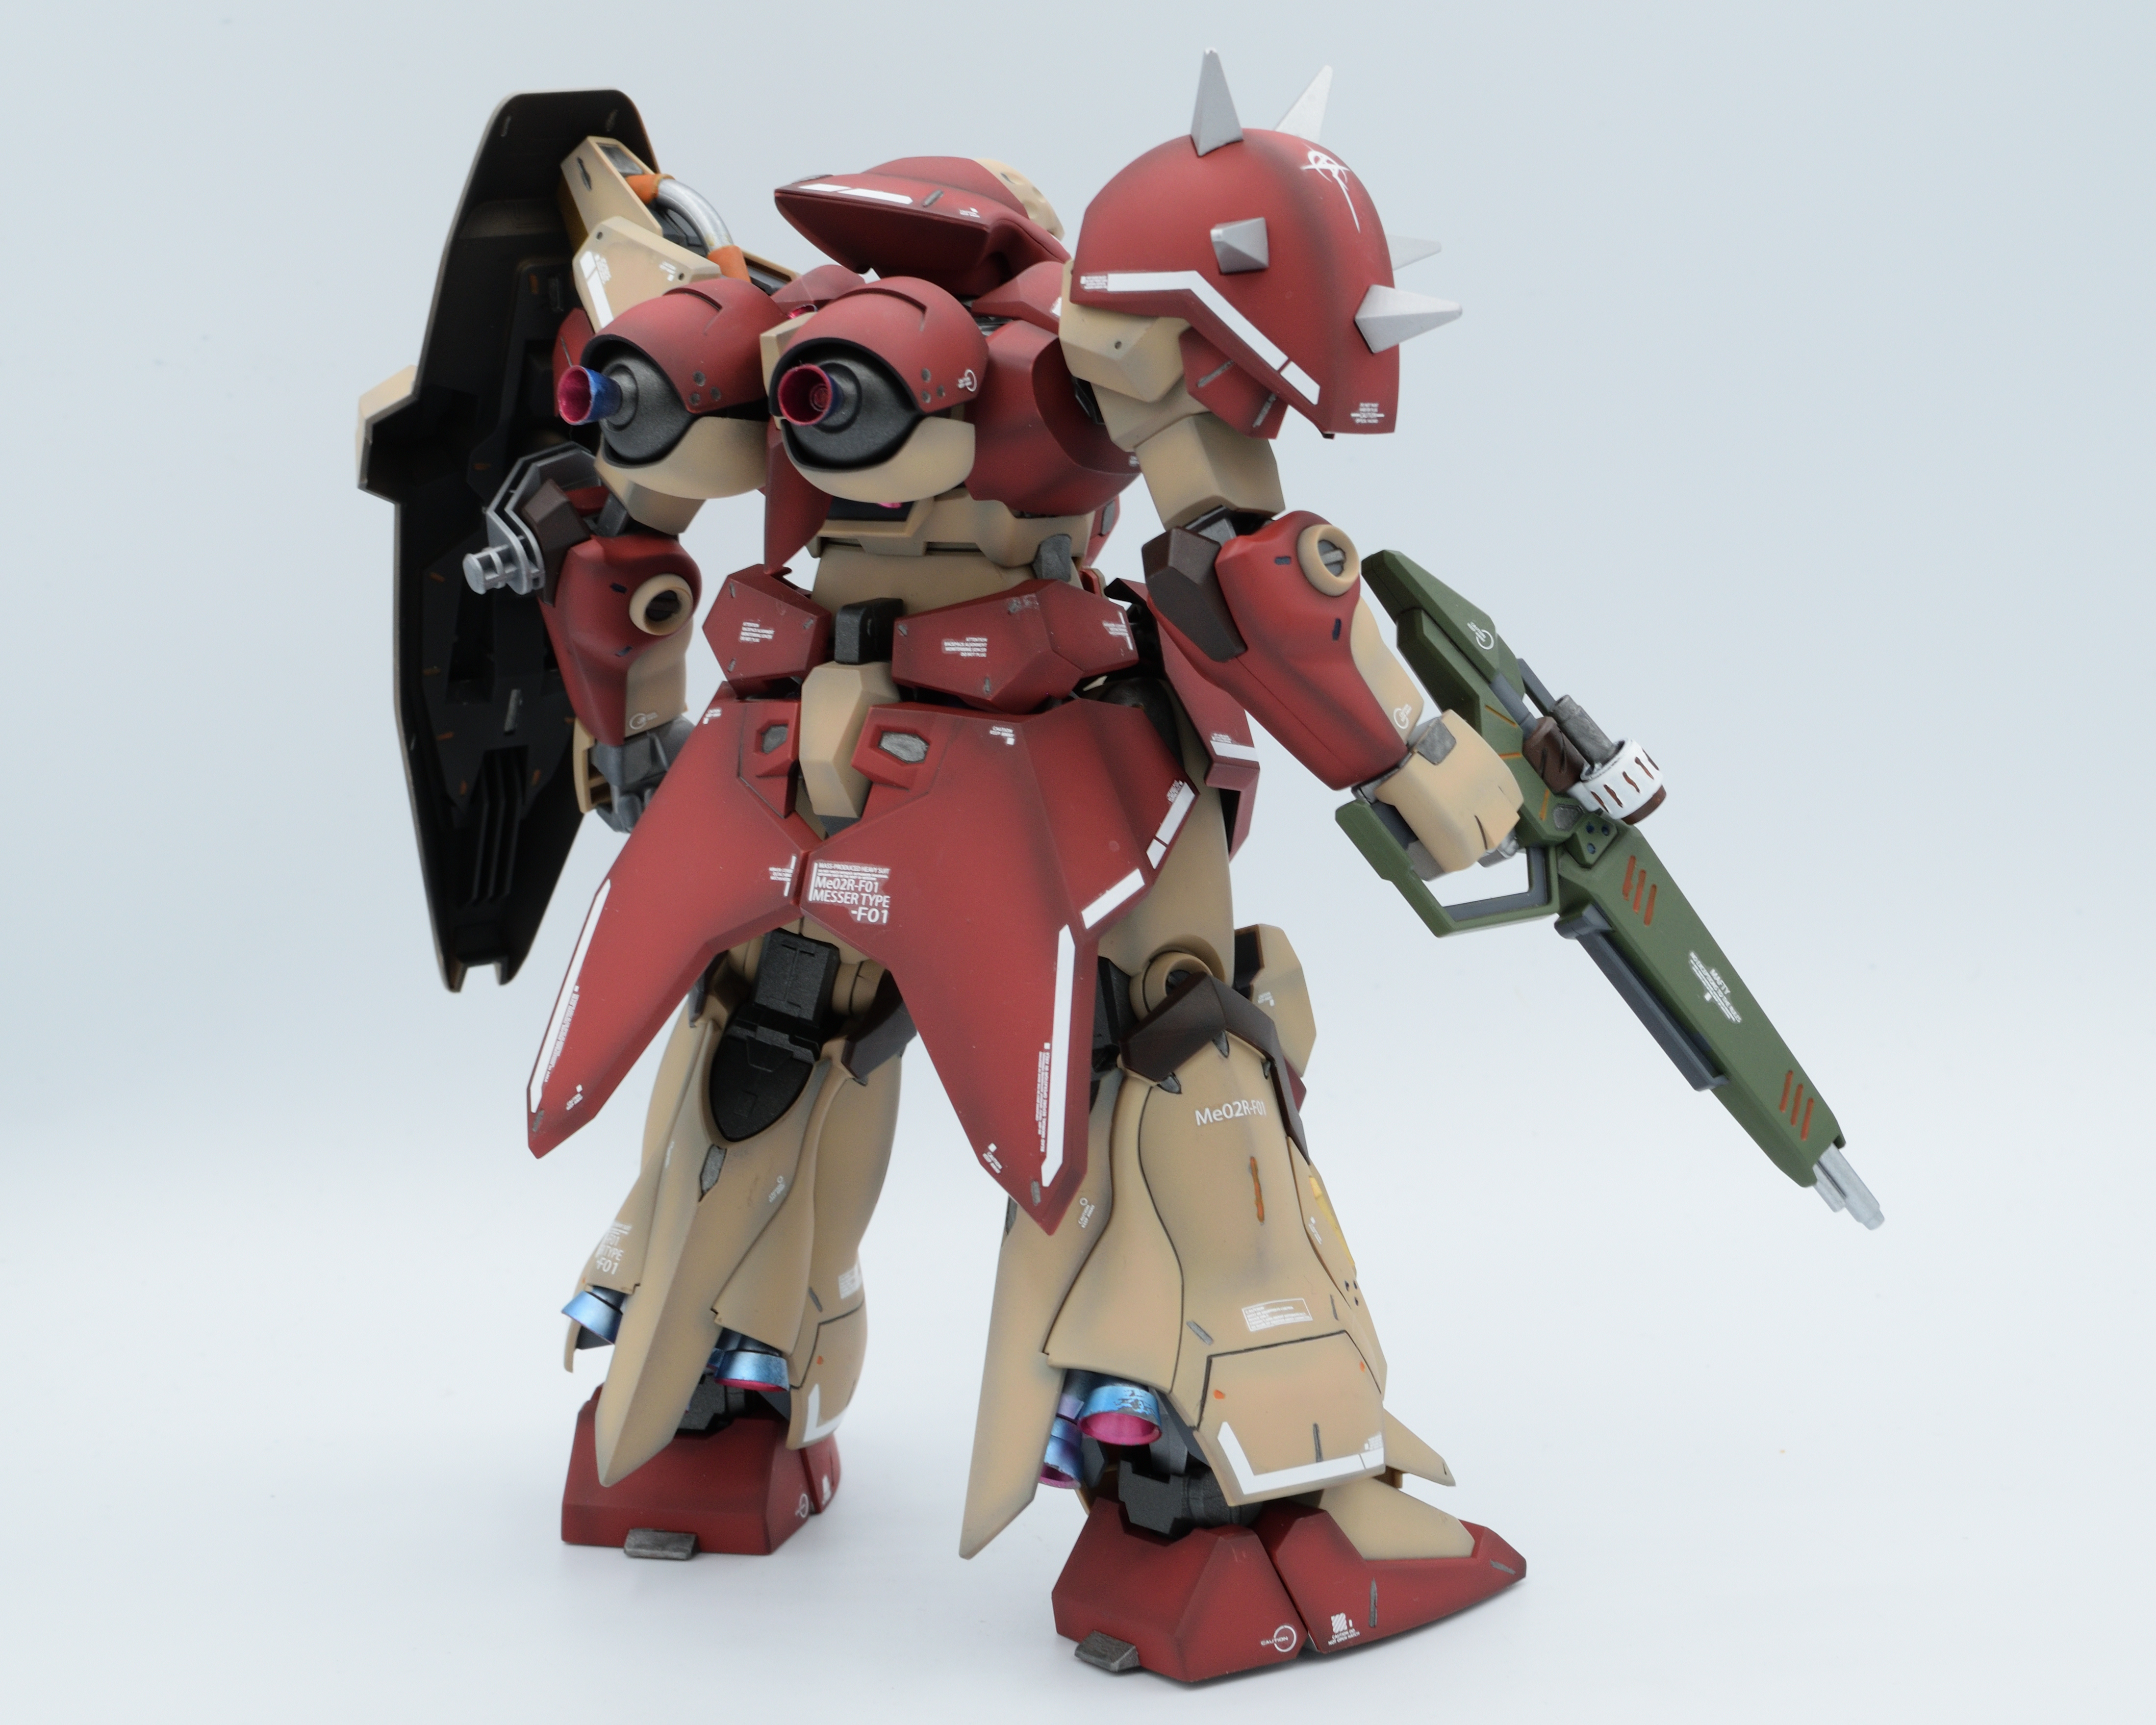
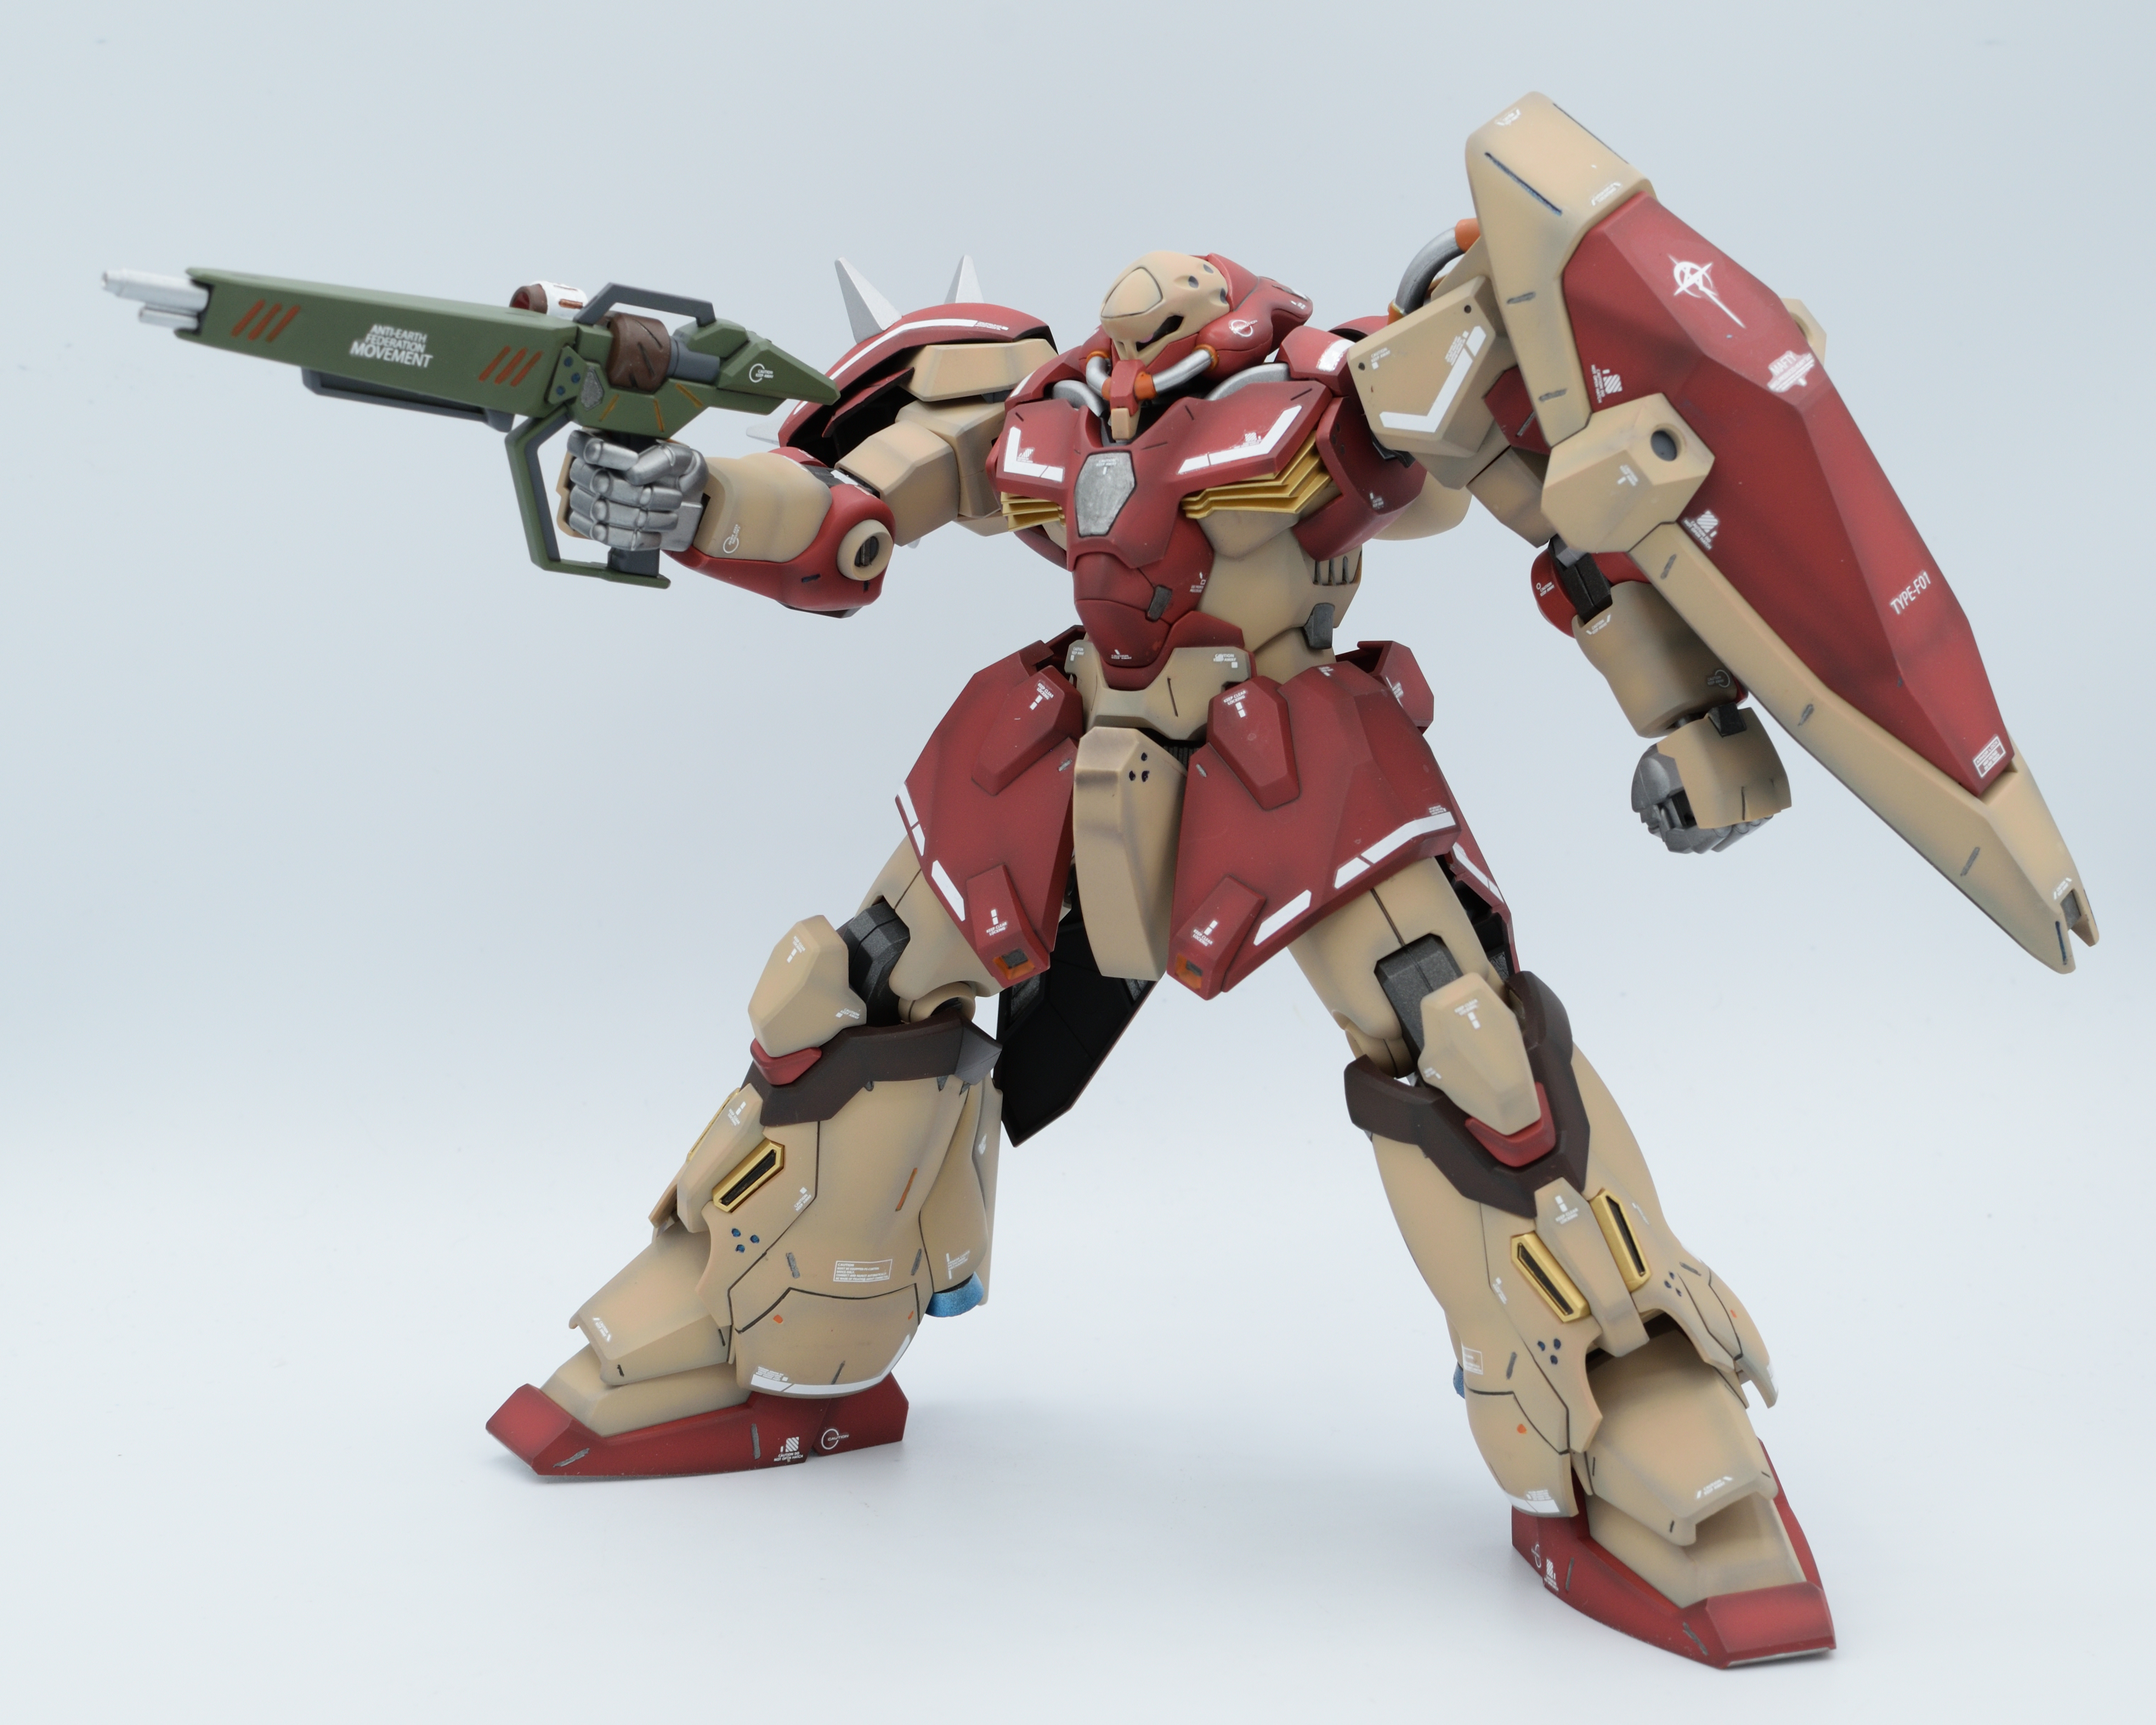
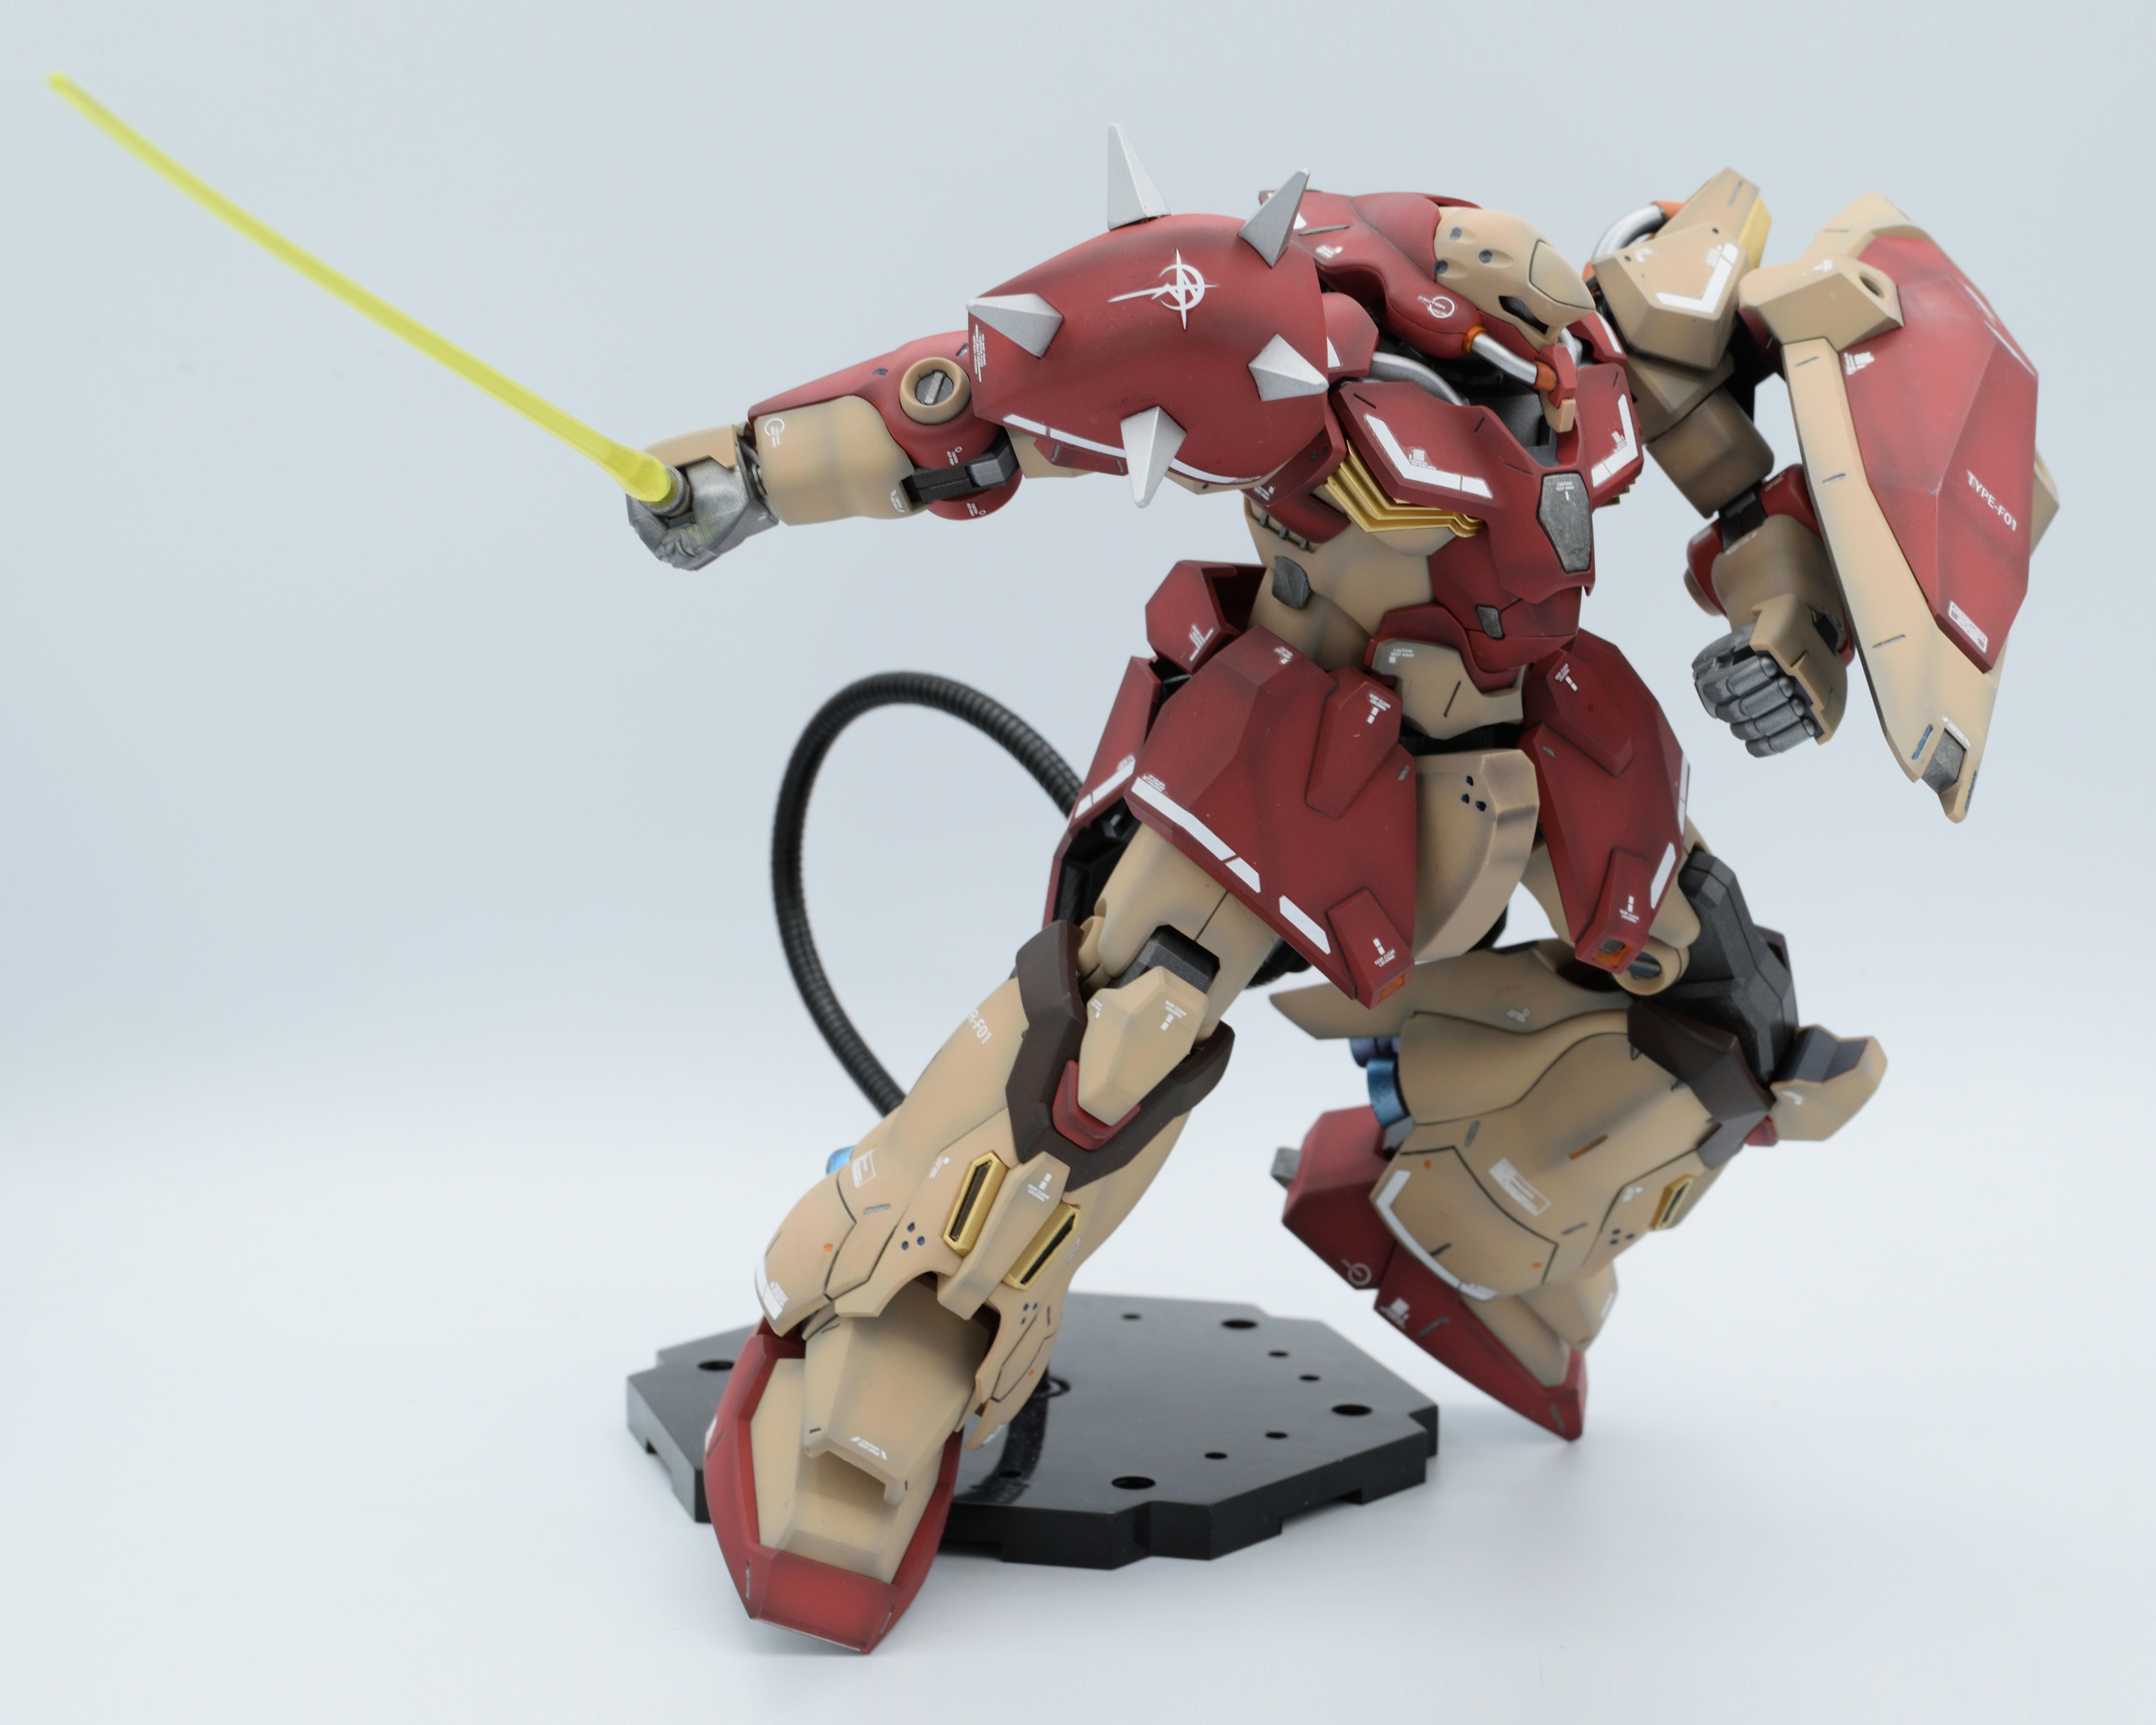
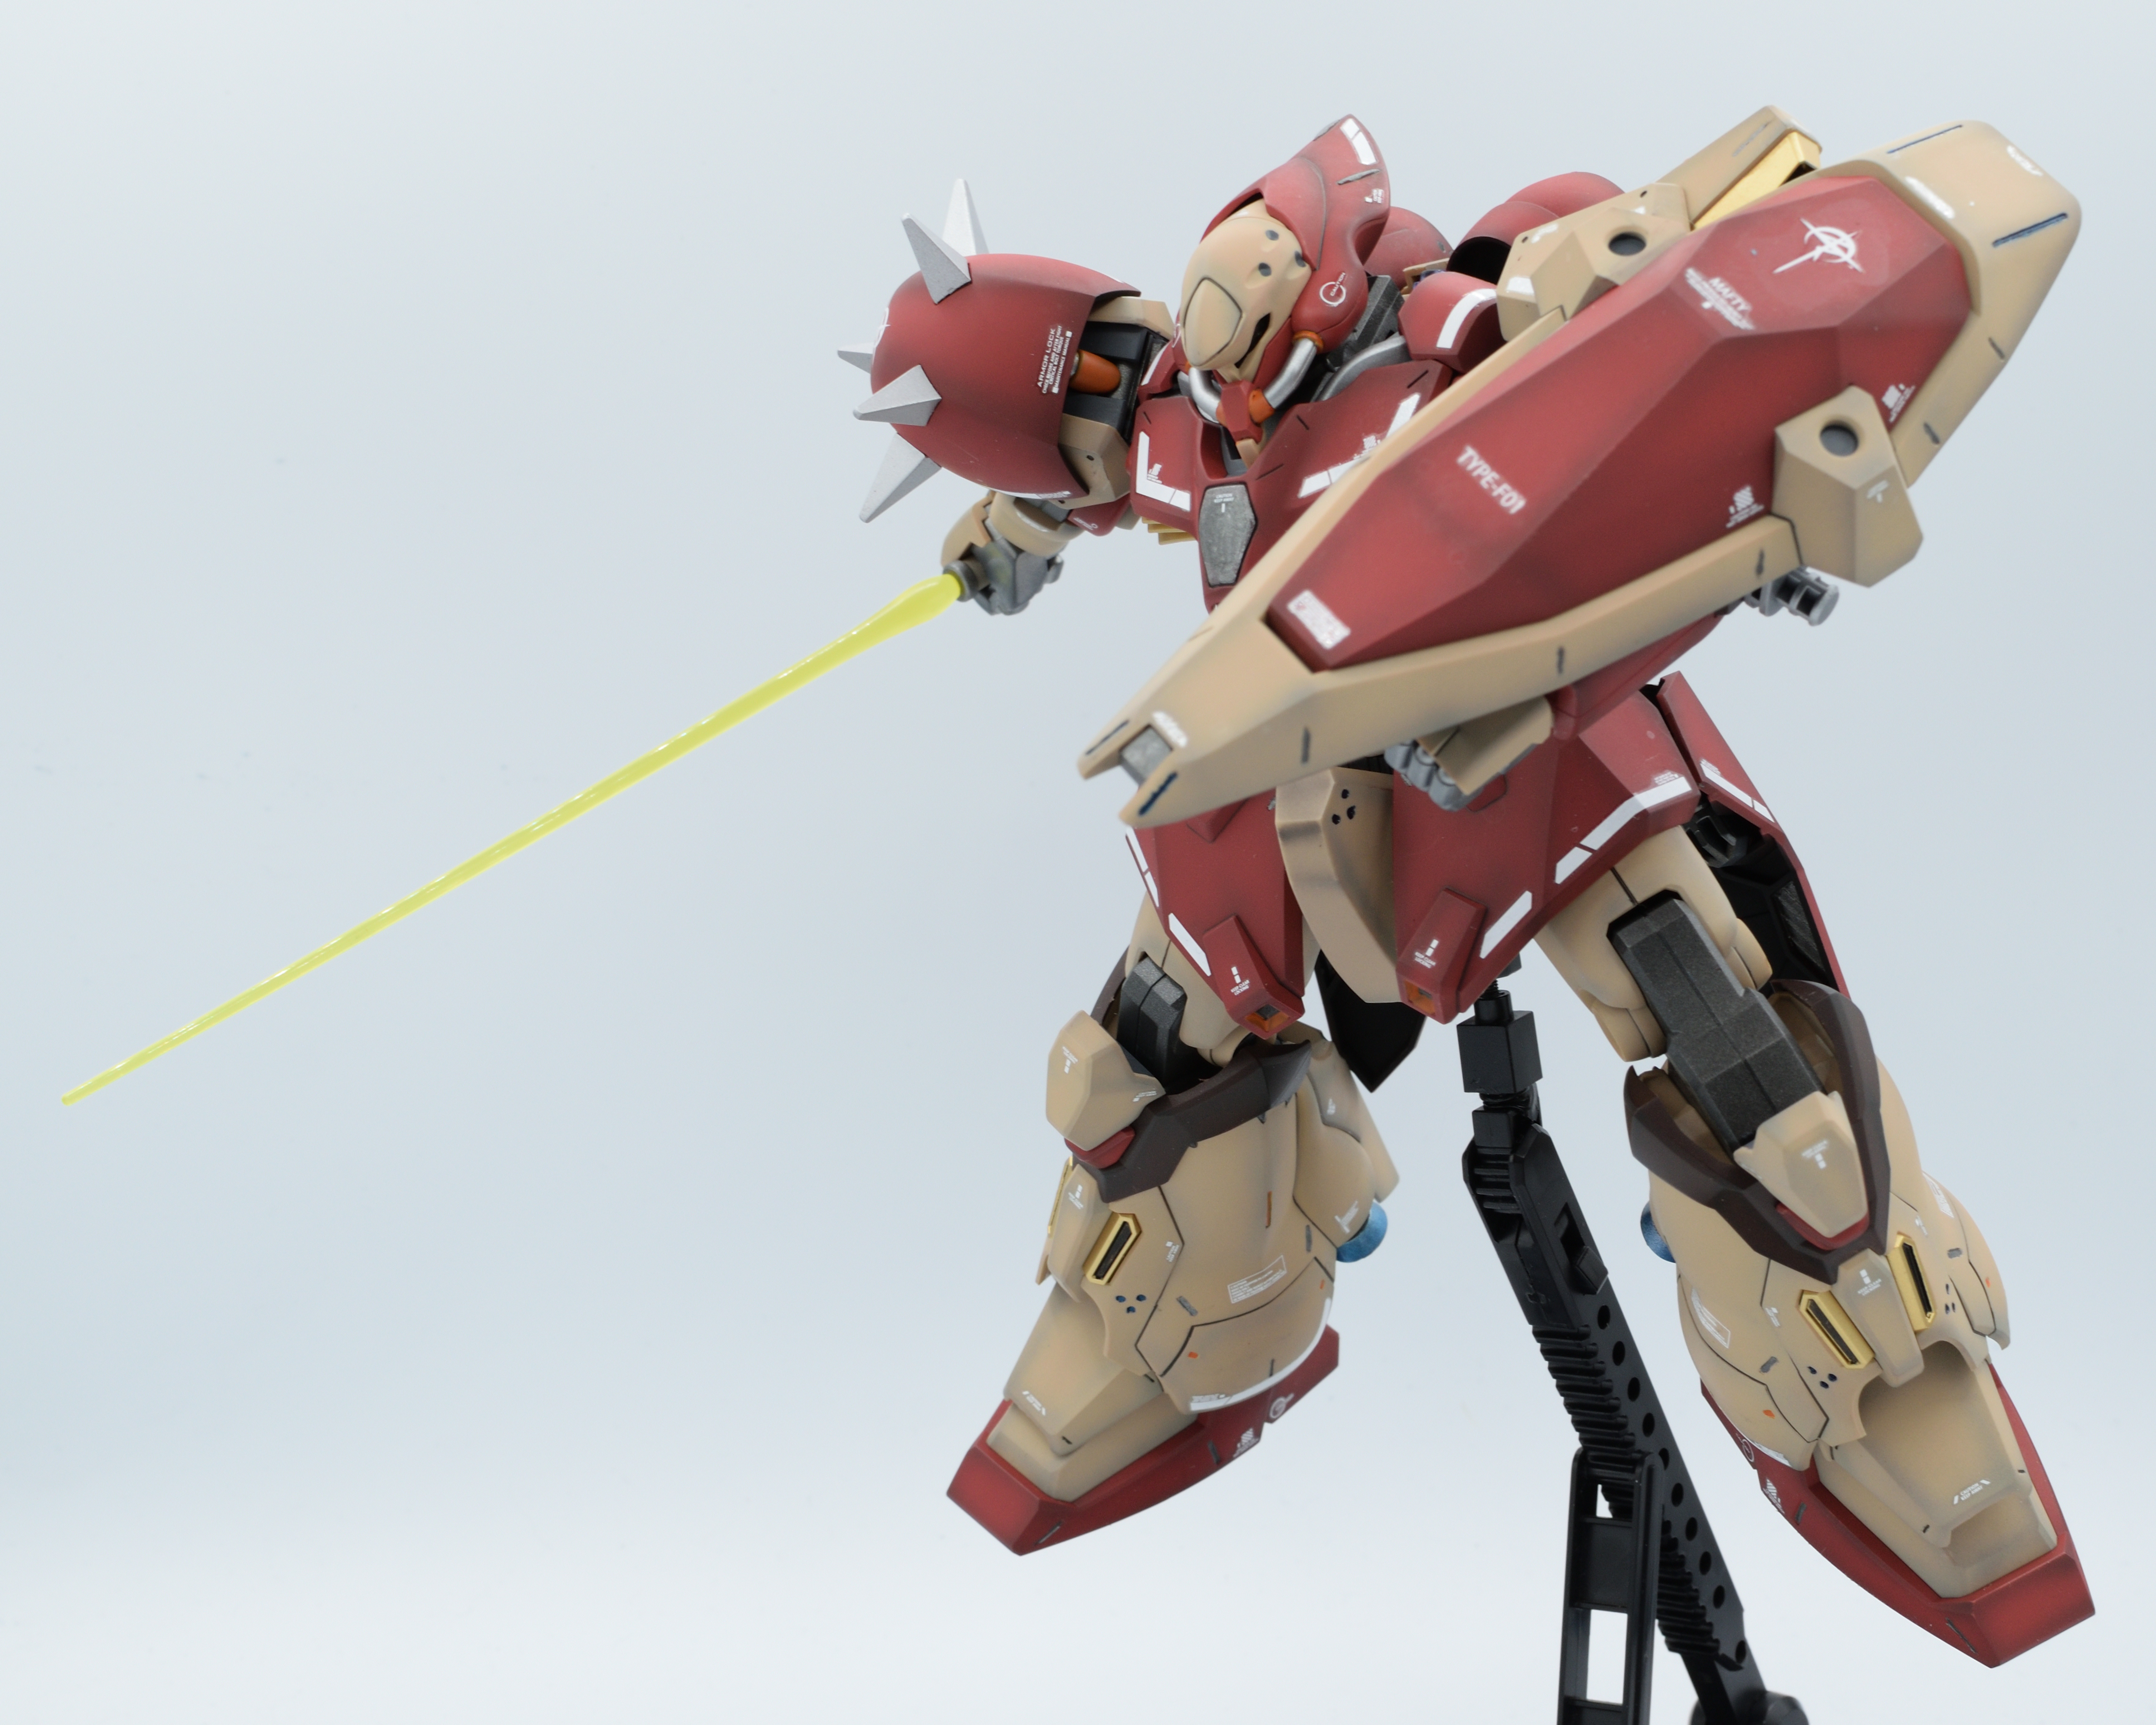
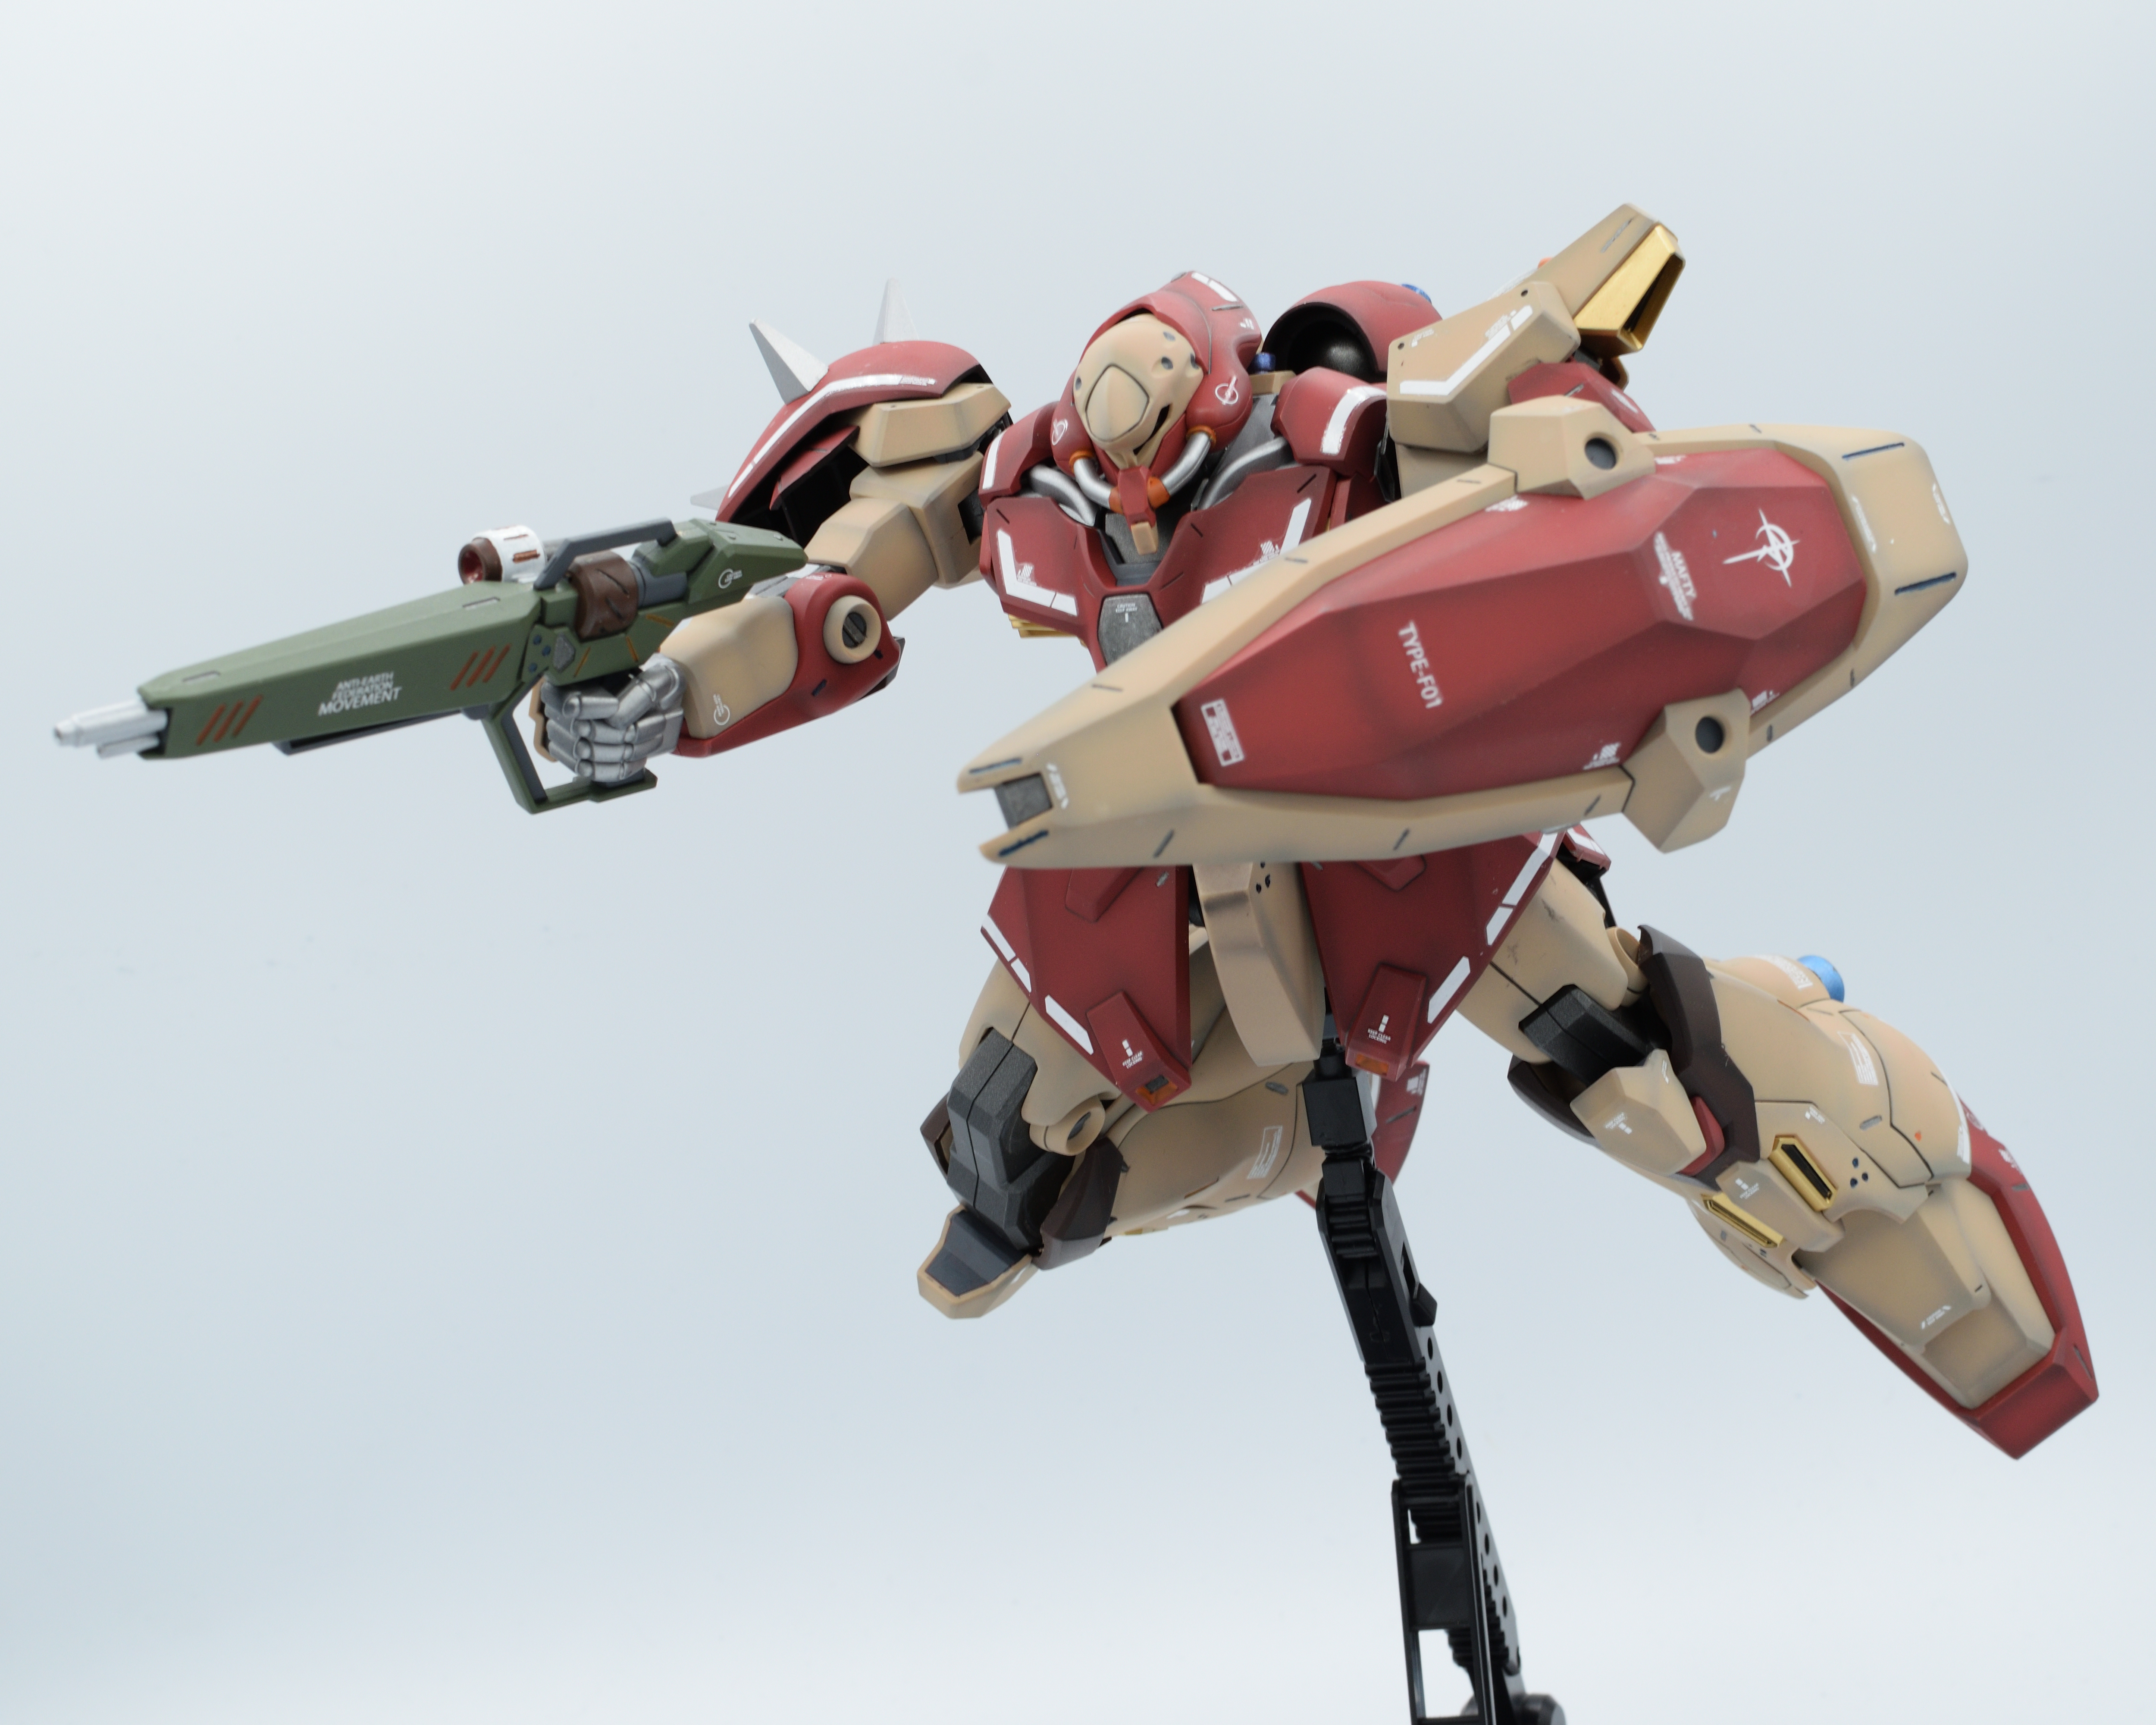
It was time to pose the Zeon poser, and yeaaaaah it sucks at doing so. Being a bulky suit, articulation is just hindered a lot, and it doesn’t help how ass the side skirt armor is connected to the waist, which they have a tendency to pop off or not move in the way you want them to. Getting ground poses for the Messer is awkward with the lack of articulation on the foot and the balance being off due to the non-existent weight on the legs. The kit primarily connects to an Action Base 5 which I didn’t have the proper connection for, so getting it on the air was annoying, the shield clashes a lot with the shoulder, the ball jointed hands are surprisingly tough to get into the arm’s square socket and is not even secure anyway, and the arms tend to pop off due to its small peg connection. All of the love I poured on this kit kinda soured at the end with how ass the kit articulates. It looks hella fine, but he ain’t really a poser.
Overall, I enjoyed detailing this kit up, but the kit itself is just… fine. It’s the cheapest Hathaway kit out there, but that cheap price definitely shows as this kit is all style, no substance. Internal structure barely exists, there’s a lot of hollow areas you’d probably want to paint, and the limited accessories the Messer comes with goes as far as doing their job at their best, and being a hindrance at their worst. It looks really cool though, as it is a mass produced monoeye mobile suit that’s the same head height as the Sazabi. Get it for the looks and the cheap price, that’s all I can really say. Thanks for reading, and I’ll see you later!