Painted, panel lined, decaled and weathered. Shot with a Nikon D5300 with an AF-S DX NIKKOR 35mm f/1.8G lens.
Behold, my most ambiguous solo project of the year—my very first fully painted build following my milestones of painting for the very first time and spray painting/airbrushing for the first time, but you’re probably wondering, isn’t this just the Command Qan[T] Desert Type with a detail painting, decals and weathering effects? Sure, it looks like that, but the base kit is the original Command Qan[T] that I got back in 2023, one of the oldest kits in my backlog. I found the kit at Hobby Lobby and got it a dirt cheap price with the 40% off boxed kits sale at the time, but it sat in the backlog as I was doing so many HGs that year that getting this kit done was low priority. However, Bandai would announce the Desert Type recolor, which I thought looked so much better than the green color scheme of that the original came with, and I had a mission to eventually repaint the whole kit to the desert colors. However however, I didn’t know how to spray paint or airbrush at the time, so it stayed in the backlog for another two years…
Fast forward to today, I eventually learned how to spray paint and got myself comfortable doing so, so it was finally time to tackle this Qan[T]. A few weeks prior, I had went to my local hobby store and bought a bunch of different Tamiya cans which for sure was considerably more expensive than just buying the kit again, so I was ready to get started!
As for the build—it is extremely easy. I’ve never built an HG00 kit before, but it’s basically like any HG in the 2010s where there’s an abundance of polycaps, articulation is meek, and seamlines beware. The new parts fit into the Qan[T] base like a glove and don’t offer any improved engineering from the base kit, but it’s not like the kit was that bad to begin with. I don’t know how the out of the box experience is like, but having painted most of the joints and polycaps, this kit is solid AF for what it is, that basically nothing but the back of the hands popped off when I was posing the kit.
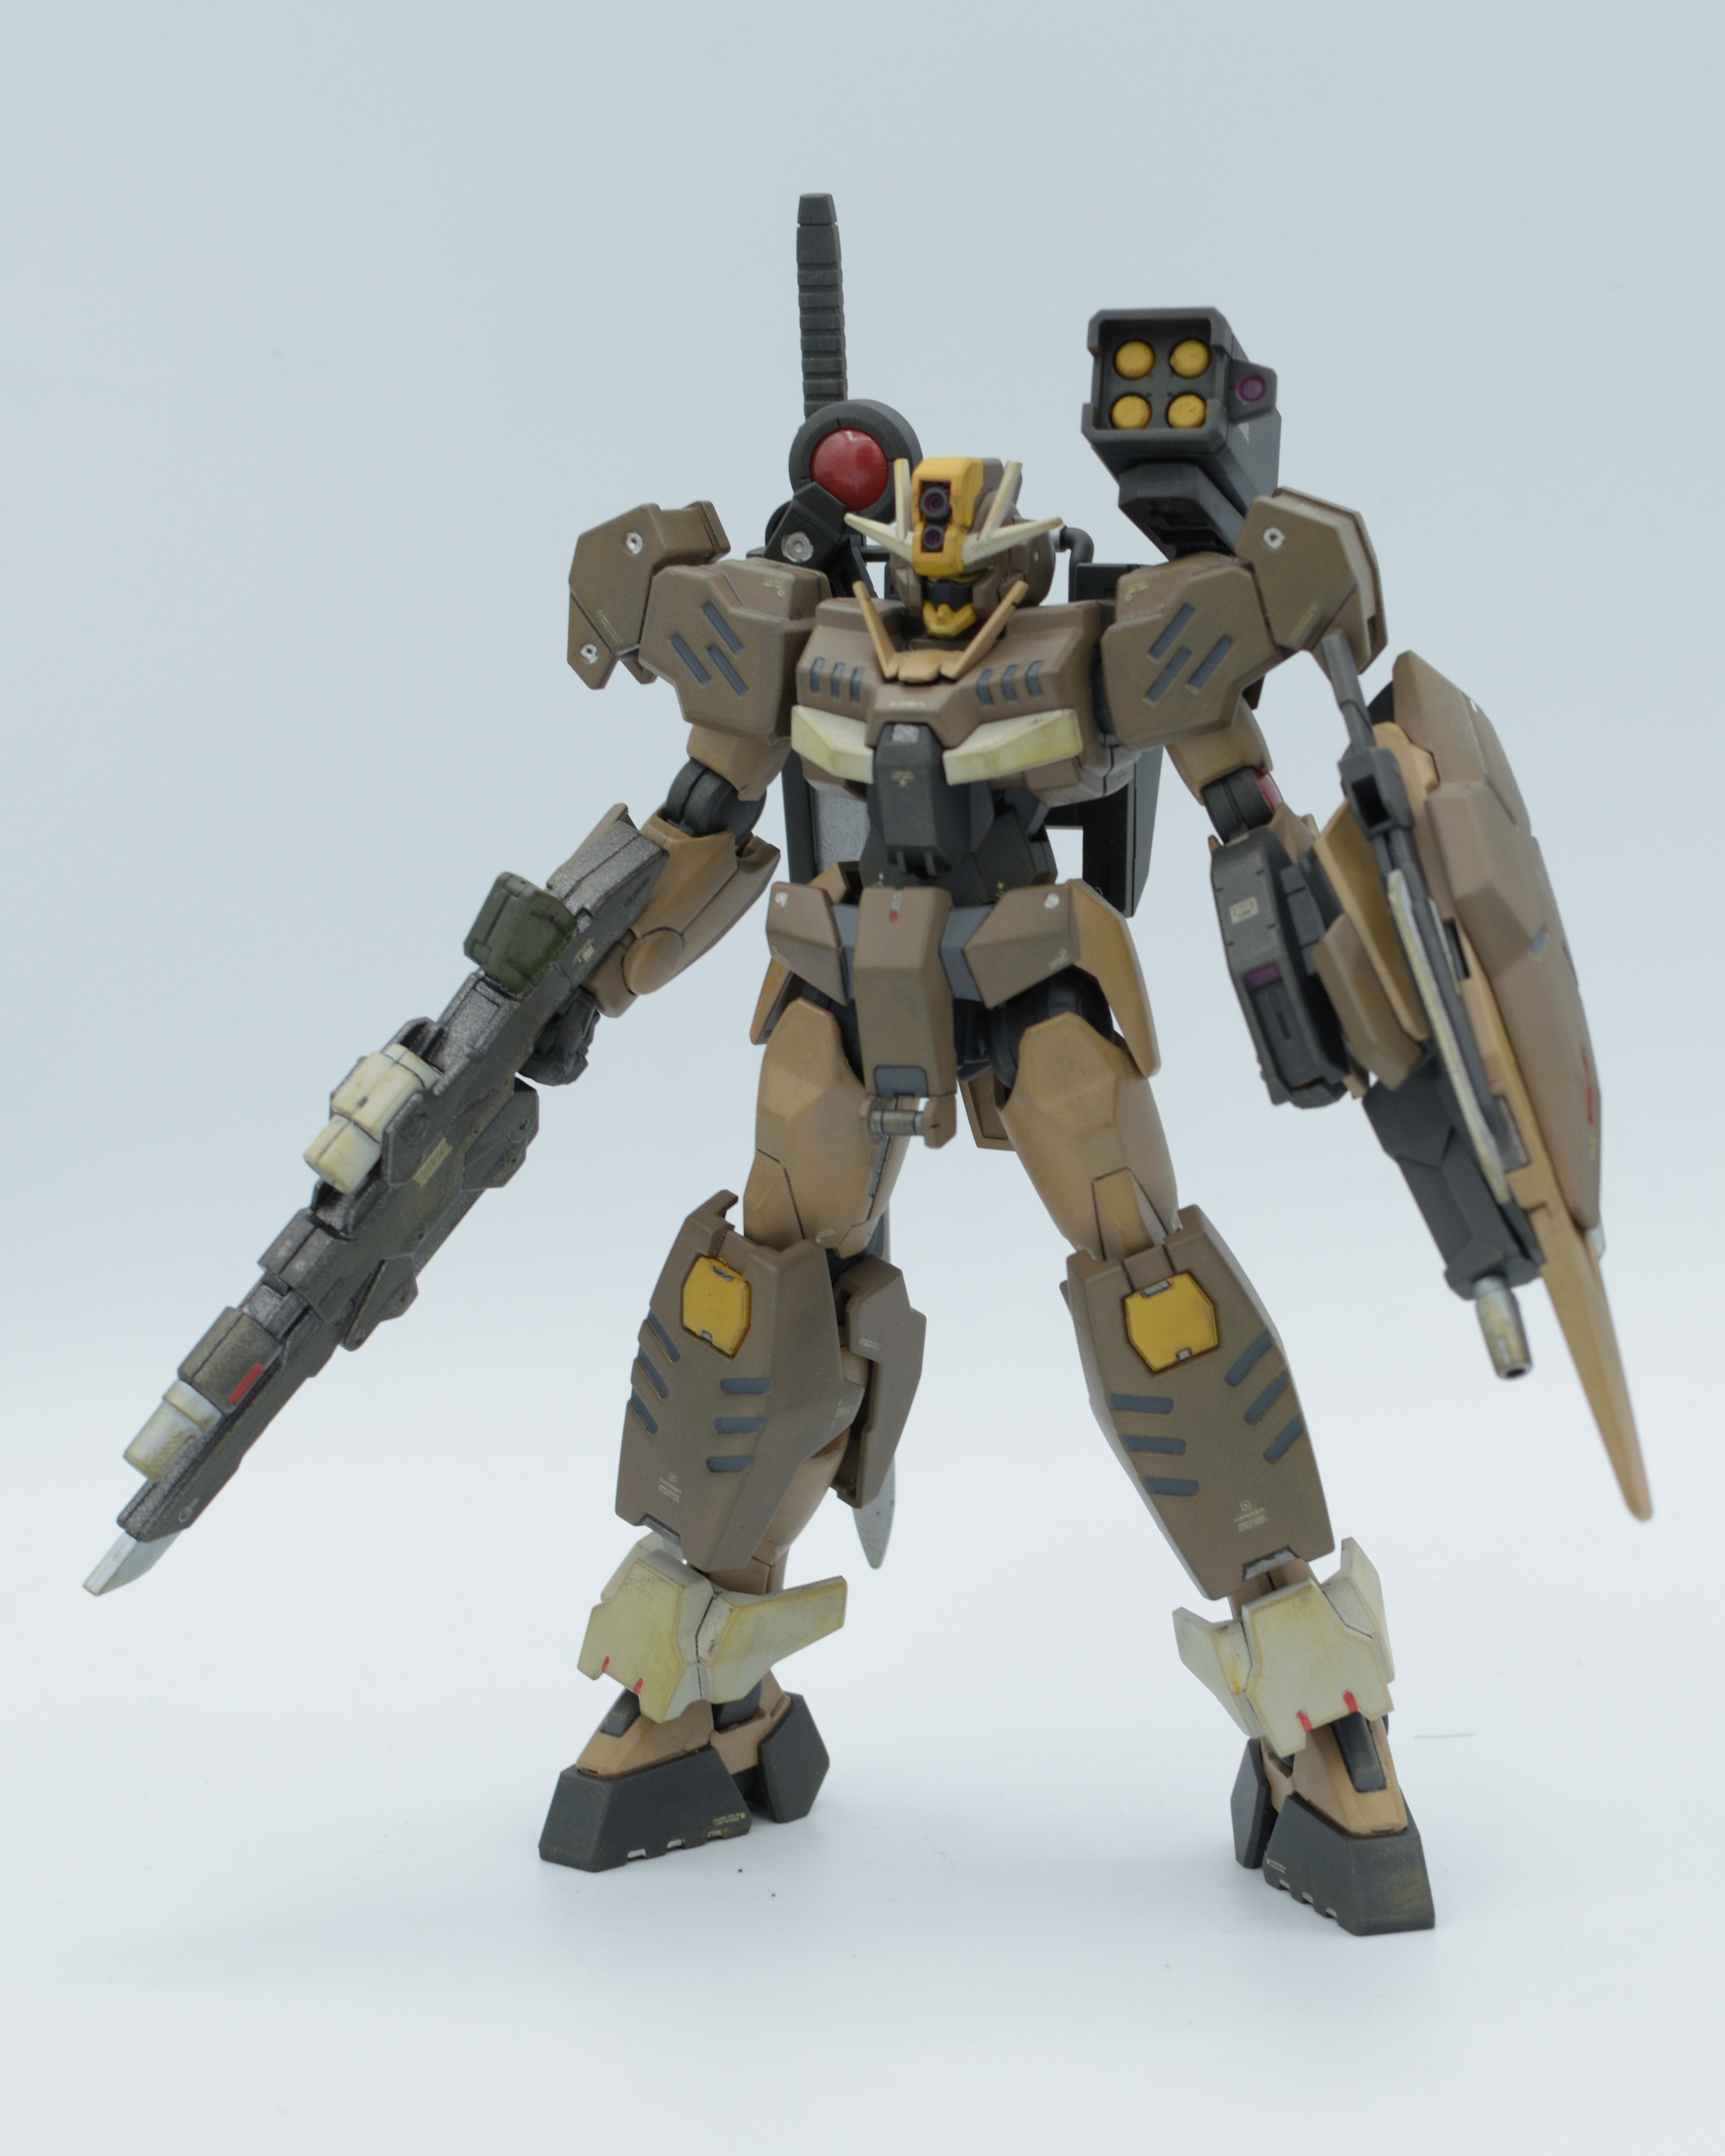
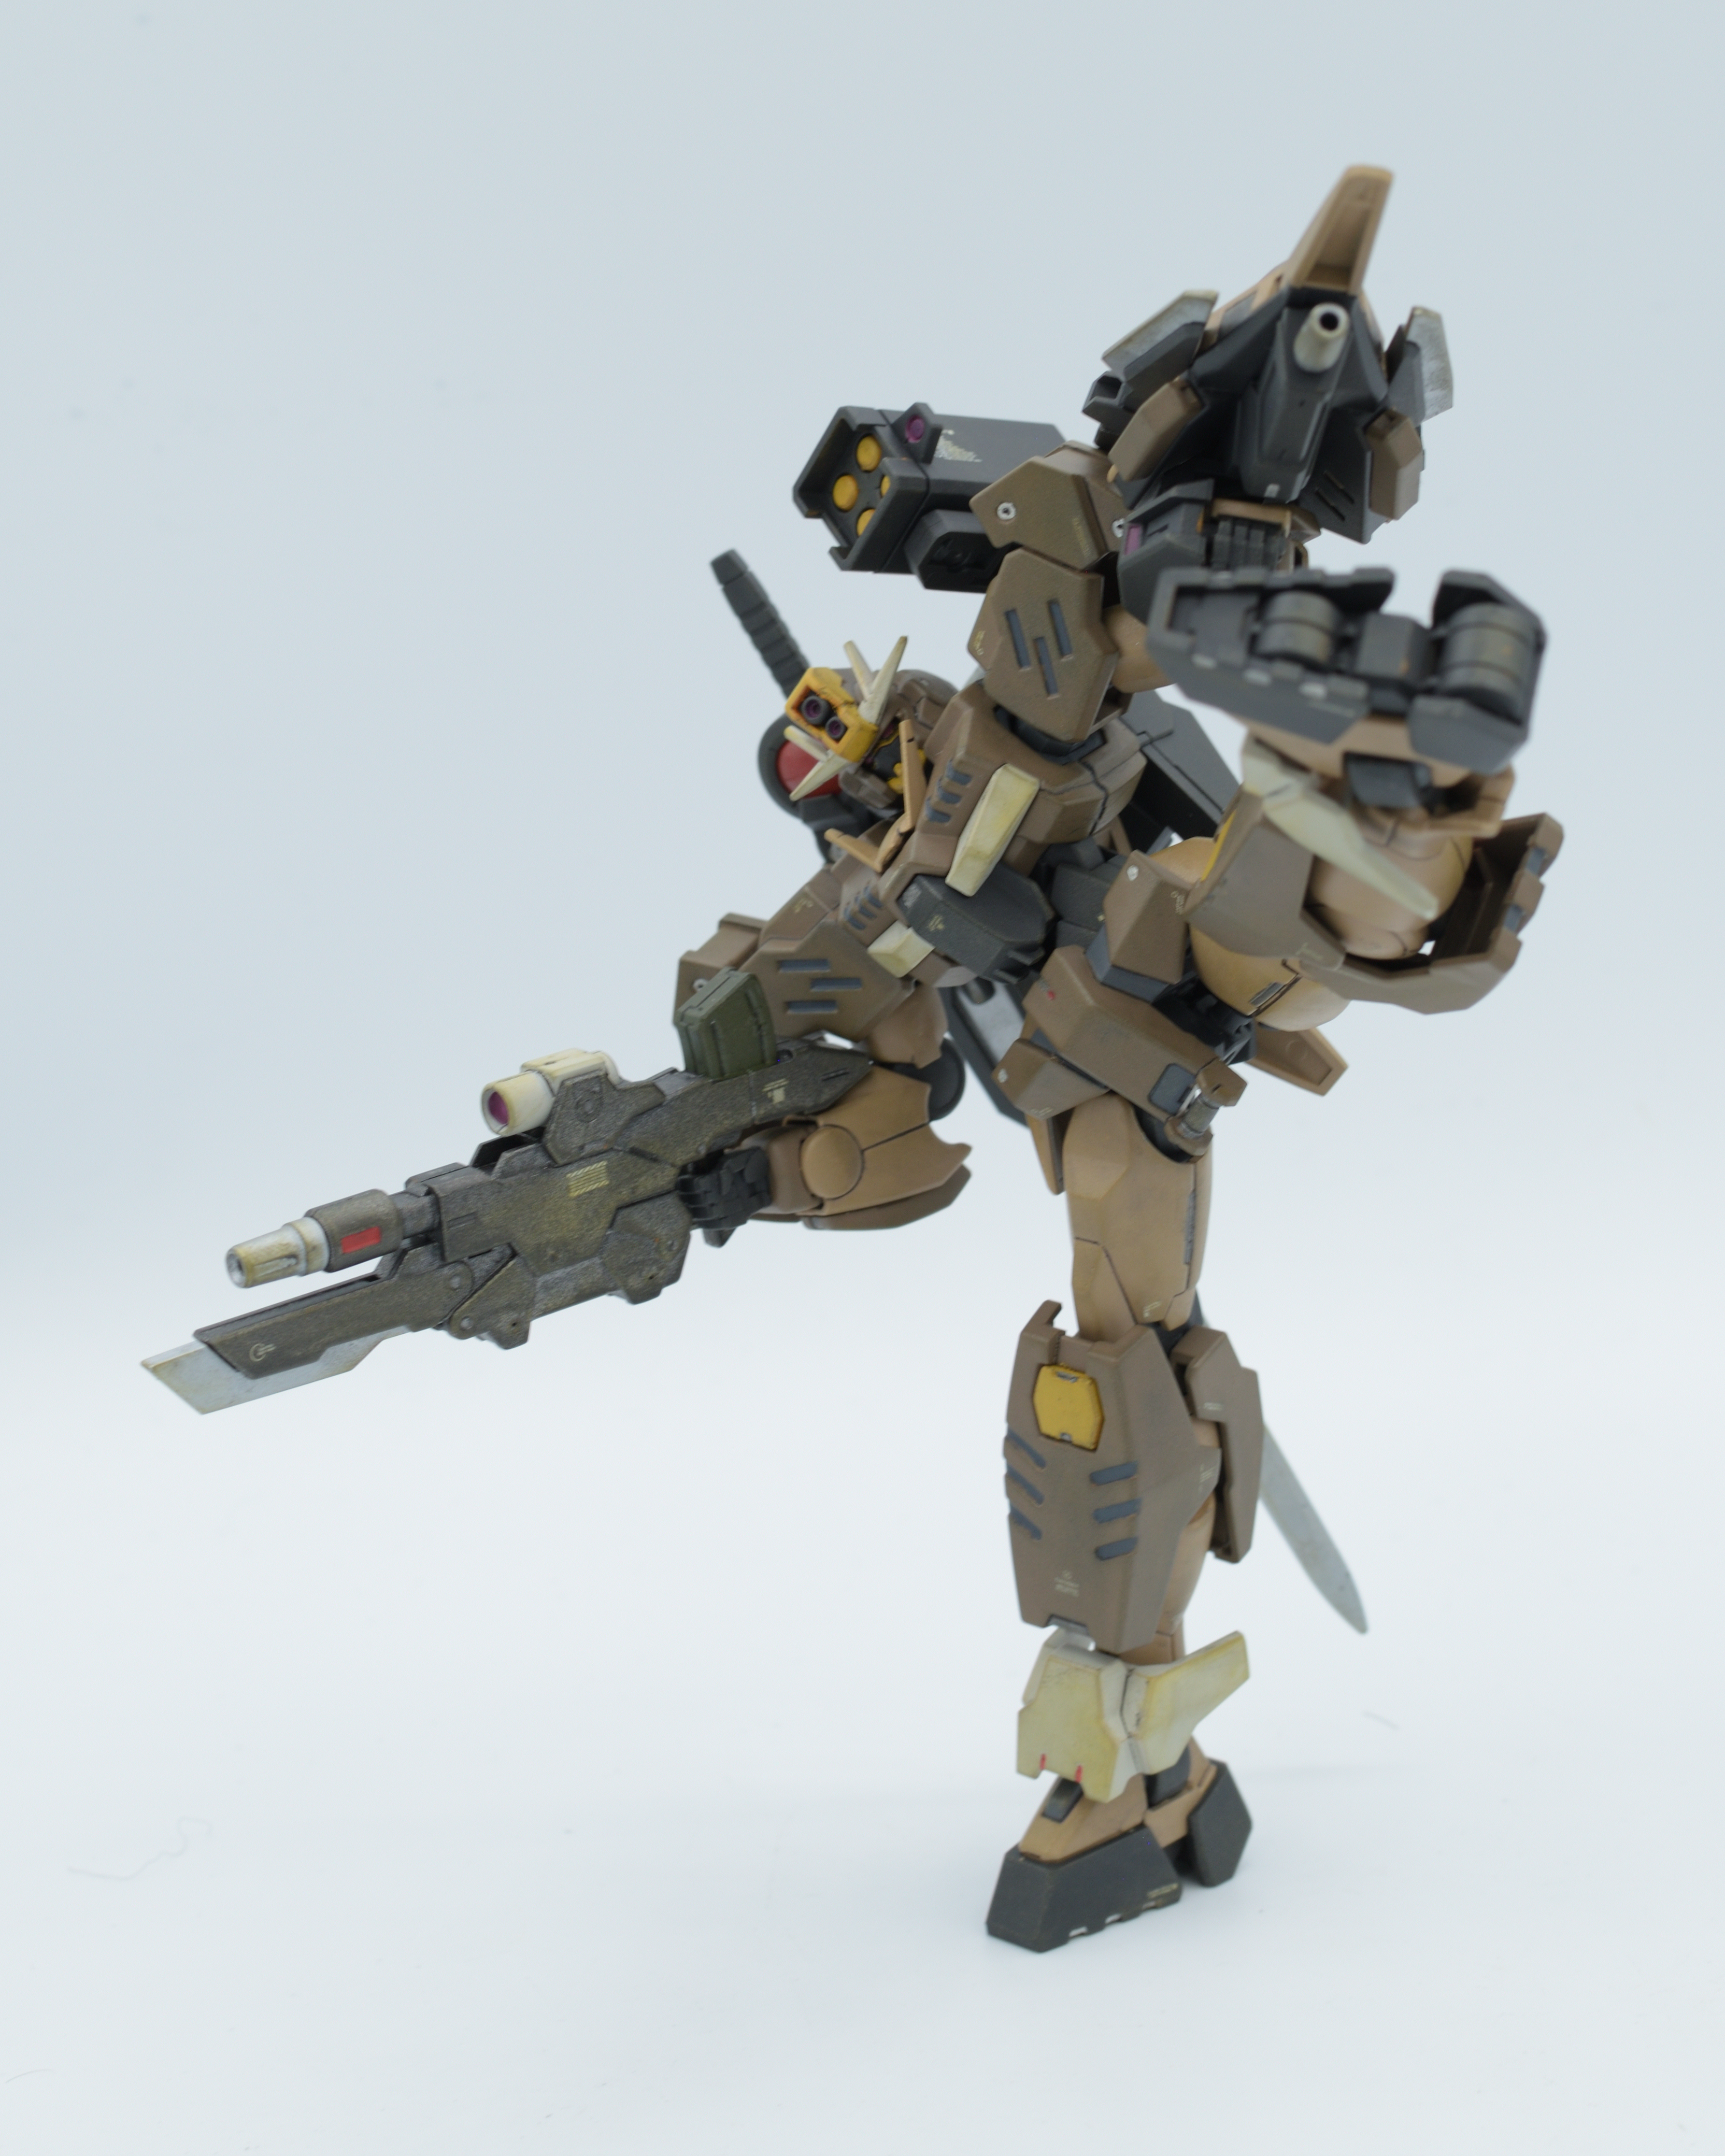
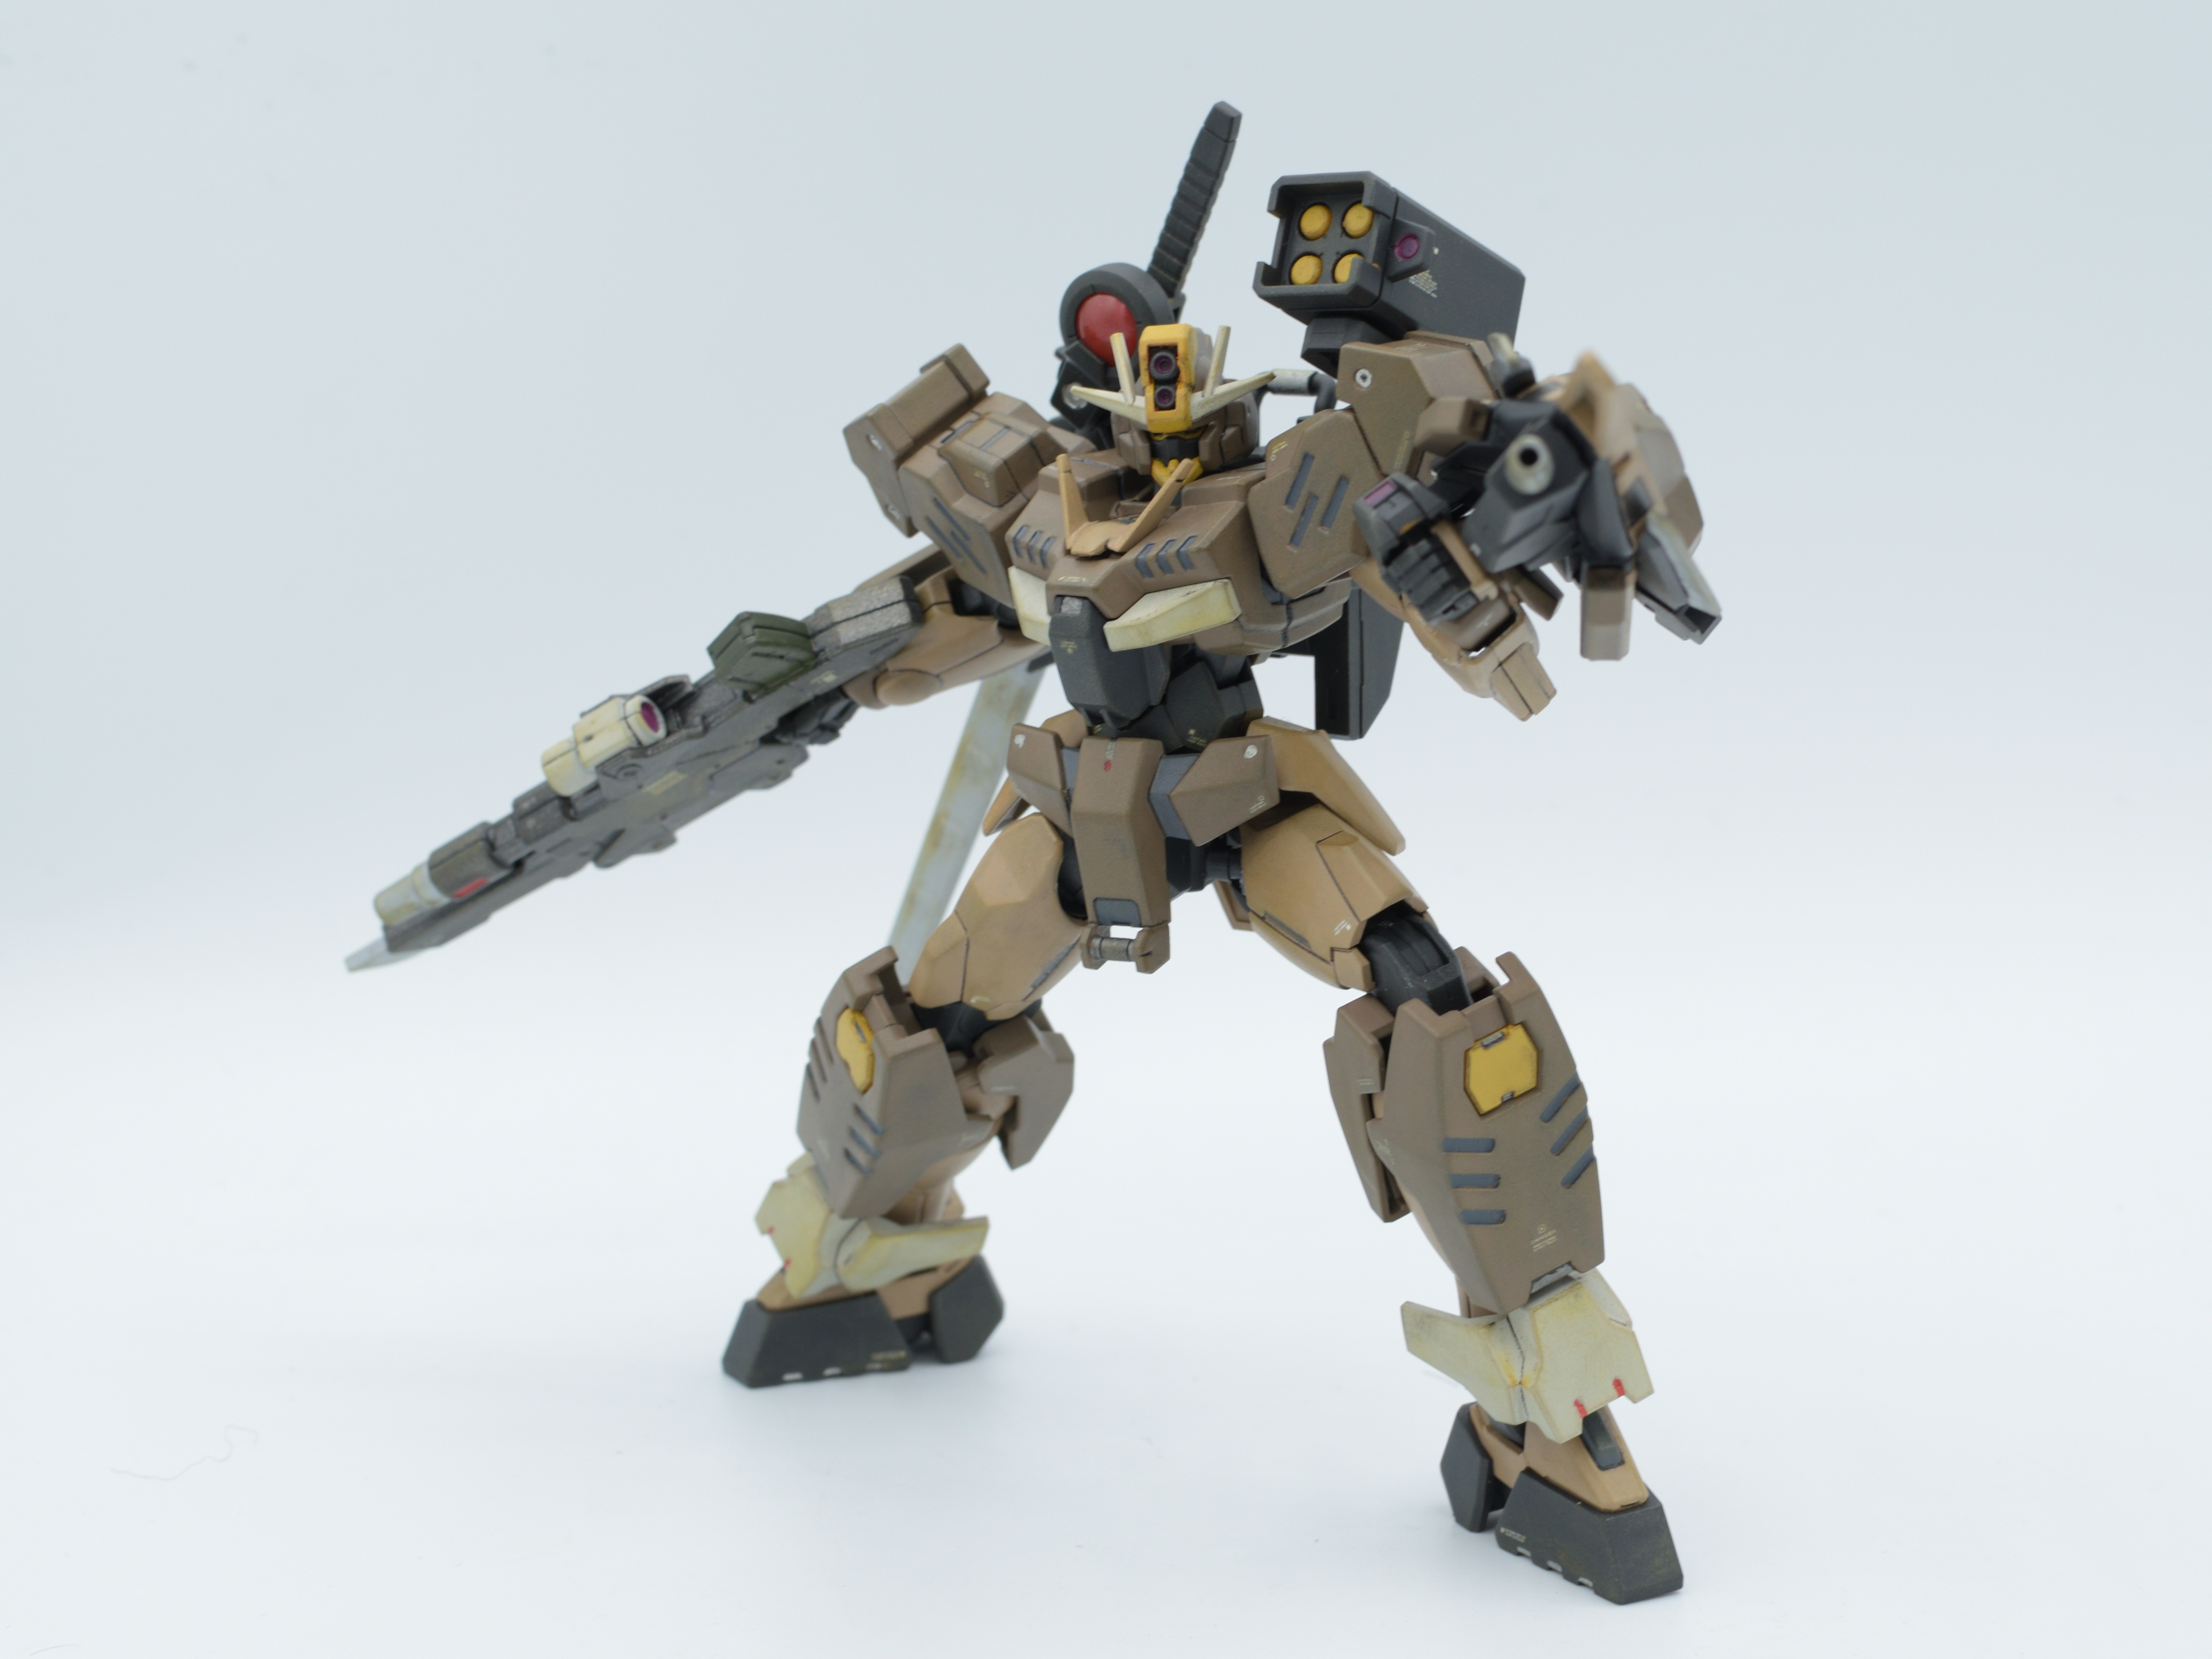
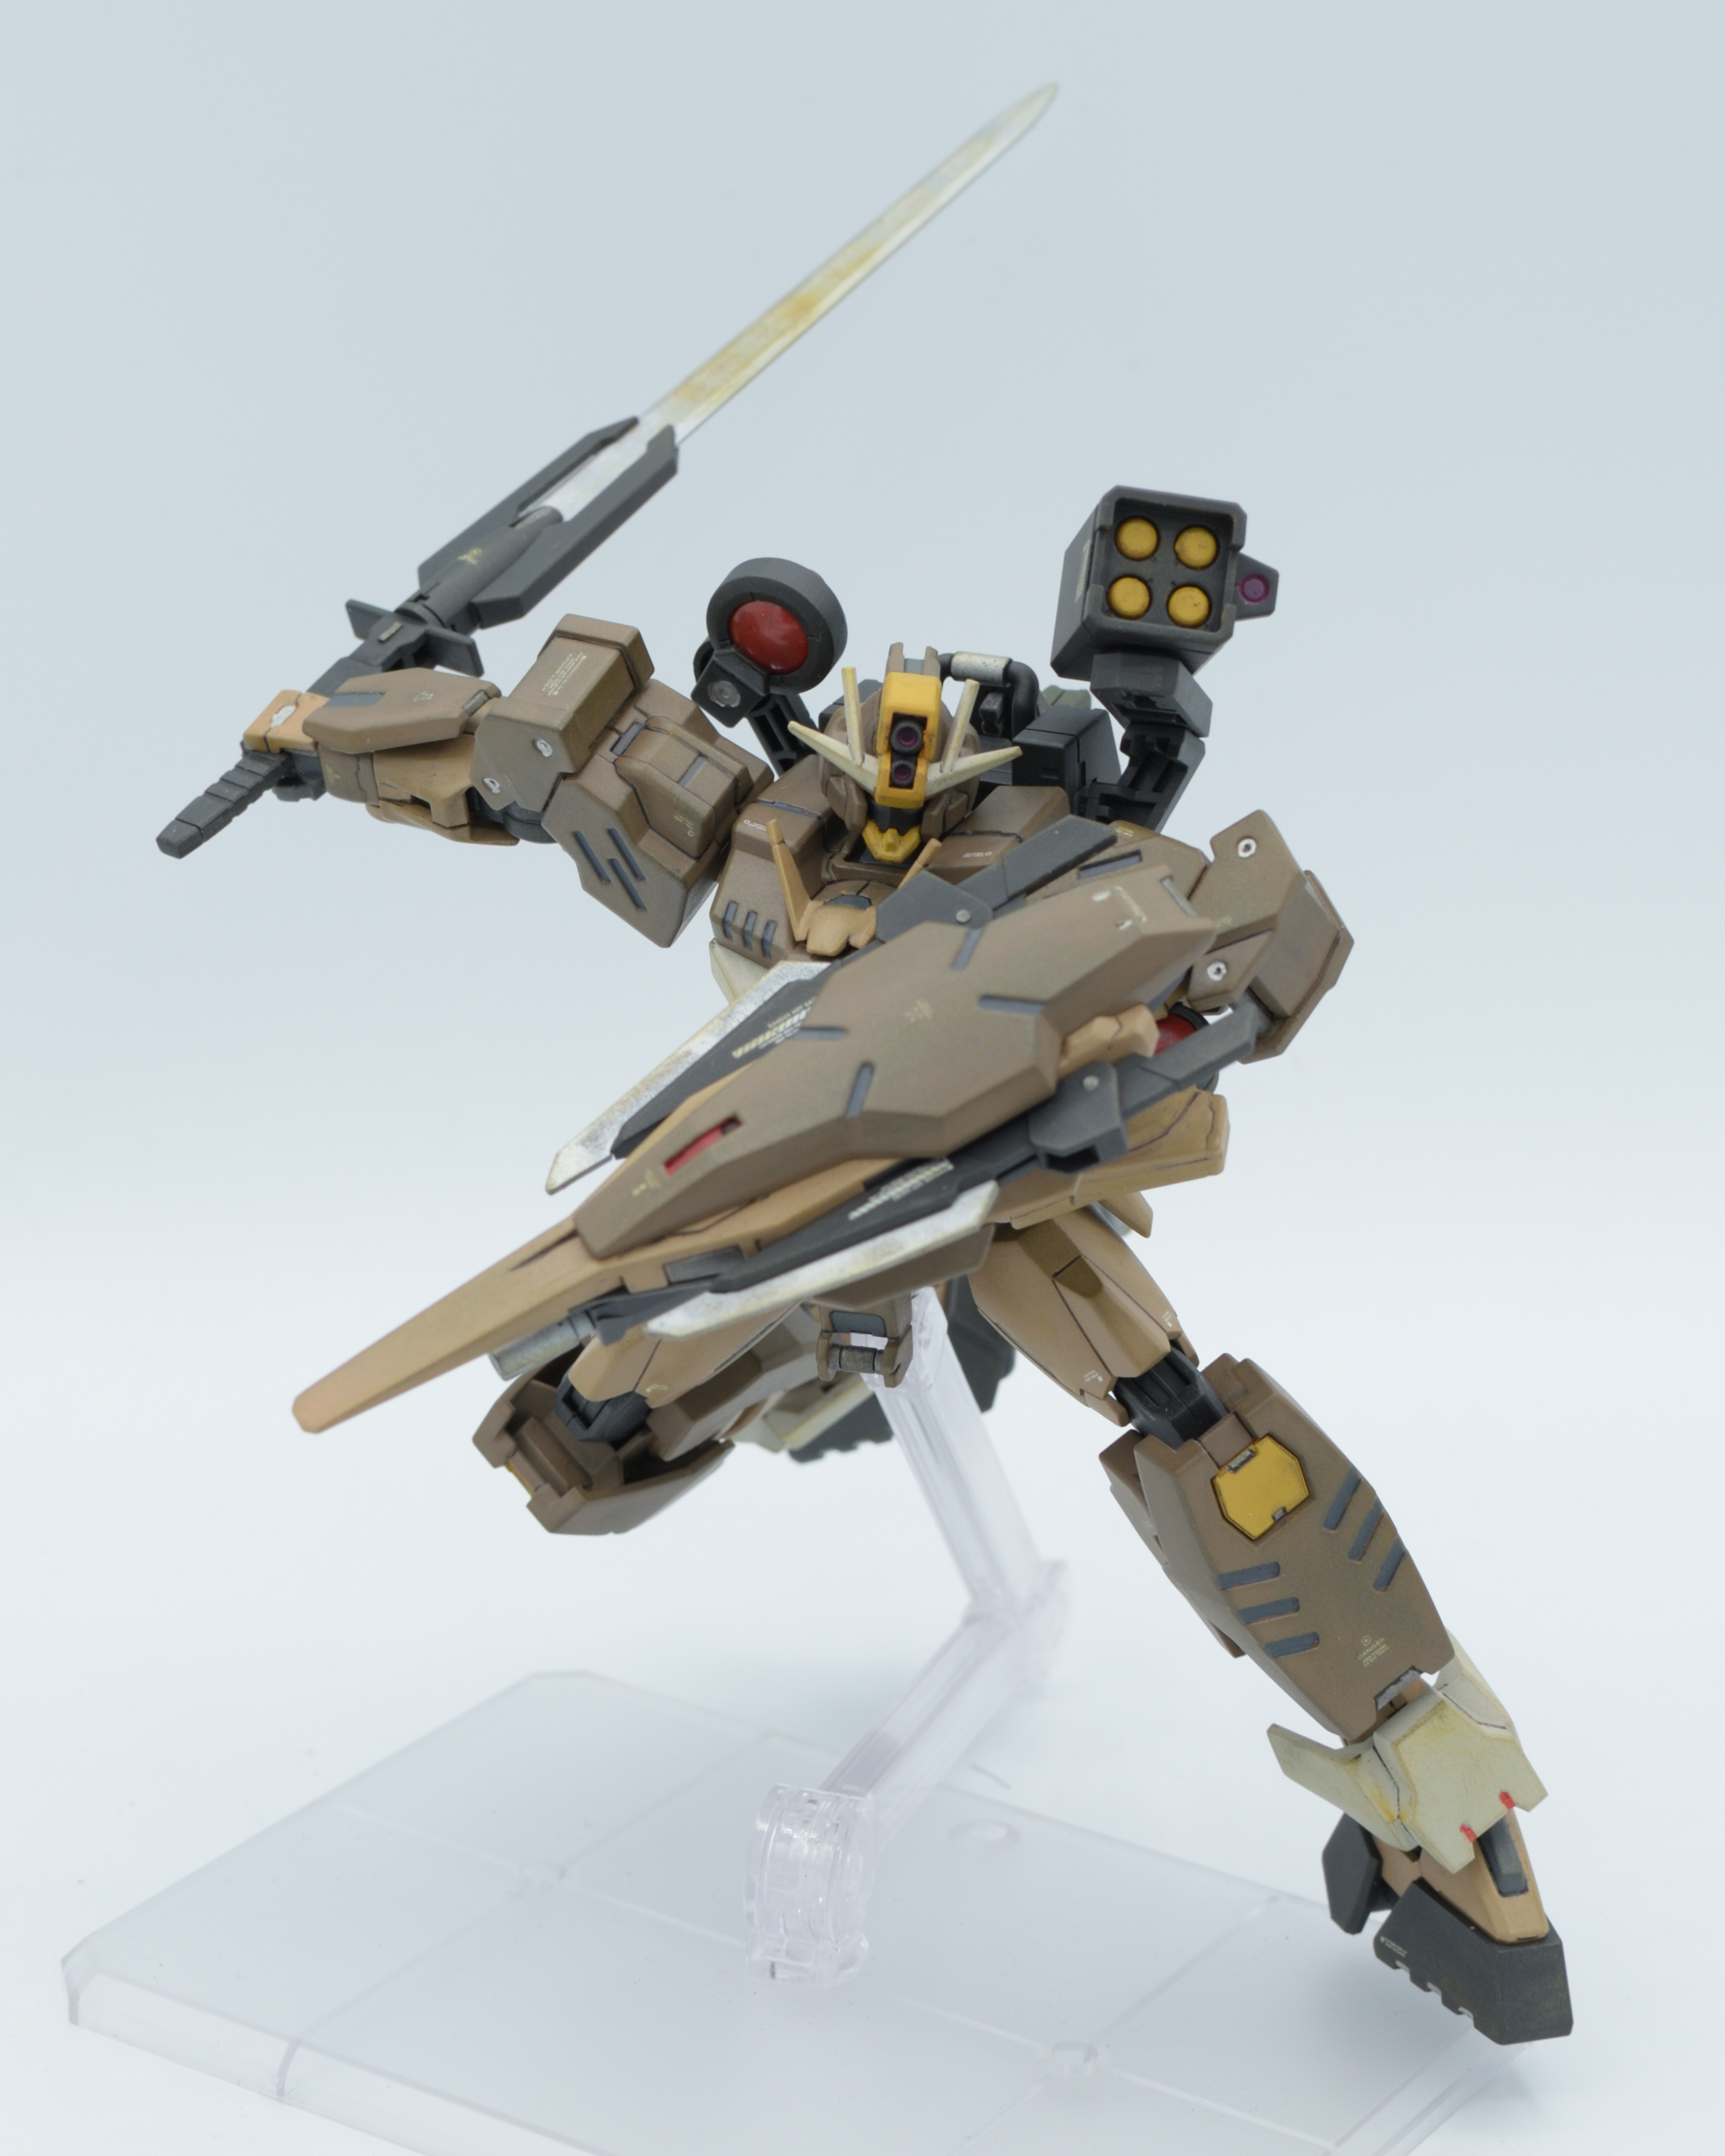
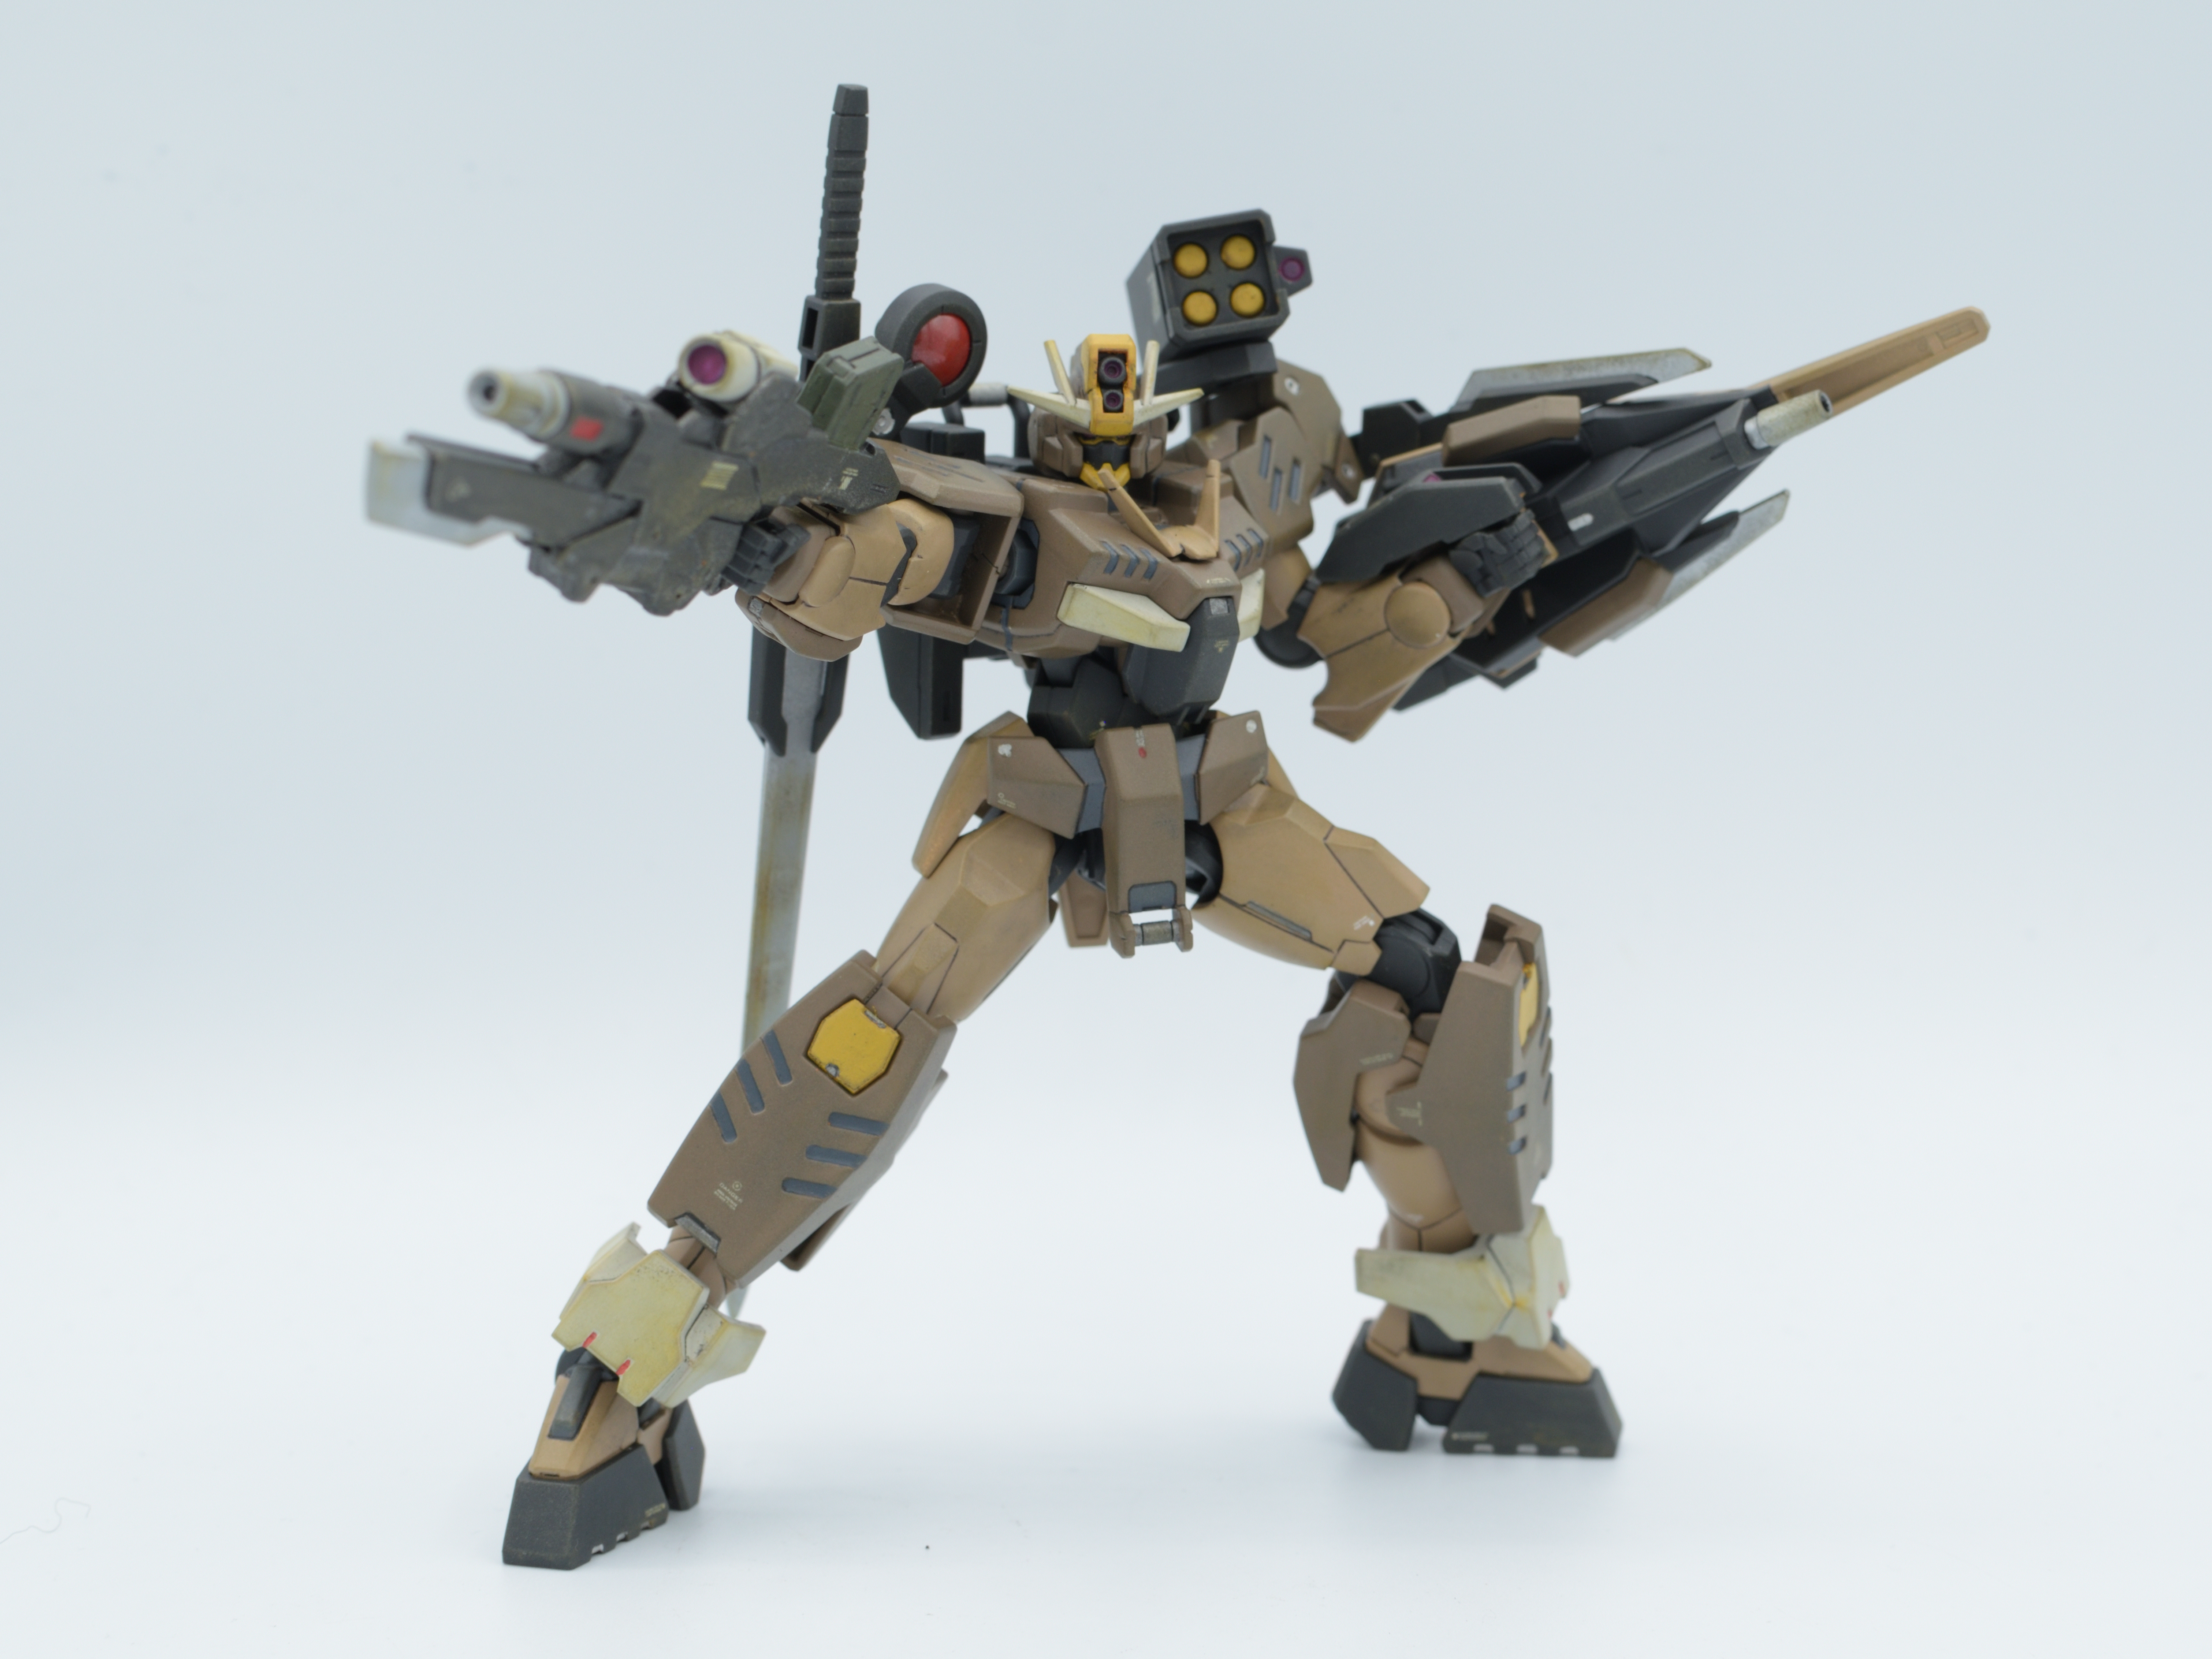
Anyway, it was time for the real challenge of the build, and it just went really smooth. For the dark gray pieces, I used Tamiya Rubber Black, which was basically like a shade darker than the original plastic, painted the yellow to USAF Light Gray, the yellow clear pieces with Mica Red, the blades with Mica Silver, and the gun Metallic Gray, which was done without a hassle. However, I thought I could get away not priming the red pieces before I painted it yellow, and the shortcut cost me, as it came out looking like shit, but you probably can’t tell as it’s “masked” with the weathering. For the green and dark green parts, I did do two coats of white primer, and painted them JGSDF Brown and Tan respectively, and it was looking real preem. Leaving the paint to dry overnight, I assembled the kit together for the first time, and holy shit I didn’t know how goddamn close I was to the actual thing. Patting myself on the back (especially hand painting the eyes as well), it was time to get detailing!
With painted plastic, I usually like to panel line so I avoid hand paint blemishes as much as possible, which there was a reasonable amount to do. For detail painting, I knew I had to fill in those rectangles, so I used Vallejo US Dark Gray, and used it quite a bit to give off that inner frame popping out effect. I then pulled out a chrome marker, Tamiya XF-56 Metallic Gray, some red, some pinkish red to spice it up even more, and oooh boy it was coming together nicely, and I was honestly impressed at myself for not fucking up the paint like I usually do. It looked quite clean, which was ironic since I was gonna weather it anyway. As usual, I also applied some generic caution water slides from Delpi Decal, and to really solidify the look of this desert color scheme, I pulled out the Tamiya weathering powder and got the kit dirty. Finally, to seal everything, I did a quick flat topcoat and my Command Qan[T] was complete. It was finally time to get ‘er posing!
Surprisingly, getting my Qan[T] done coincided with my arrival of my new used DSLR, the Nikon D5300. Long story short, I’ve been looking for a new hobby for a while, and digital photography with actual camera gear sounded just the thing—I already do a lot photography for my plastic models, and taking good photos of stuff hits me with a lotta dopamine. However, I also didn’t want to hurt my wallet, which I settled for a used D5300 and 35mm f/1.8G I got for a total of $300 on MPB.com, and after learning how to use the camera for a day and getting reasonable results, I decided to do the photoshoot with the D5300!
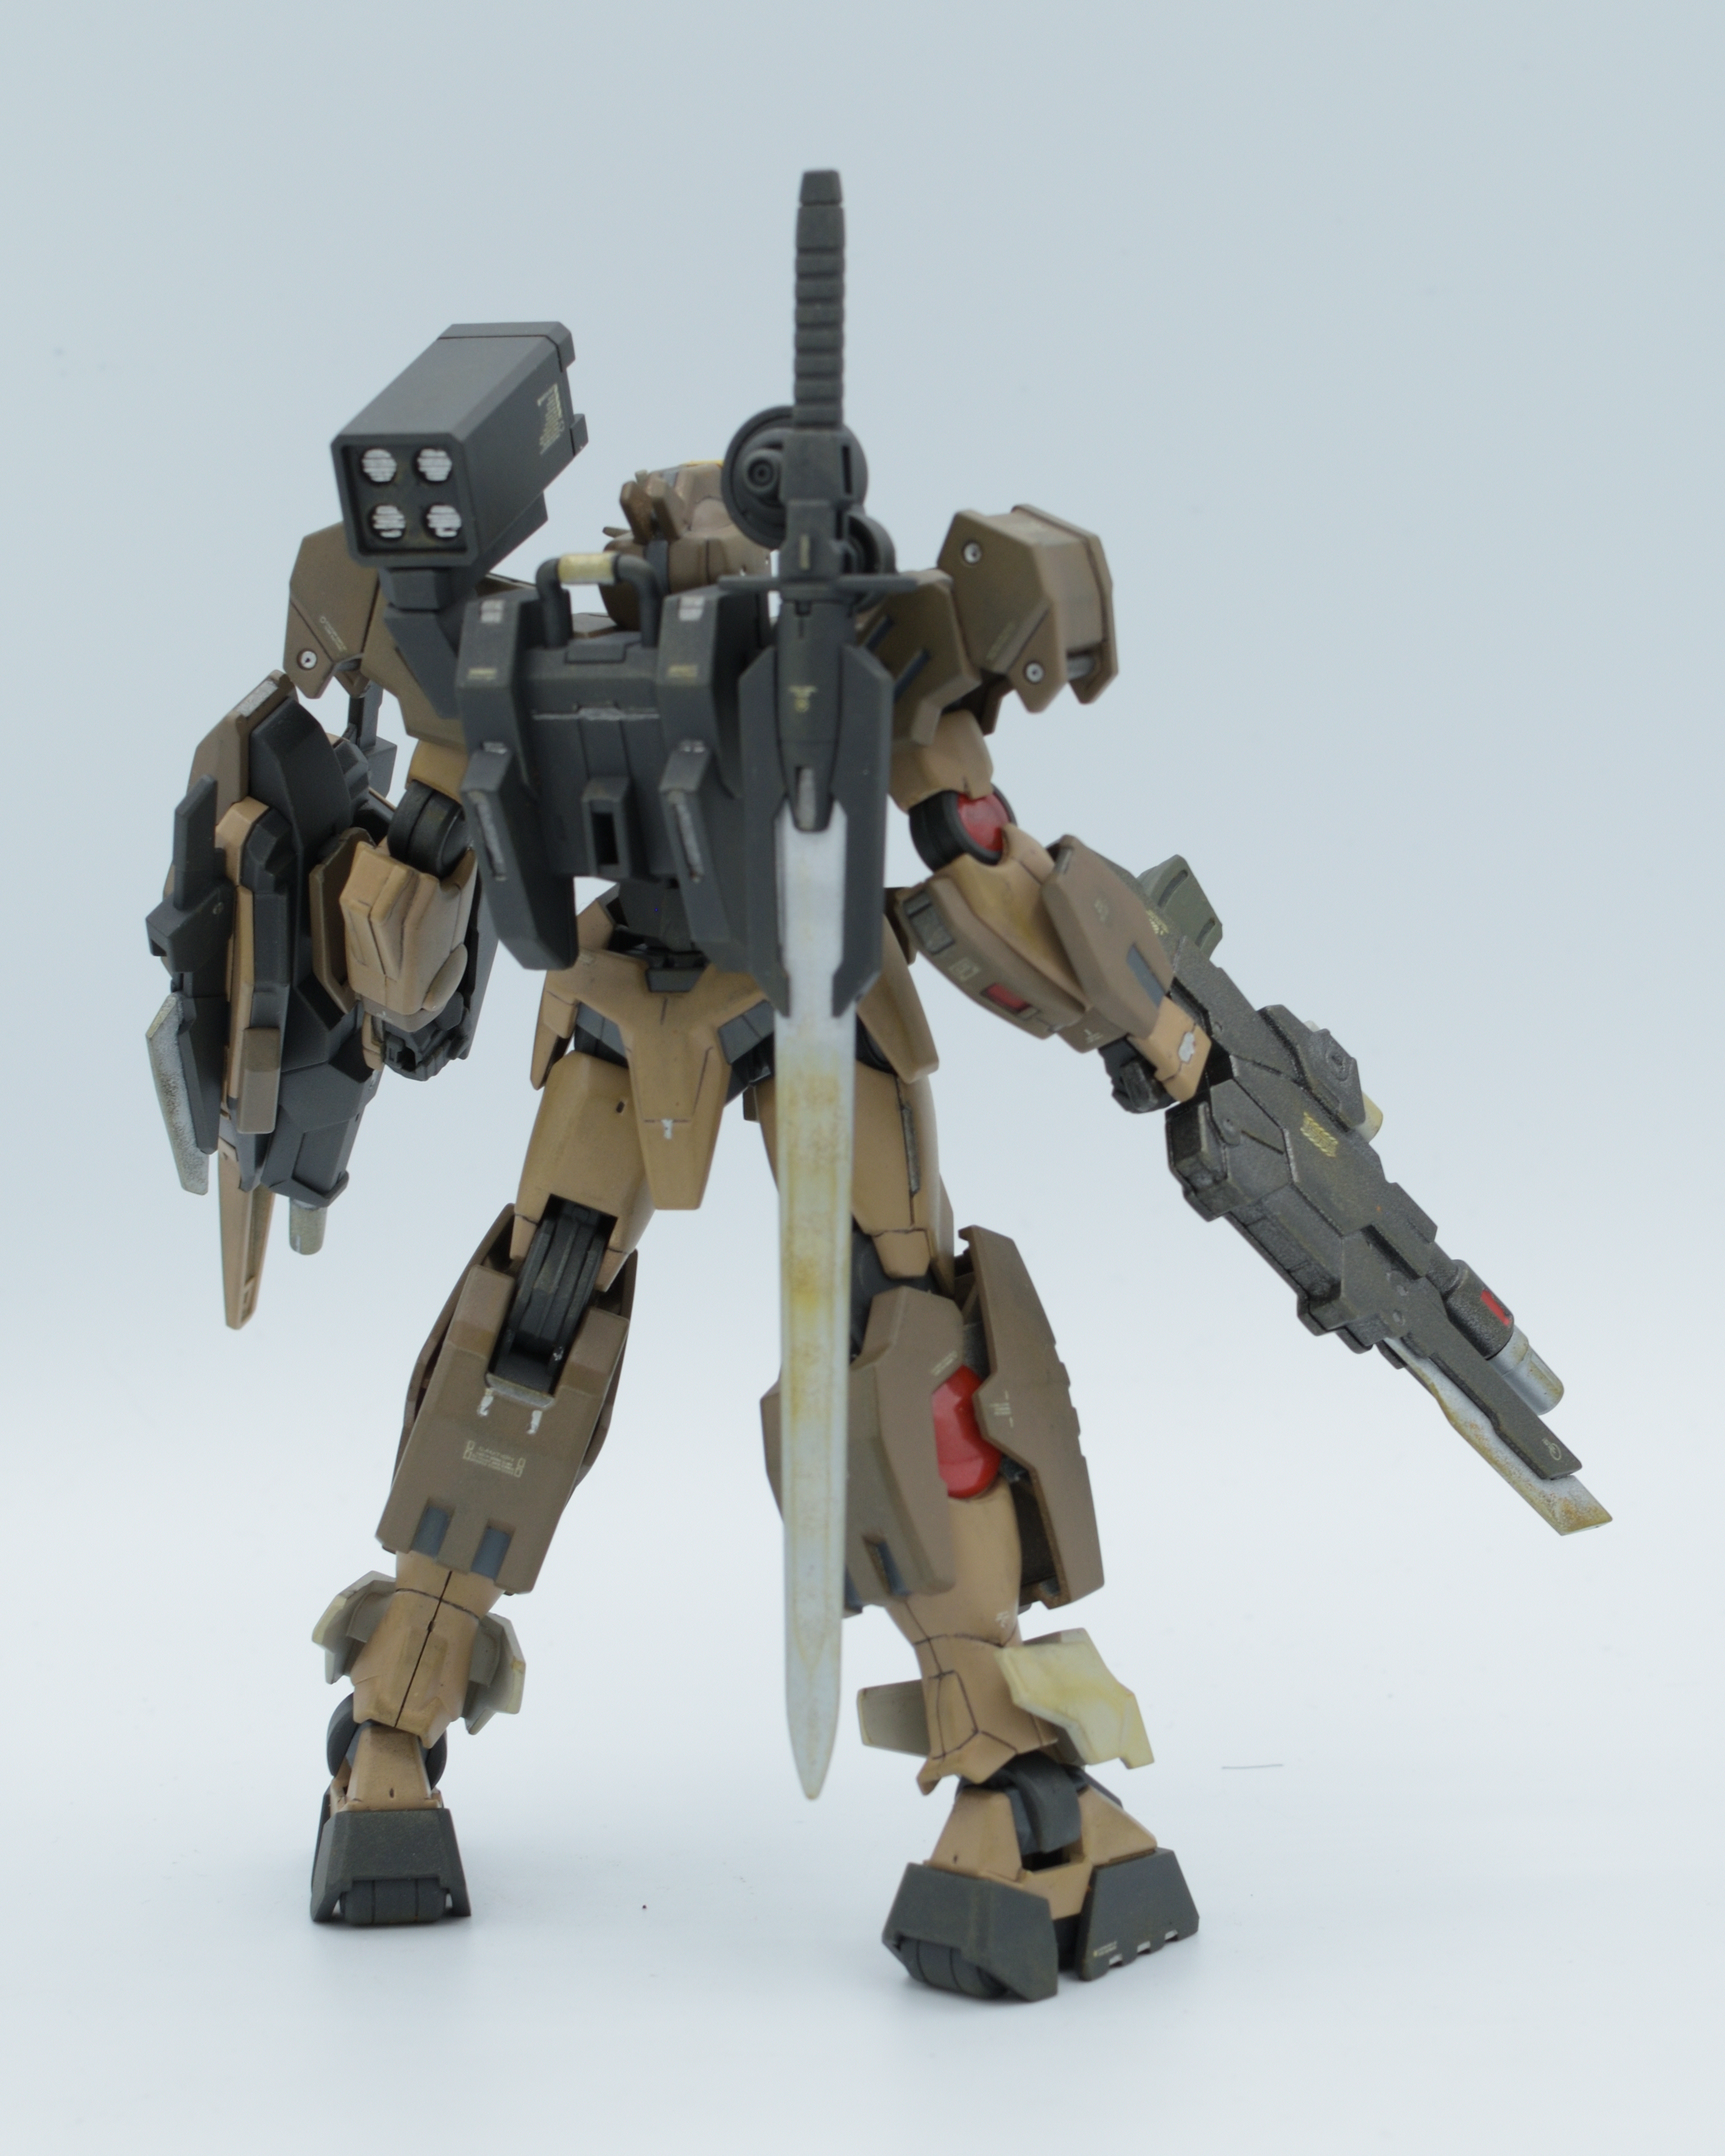
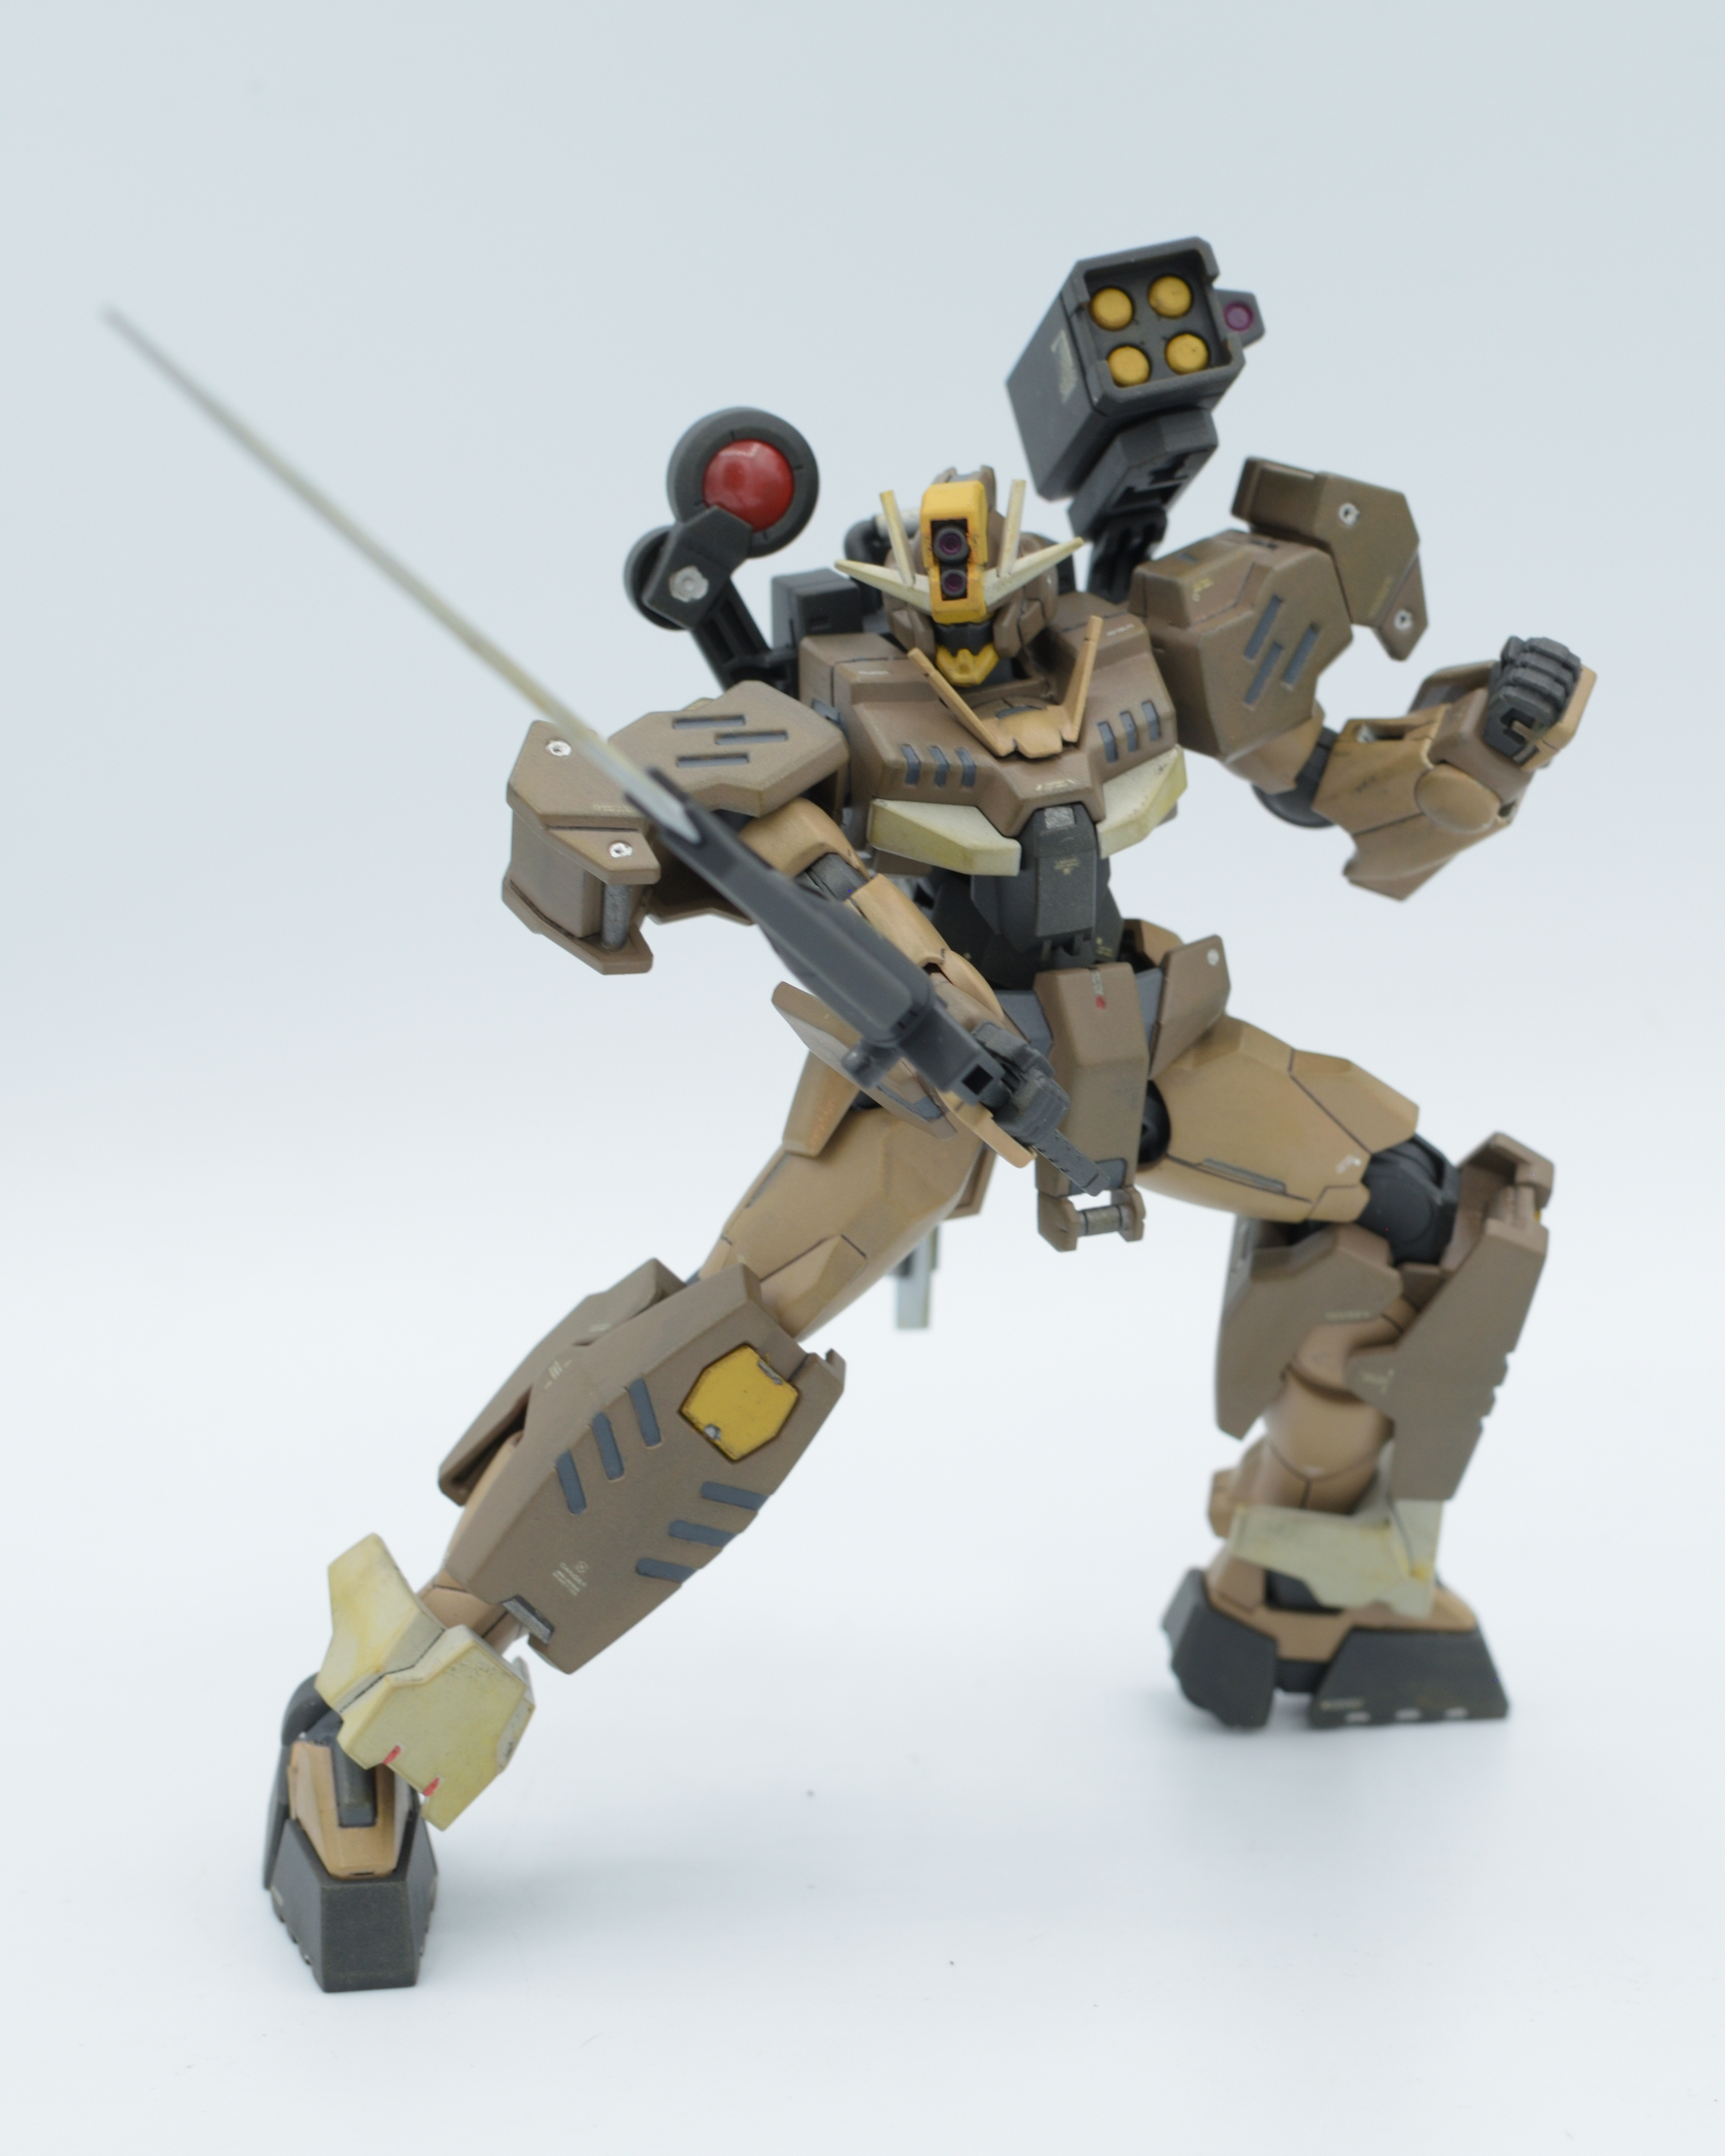
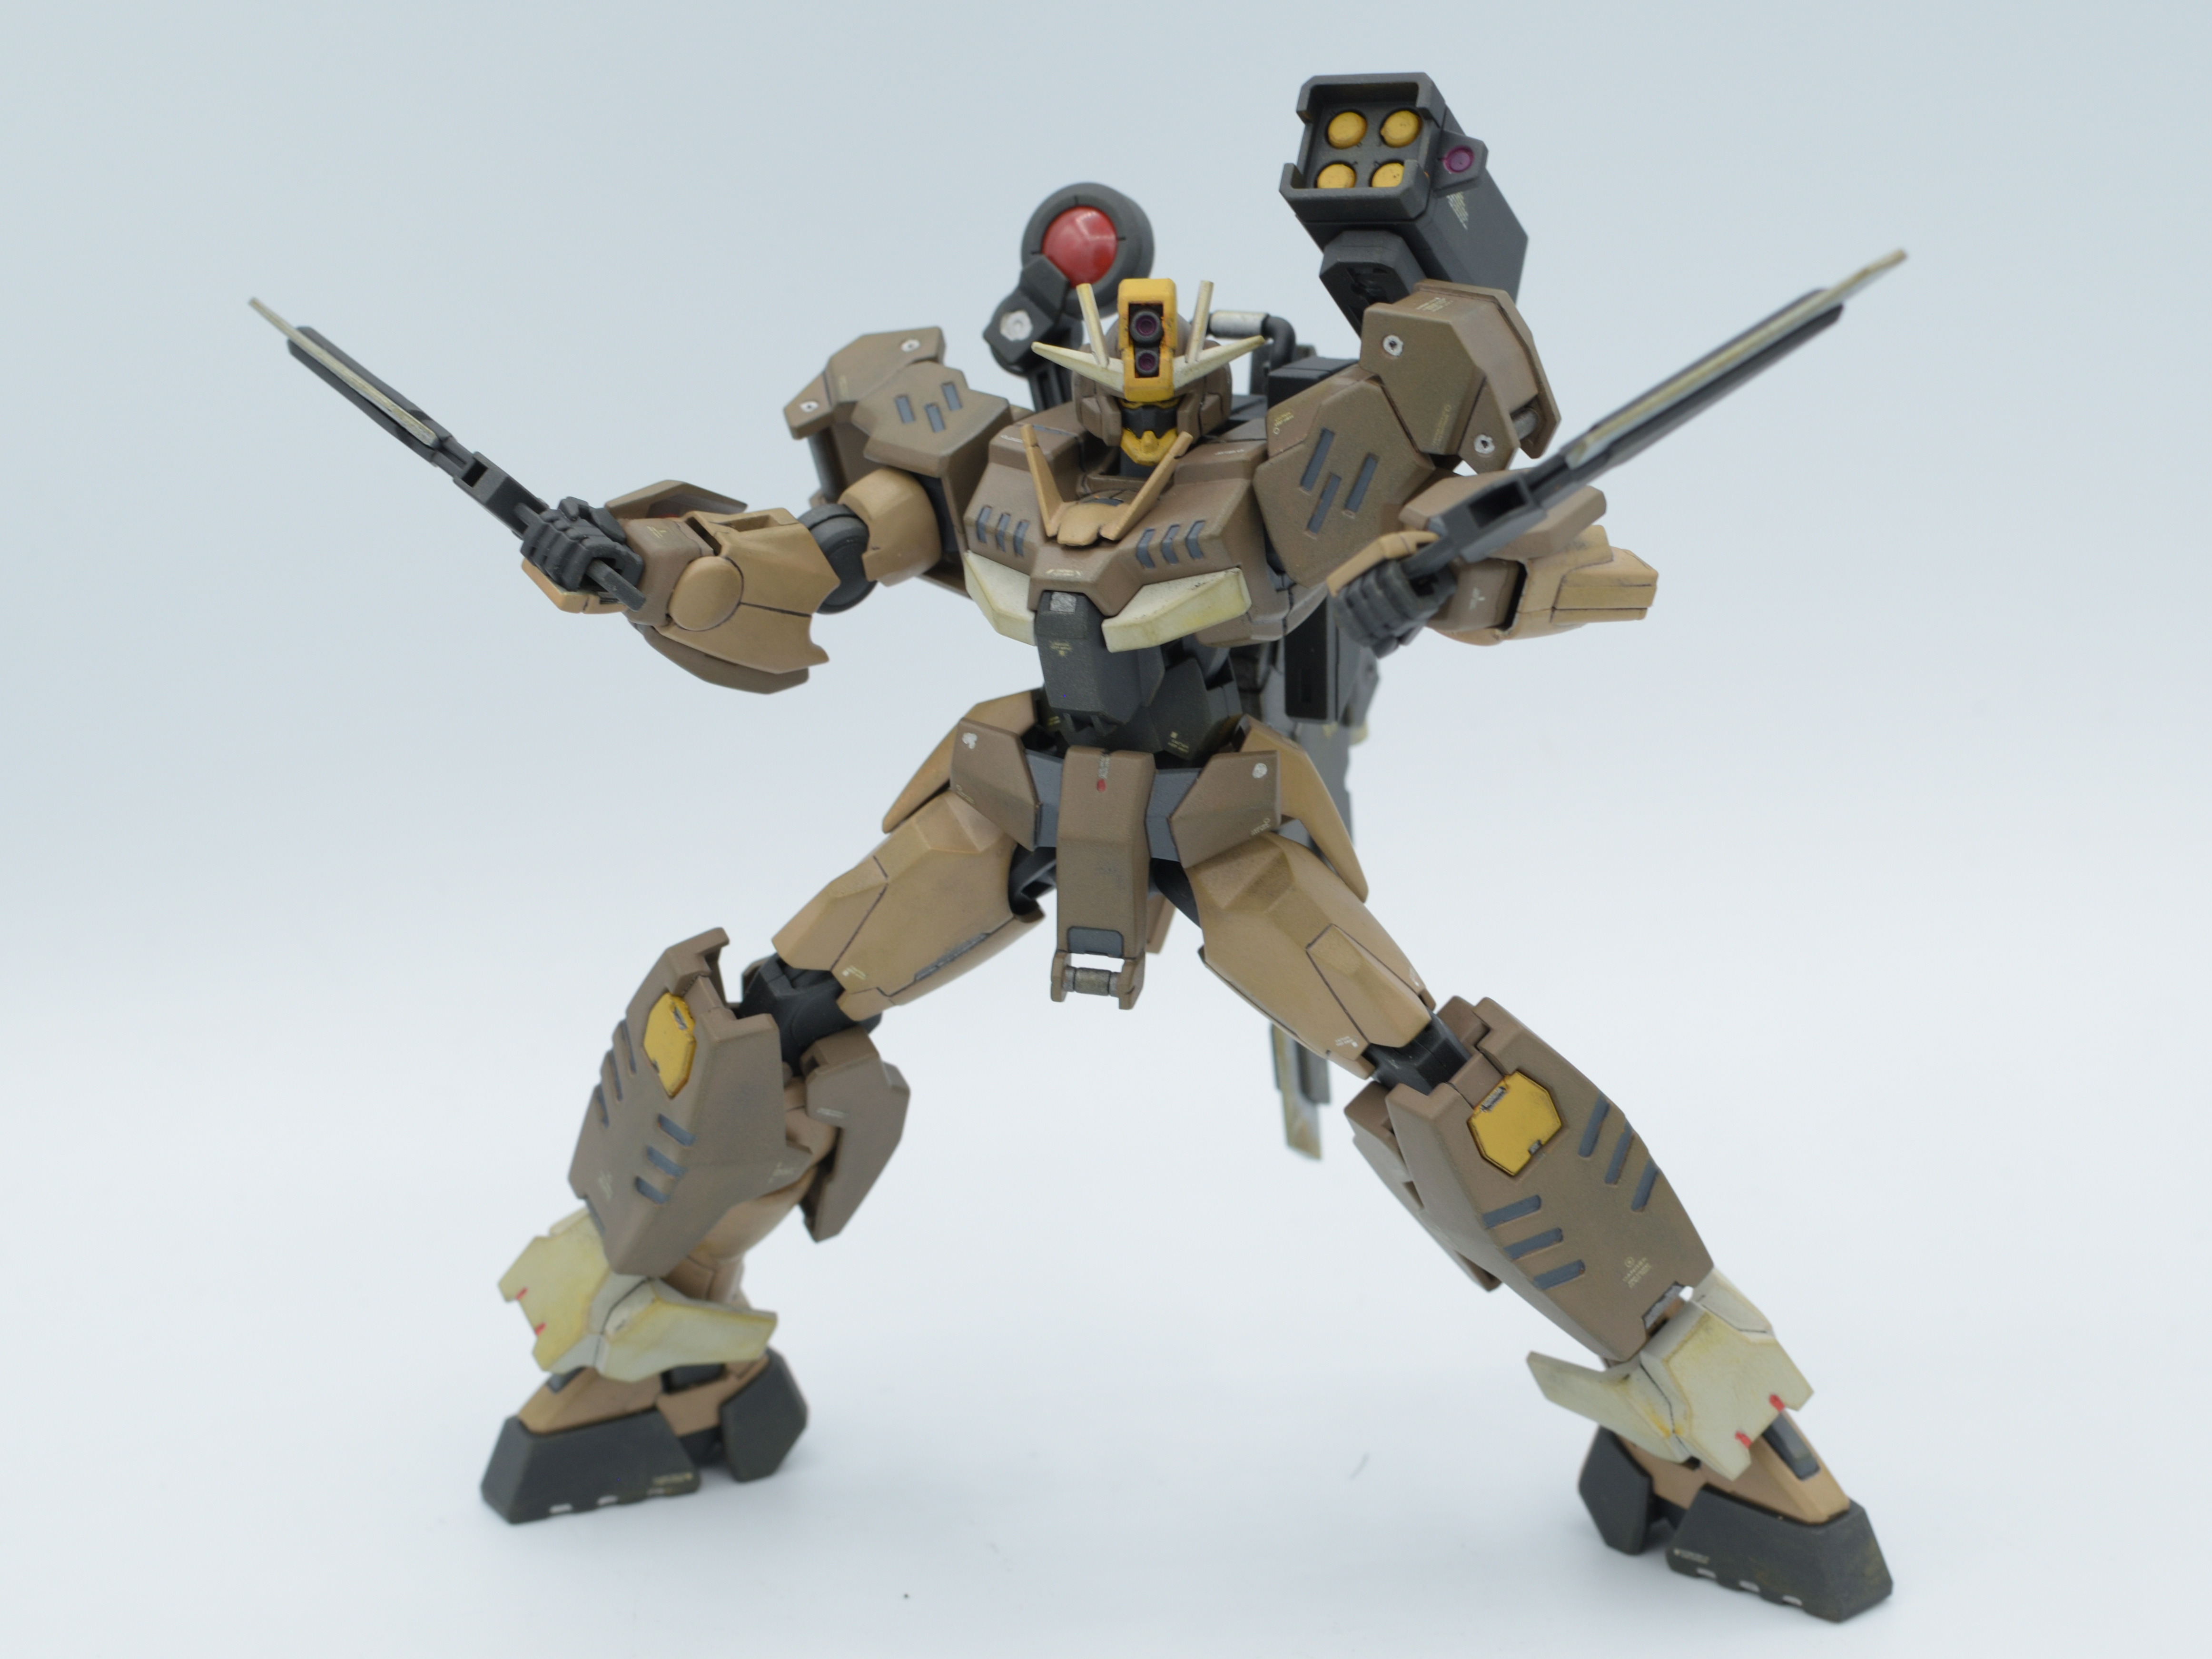
First of all, posing the kit is absolutely amazing. The Command Qan[T]‘s silhouette is super imposing, and with all the weapons it has, it can do a lot. For as big as the gun and the shield are, they both directly attach to the forearm, so no weapon ever feels cumbersome to deal with, and the rock solid stability just made it super easy to get ground poses, aerial poses, you name it. It can also do a solid kick without any help. On the other hand, I’m really surprised how well the photos came out considering I just started using it since yesterday. The colors look much more natural compared to my S21 Ultra, but sharpness was quite behind as the weathering detail is a lot more subtle. I did a bit of post processing with NX Studio with the raw files because the way the JPEGs were processed looked bad. All in all, there’s room for improvement, but I love how much more control I have taking photos with a DSLR and raw files versus my S21 Ultra.
But yeah, this was quite the project, not only fully painting a kit for the first time, but changing the way I do my photography as well. The experience was truly something, it was new, exciting and overall very fun. I can’t wait to do more fully painted customs, like wanting to paint my SNAA Giant Axe something like this, and see how far I can go with my D5300. Thanks for reading, and I’ll see you next time!