WIP
Well, that was quick.
Ladies and gentlemen, say hello to the Heavyabrams—a Heavyarms EW inspired custom of the Buster Doll Tank. When the Buster Dolls were first released last year, I wasn’t really interested in them until I saw the Tank. When Tank came out a few months ago, I wasn’t really in a rush to get her as I was still waiting to get my space problem fixed, and she was nowhere to be found as everybody and their grandma was buying them. Out of curiosity, if I did decide to get Tank, I wanted to paint her in a Heavyarms color scheme, mostly due to the fact that you can configure her cannons(?) like dual double-barreled miniguns, so I decided to photoshop her with Heavyarms’ colors, and shit, I cooked too much. I really liked what I came up with that I started looking for a Tank, though she was found at an inflated price in Suruga-ya, most US retailers didn’t have her, but I found her on Gundamit, which I paid the hefty US retail price of $67.
So, is the Buster Doll worth the hype? Yeah, I’d say so. In a lot of ways, this kit is really trying to compete with Bandai’s 30MS line. For as big as Tank’s silhouette is, her armor’s construction is deceptively simple, her hair is made of 3 parts which feels unusual, the engineering of Block2 is considerably streamlined from its predecessors, and there’s a lot of extra parts used for customization. Unlike most, the BDs come in 4 different modes, but two are kinda whatever. The fact you have to swap out her chestplate to her sailor uniform turned me off, so I skipped using her basic Block2 form entirely and went straight into her sailor uniform. I’m not into the whole schoolgirl aesthetic as a whole, and Tank doesn’t really change my mind. The fact that she comes with panties is wild and I was starting to wonder why I got the Tank again. I then got her to her light armor mode—it’s very underwhelming. It’s until I built her into her fully armored mode where I was like, ah right, this is why I got her.
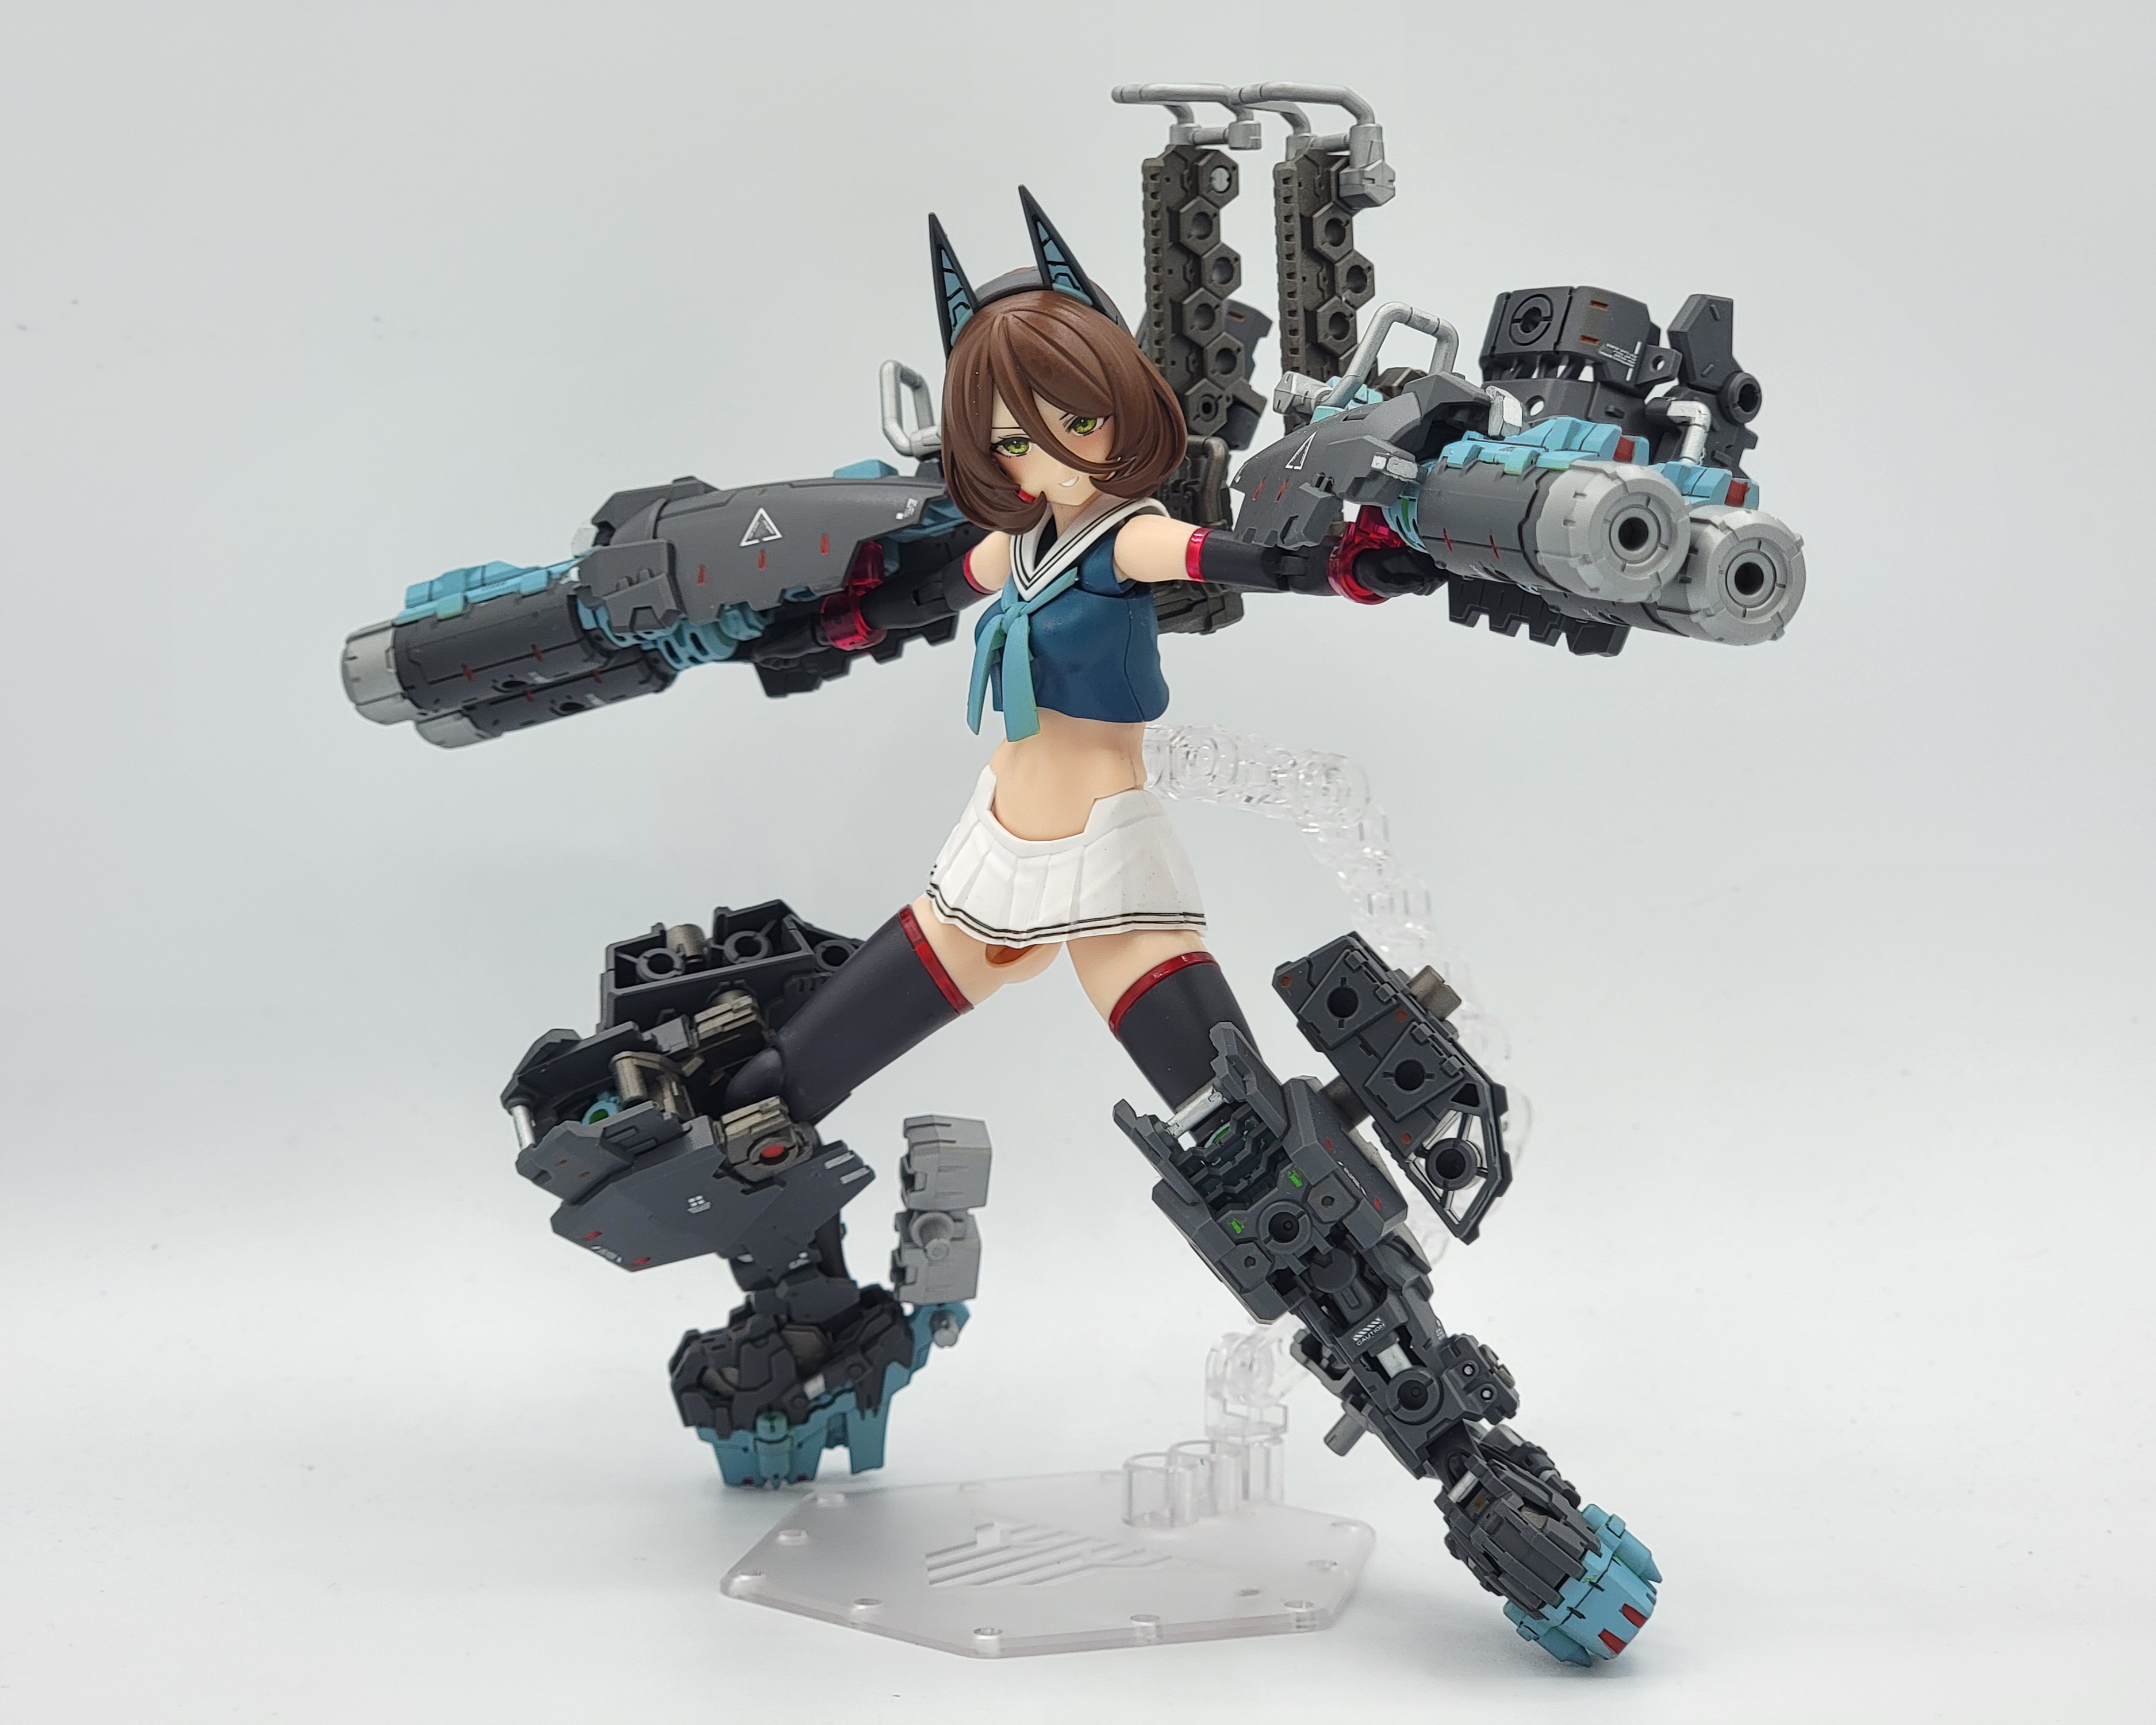
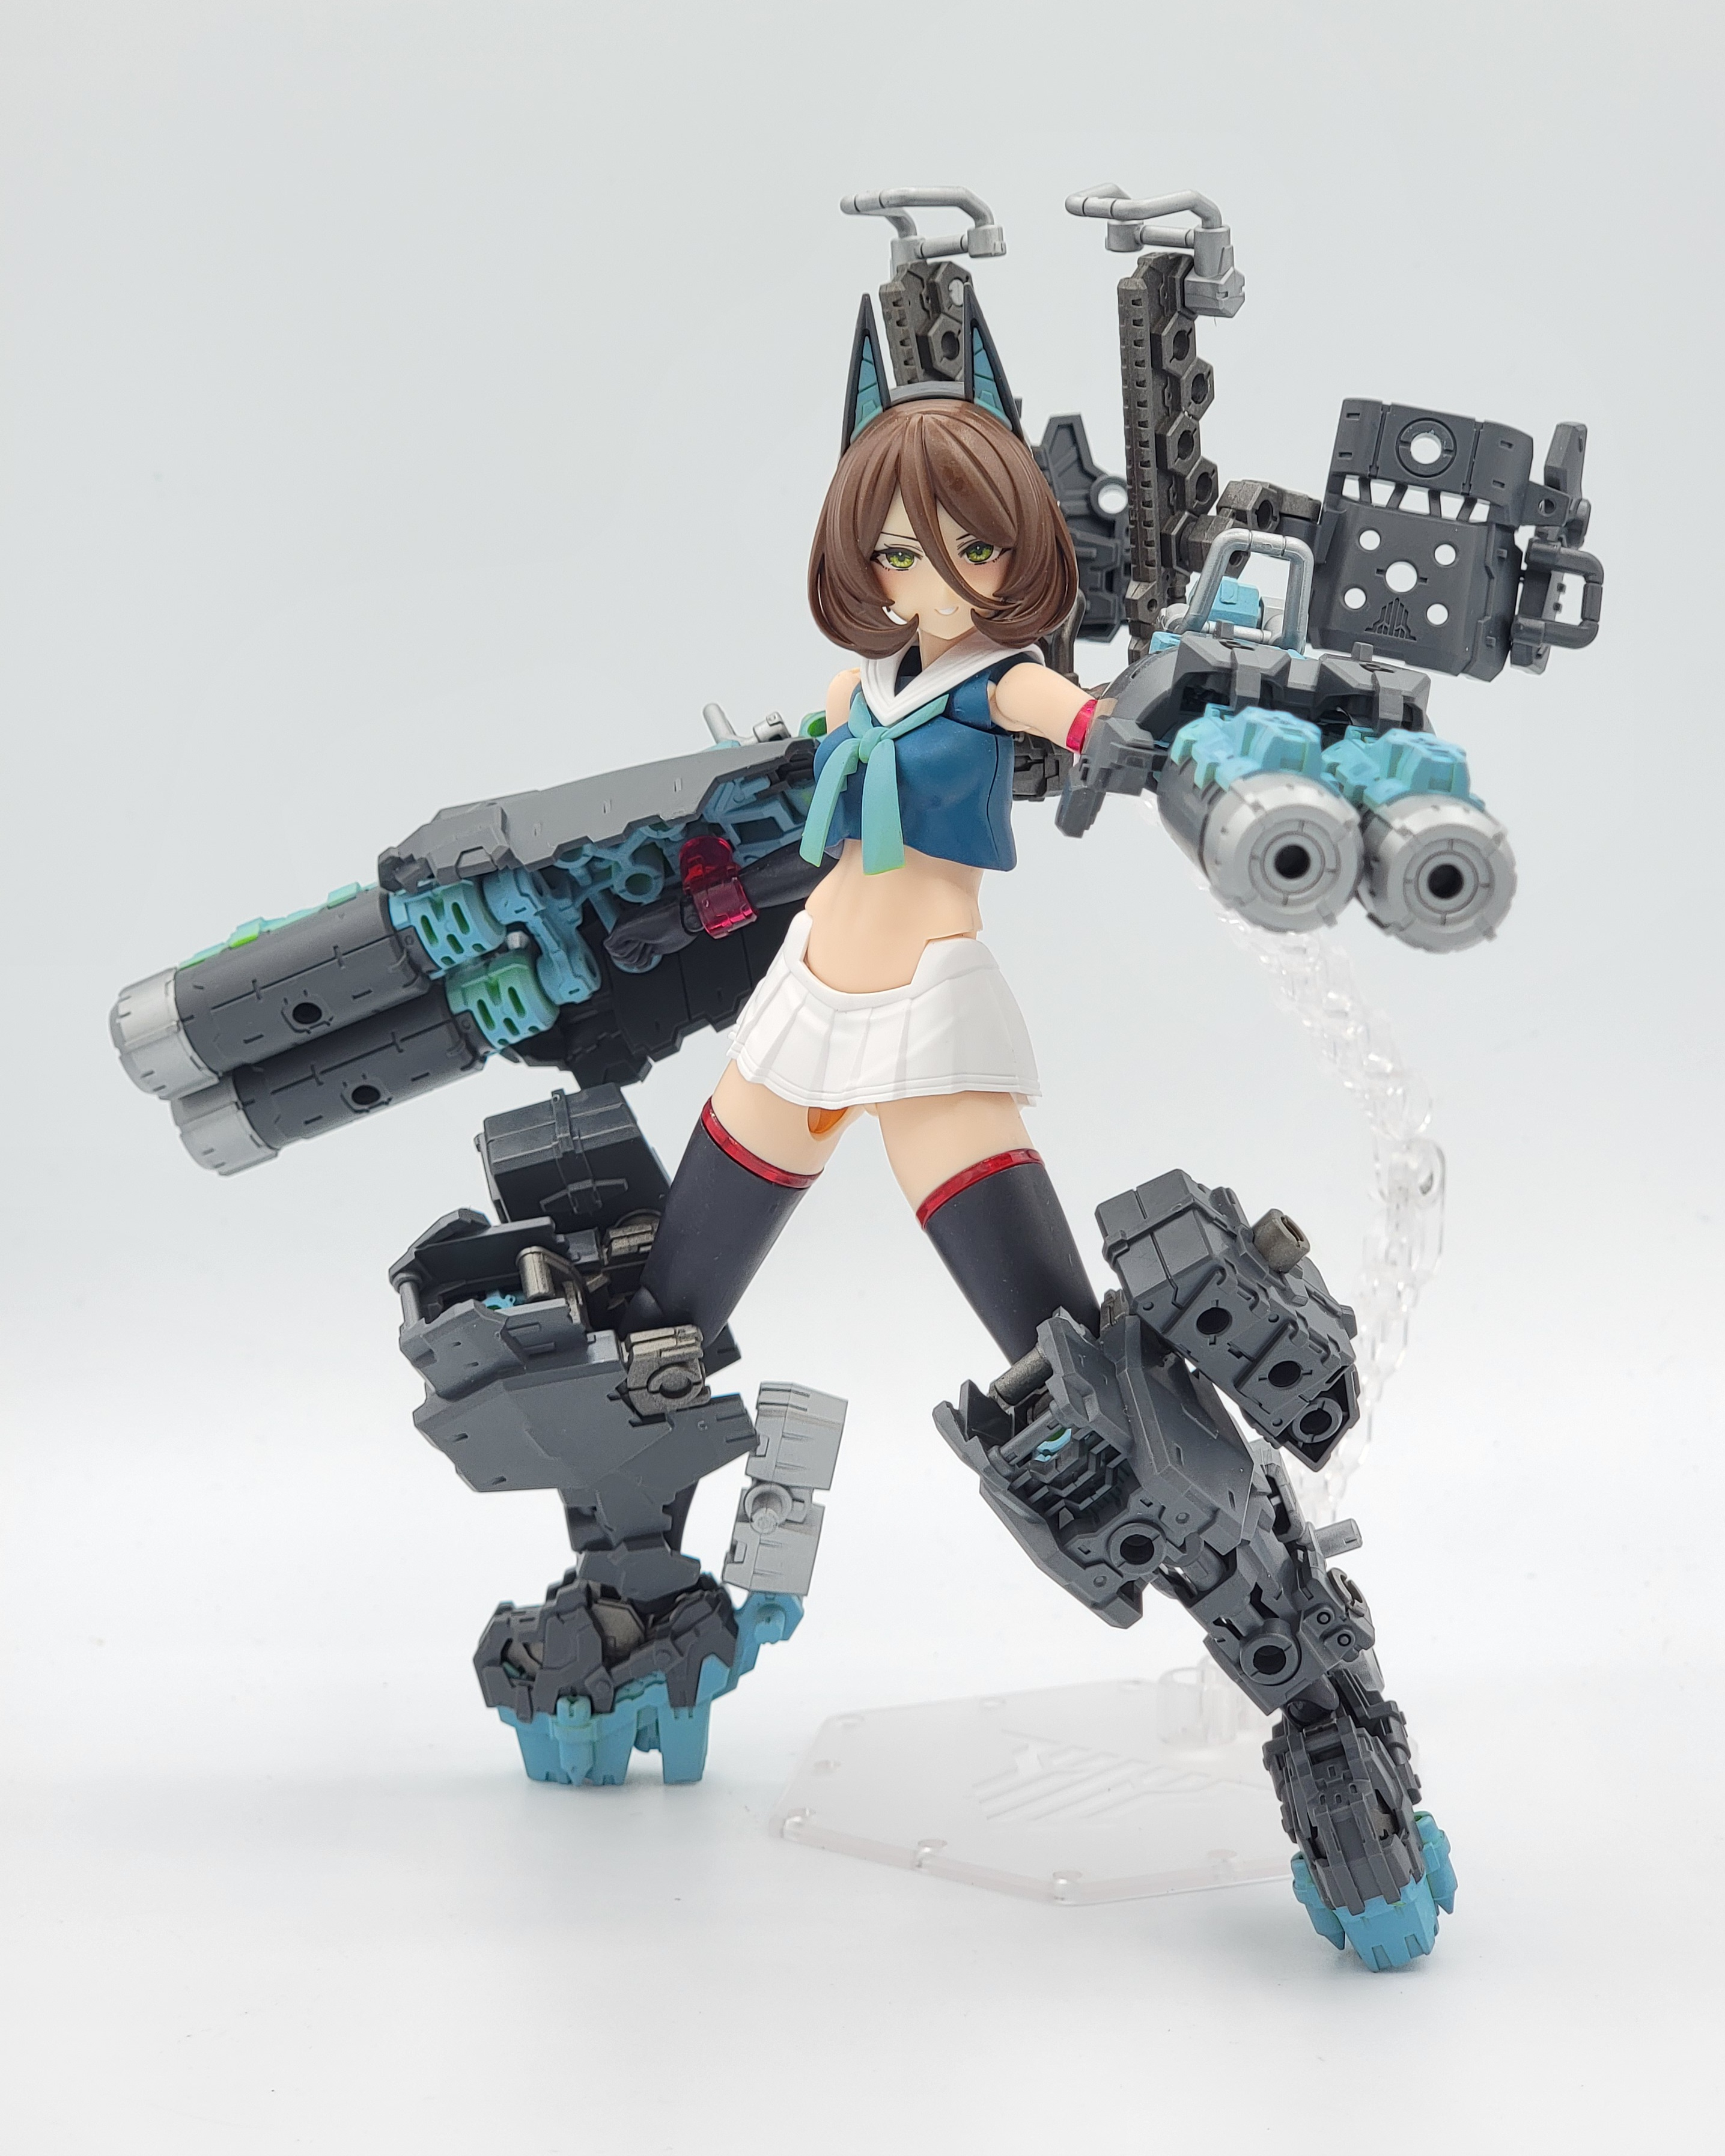
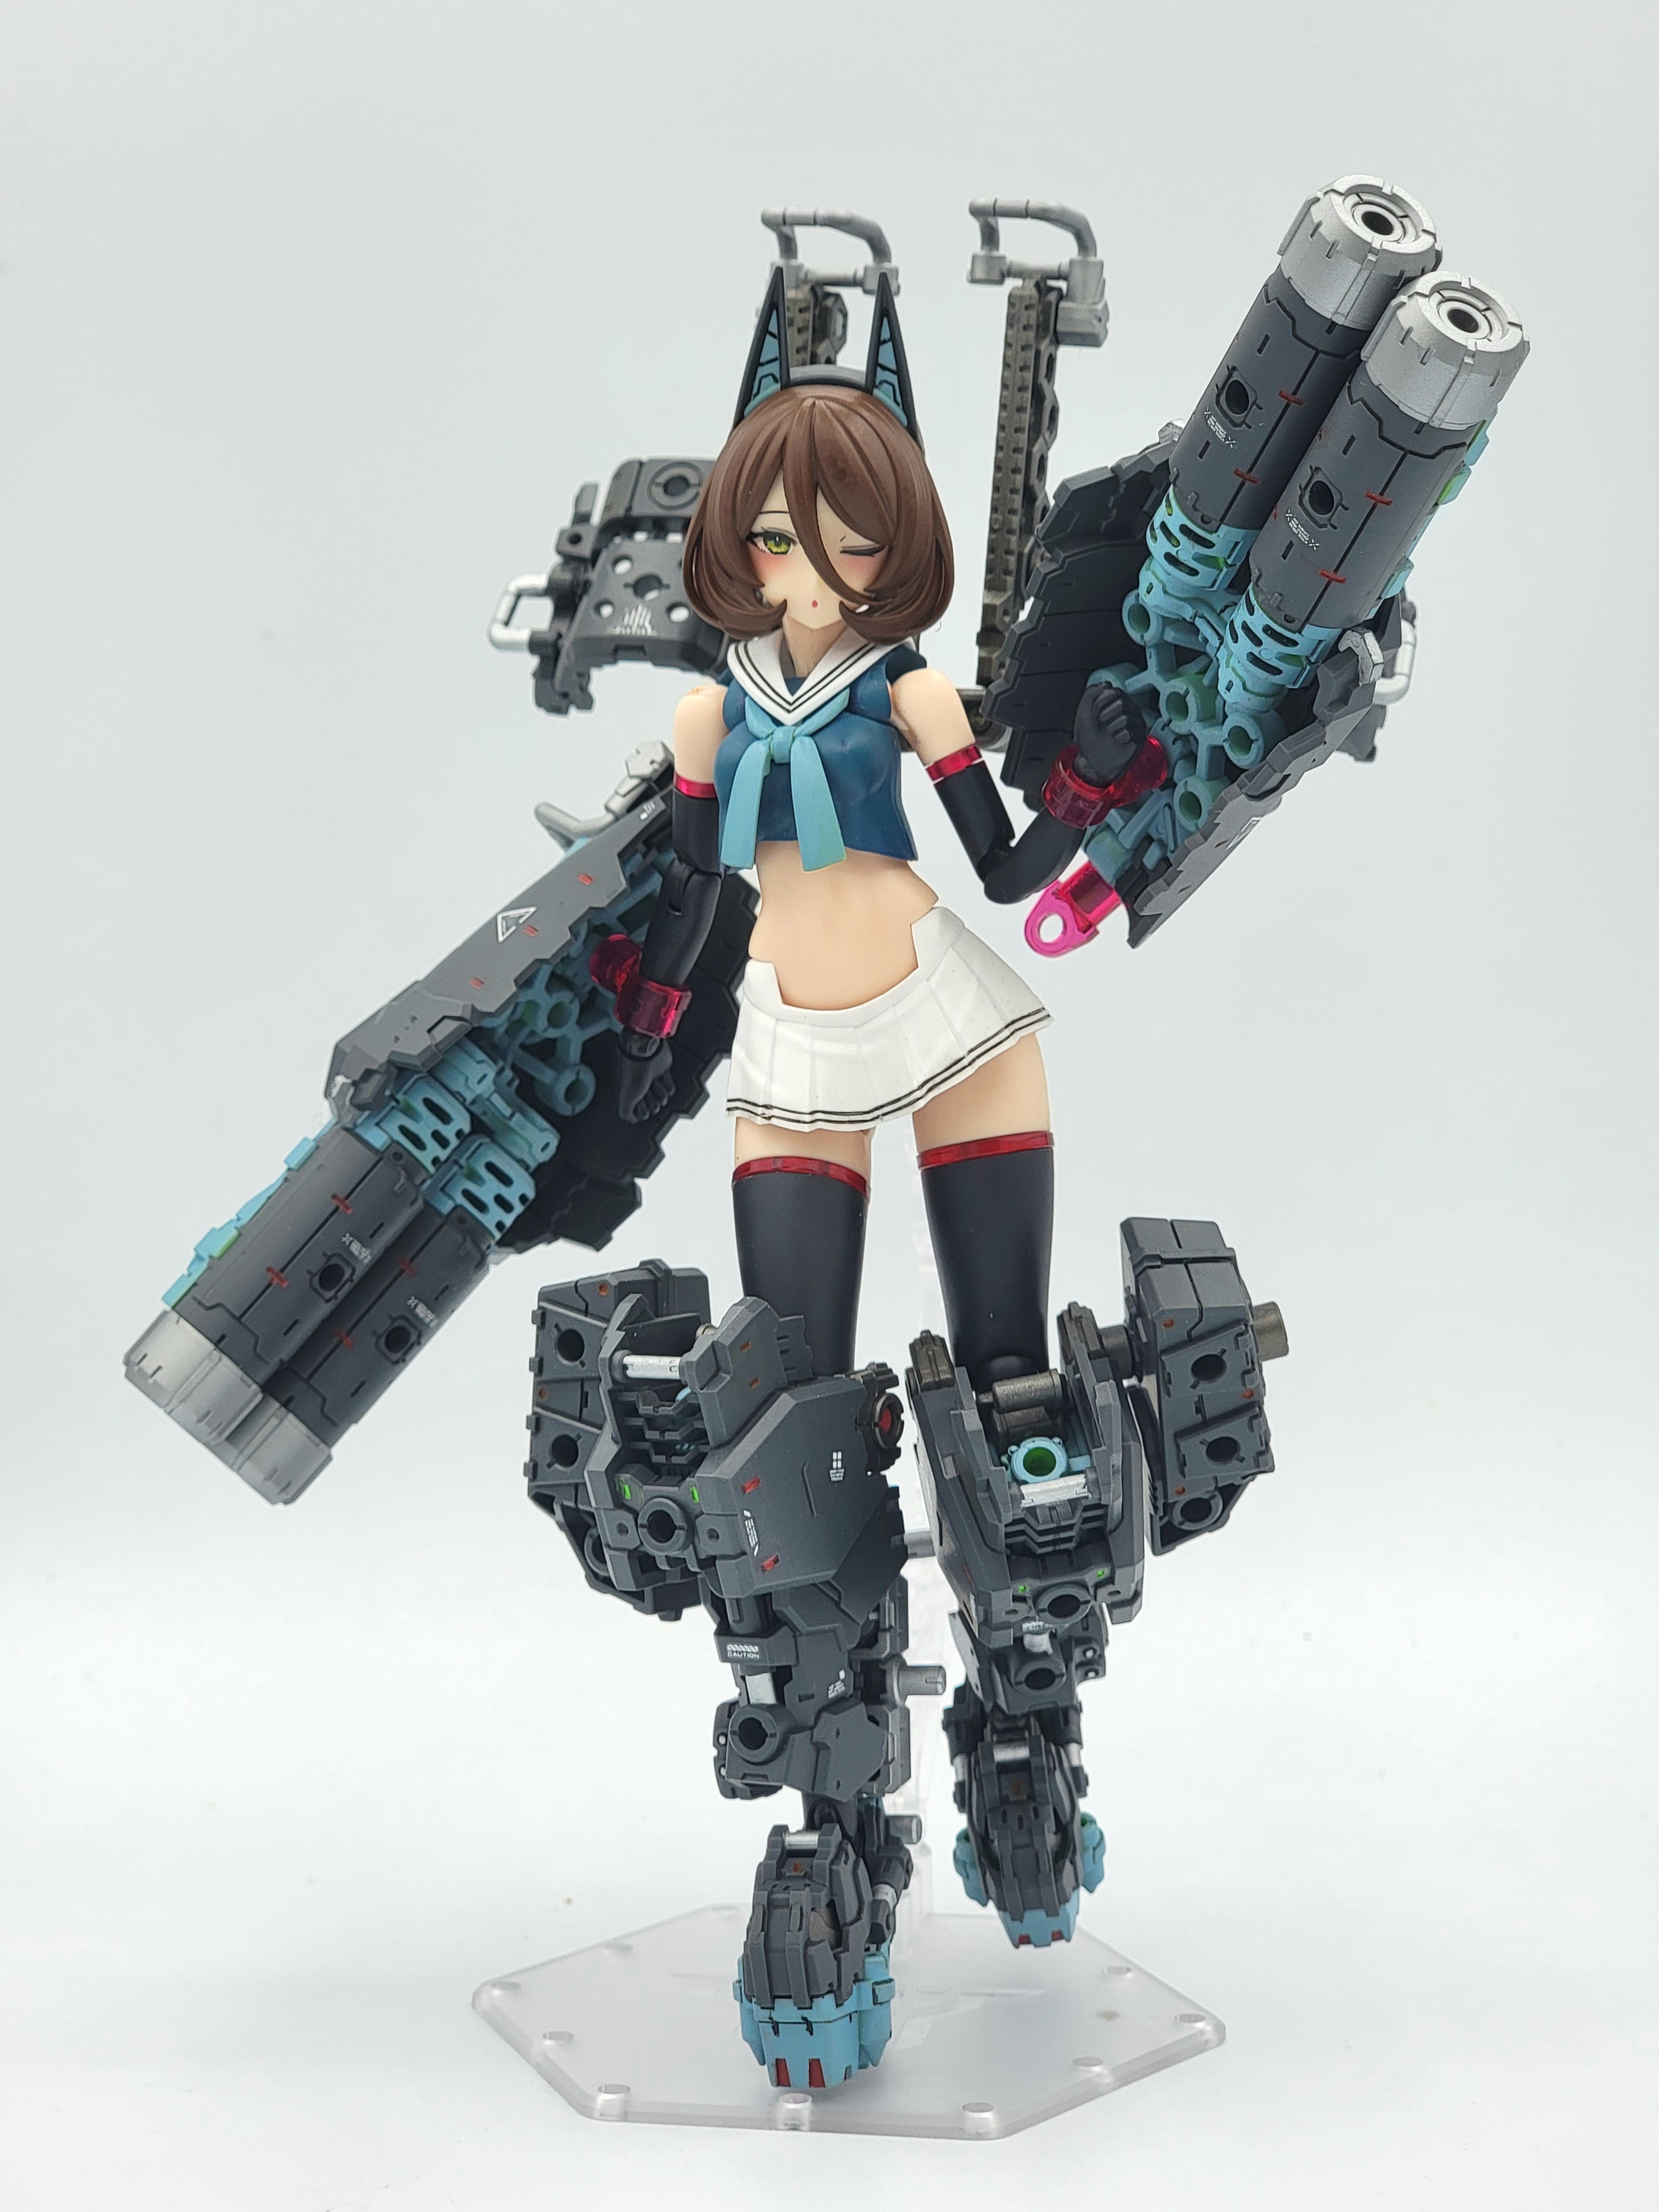
Fully armored Tank is flipping cool, full of surface detail, articulation and many ways to customize the arrangement of parts, with the build being really simple. It’s been since my Acerby where I’ve built something more mechanical looking, and yeah she just rocks in looks. Her default form is nice, but there’s not much to work with considering that… she has no weapons. Of course, I got her into her dual double-barreled minigun form, and yeah, she looks like a Heavyarms gal alright. Surprisingly though, she’s actually not that much shorter than my Supernova Heavyarms than I anticipated, and she actually lives up to the name of Heavyarms as her armor itself is… hefty.
Unfortunately, the Buster Doll is not exempt from flaws, as there are a few annoying things. Kotobukiya can never seem to make a shoulder joint not aggravating, as now the shoulder does not deal with 1 ball joint, but 2 of them. The ball joint from the arm is tight out of the box, and that connection is made even tighter due to paint. The problem? The shoulder has a tendency to just pop off the torso due to the fact that it’s connected to a socket, not trapped in a swivel like Block1. It’s more annoying than it is convenient, and somehow, I made my ball joint too loose that it has trouble carrying the minigun, so I had to replace it as the kit somehow comes with spares. The single piece thigh and calf is great, but instead of having seamlines, there are now mold lines, so I’m still sanding the legs regardless… Speaking of legs, the ankles are questionable in her fully armored form. The ankle peg doesn’t have the best connection to the armored foot and it rotates a bit awkwardly. And finally, my biggest letdown—the included stand, which is quite an improvement from any other stand that comes with any other MD kit, cannot hold Tank for shit. It can get her to stand up, but when airborne, Tank is just too heavy that gravity does its work, and I have run out of Action Base 7s at the moment to alleviate this glaring problem. Once I find myself with another AB7 again, you can bet that some of my problems will go away.
Last but not least, how was the paintjob? It’s definitely a learning experience. I just bought primer for my Mad Wolf, but I shoulda used it to paint the light blue. Changing the green was not easy with an airbrush as it took quite a bit of paint to get it covered, and even now, some areas still leak with green that I might go ahead to give the blue one more coating. The turquoise blue—much easier, but then I forgot a spot on the shoulders so I had to repaint that. The brown for her hair, yeah I botched that up in the first place where I think I thinned it too much, the paint looked like aero chocolate instead, but it worked itself in the end, besides this small spot right here. I painted the frame parts as well as they suffered from injection crack damage or whatever it’s called with some Alclad paint. Overall, I think I did pretty well, but yeah I’m gonna go ahead and fix that light blue.
This was a long post. A really long one, for a kit that is simpler than most MD kits. As usual, I’ll be giving her some extra hand paint detailing, I just bought a new sheet of white caution decals that’ll hopefully come in soon to decal her, and of course, give her a topcoat. I’ll be going on vacation for a week on Saturday, which I hope to finish by Friday. If you don’t see a post of her completed by Friday, uhhh, that probably means I’m not getting her finished until the end of next week. Thanks for reading, and I’ll see you then!
Completed
Oh boy, I sure do love speedrunning kits to completion when I know I’ll be away from home for a considerable amount of time.
Heavyabrams—my Heavyarms-inspired Buster Doll Tank is complete, and wow there was a bit more detailing to do than I anticipated. I don’t know why I thought it’d be simple when I already knew how much surface-detail is packed with Tank, but nonetheless I got it done in like… 2 days. Yeah, basically when I got home from work yesterday and today, I was just sitting my ass off trying to get her done, but luckily it wasn’t as frustrating as it was time consuming.
For detail painting, I used a total of five different colors, all of which you can look at the table below. I didn’t plan to use as much, but as I was painting a bunch of areas with red and steel, I felt the need to paint some of the other unpainted areas with another color, so I opted with orange (Vallejo calls it Light Red) and a miniscule amount of green. I also applied gray inside the holes of the cannons(?) so that the green doesn’t leak out as much. With it disassembled, there was a lot of paint all over the parts, that I kinda got worried that if I applied too much with too many colors.
Nevertheless, the paint was done, and I decided to panel line for a bit right after. I thought that I would panel half of it that night, and then finish lining the next day along with doing the decals. At first, I didn’t even want to panel line the dark gray, as there was so much to do, and it was dark anyway, nobody’s gonna not—shit, it’s noticeable. Panel lining half of this kit takes a while. There’s so much to do in the gray, there’s so much to do in the light blue, it’s as insane as panel lining an RG kit. I finished half of it in like 1-2 hours in one sitting, and I thought I would be done for the night. But I just kept going somehow. I kept panel lining through the night, that I decided I would finish it the same night I started painting, and gosh, that was 4 hours of my free time just working on this gal.
Next day comes in, I go to work, and immediately coming home I grab my new sheet of white caution decals from Delpi and start decaling. I finally got 1/100 scale decals as working with 1/144 is just tiring after a while, and my white 1/144 sheet has been used to death since I got it last summer. I put a decent amount on her legs, but, I may have been overzealous with her upper armor, at least when it was still disassembled. My worries of Tank being too busy grew, but regrets would have to be saved when I finally put her together after a topcoat. Speaking of which, I did give her a flat topcoat as soon as I finished decaling her, the time was right as humidity was low, and since the day was still bright, I ought to do the final poses while I was at it.
Alas, it was time to find out if I had overdetailed her, and… no, I was just being paranoid. Her school uniform barely changed, which was already close to finished as soon as I airbrushed the blue. Tank’s fully armored form… looks really nice, and all the detailing is way more subtle than I expected. Darkening the holes in her cannons did great in the end. I really like how she ended up!
Finally, I posed up Tank in her full armor again, and it got a bit annoying. I still don’t have spare AB7s, but I don’t think that would matter anyway as the peg on the AB7 can’t fit on the 3mm hole on her torso, only on the backpack, which is quite aggravating to work with (2 points of rotation to deal with). Regardless, I used an AB7 from my Mighty Strike Freedom just to do a few aerial shots for Heavyabrams, and I found my way dealing with the included stand when I did ground poses. I guess it did become serviceable somehow.
Overall, this was a fun build, kinda bogged by the time constraints I have, but my experience with Heavyabrams has been better than most. She better than Guren? Hell no. The schoolgirl aesthetic still isn’t my schtick, but having it combined with her very detailed industrial armor does surprisingly work for me. I mean, I guess I always admired cute and cool. Well, that’s all for Heavyabrams! I’ll be going on vacation very soon, so, I’ll see you once I’m back with the one and only Mad Wolf!
)